
In summary:
- Winterizing your Montreal plumbing is not a chore; it’s a financial strategy to prevent catastrophic damage and six-figure insurance claims.
- Focus on points of failure: outdoor faucets, pipes in unheated spaces like crawl spaces, and those along exterior walls.
- Insurance compliance is non-negotiable. Leaving your heat below 15°C or your home unchecked while away can void your policy.
- The right insulation (like closed-cell spray foam) is an investment, not an expense, offering protection from both winter freezes and summer condensation.
- Knowing how to shut off your main water valve and thaw a pipe safely is your last line of defense before a disaster.
Welcome to your first Montreal winter. The beauty of the snow-covered city is undeniable, but for a new homeowner, it comes with a deep-seated anxiety: the threat of a burst pipe. You’ve probably heard the standard advice—disconnect your hoses, let faucets drip. But in a city where temperatures can plummet below -20°C and old triplexes have plumbing quirks older than your grandparents, that generic advice is dangerously inadequate.
The hard truth is that most guides overlook the specific financial and structural risks tied to Quebec’s climate. They don’t talk about the rapid freeze-thaw cycles that stress your pipes to their breaking point, or the fine print in your home insurance policy that could leave you with a massive bill for water damage. The cost of a simple mistake can be staggering, turning a dream home into a financial nightmare.
But what if you stopped thinking like a worried homeowner and started acting like a pragmatic building manager? This guide adopts that professional mindset. We’re moving beyond the “what” and diving deep into the “why” and “how much.” We will analyze the points of failure in your home’s plumbing system, evaluate solutions based on cost-effectiveness, and ensure you’re in full compliance with your insurance obligations. This is not just about preventing a leak; it’s about protecting your single largest investment.
We’ll walk through the critical steps, from the science of burst pipes in our specific climate to the emergency procedures you need to know by heart. By the end, you won’t just have a checklist; you’ll have a comprehensive seasonal management strategy for your home’s plumbing system.
Table of Contents: A Proactive Guide to Protecting Your Montreal Plumbing This Winter
- Why Do Pipes Burst More Frequently During Rapid Thaw Cycles?
- How to Drain Outdoor Faucets Correctly to Avoid Spring Leaks?
- Fiberglass or Foam: Which Insulation Is Best for Unheated Crawl Spaces?
- The Mistake of Ignoring Pipes on Exterior Walls That Costs $5,000
- When to Shut Off Main Water: A Schedule for Snowbirds Leaving Quebec
- Why Your Insurance May Deny Claims if You Left Heat Below 15°C?
- Why Does Condensation Form on Pipes During Summer Heat Waves?
- How to Handle a Frozen Pipe Emergency Before It Bursts?
Why Do Pipes Burst More Frequently During Rapid Thaw Cycles?
The common belief is that water freezes, expands, and splits the pipe. That’s only half the story. The real danger in Montreal’s climate is the pressure buildup caused by a phenomenon I call thermal shock. When a deep freeze hits, an ice plug forms inside a pipe. The problem isn’t this initial plug. It’s when a sudden thaw, or even indoor heat, begins to melt the ice closest to the house. This meltwater gets trapped between the ice plug and the closed faucet, creating an immense and inescapable pressure spike. It’s this hydraulic pressure, not the ice itself, that causes the pipe to rupture.
This isn’t a minor inconvenience; it’s a significant financial risk. The resulting water damage can be catastrophic, leading to structural repairs, mold remediation, and ruined possessions. To put it in perspective, insurance providers like Square One report an average claim cost of $16,000 for frozen pipe incidents in Canada. Understanding that the burst happens from pressure, not just ice, shifts your focus from merely keeping pipes warm to ensuring there’s never a trapped section of water anywhere in your system.
Data from Environment and Climate Change Canada confirms that our region regularly experiences the extreme conditions that facilitate this. With winter temperatures often dipping below -20°C, the potential for deep, solid ice plugs is high. Every uninsulated pipe in an unheated space becomes a potential hydraulic bomb waiting for a slight temperature change to detonate.
How to Drain Outdoor Faucets Correctly to Avoid Spring Leaks?
Your outdoor faucets, or hose bibbs, are the most common point of failure. A single night of freezing temperatures with a hose still attached is enough to crack the fixture or the pipe inside the wall, leading to a surprise leak in the spring when you turn the water back on. Draining them correctly is a non-negotiable annual task. It’s a simple procedure that prevents thousands of dollars in potential damage.
Here is the professional, step-by-step process. Do not skip any steps:
- Disconnect and Store: First and foremost, disconnect all garden hoses, drain them completely, and store them in a garage or basement. A connected hose guarantees that water will be trapped in the faucet.
- Locate the Shut-off Valve: Inside your basement or crawl space, find the specific shut-off valve for each outdoor faucet. It’s typically an oval, lever-style, or round handle on the pipe leading to the exterior wall.
- Close the Valve: Turn the handle clockwise until it is tightly closed. This stops the water supply to the outdoor line.
- Drain the Line: This is the most-missed step. On that same interior shut-off valve, there should be a small metal cap called a “bleeder valve.” Place a bucket underneath it and unscrew the cap. A small amount of trapped water will drain out. Screw the cap back on.
- Open the Outdoor Faucet: Go back outside and turn the faucet handle to the “on” position. Any remaining water will trickle out. Leave it in the open position all winter. This allows any water that might find its way in to expand and exit without building pressure.
Many older Montreal homes have standard faucets that are highly susceptible to freezing. If you’re doing any plumbing work, consider upgrading to a modern, frost-proof sillcock. Its valve is located 12-18 inches inside the heated part of your home, keeping the water far from the frigid exterior.

The visual difference is clear. A frost-proof model is a smart, one-time investment that provides permanent peace of mind and simplifies your annual winterization routine significantly. It’s a classic example of proactive maintenance over reactive repair.
Fiberglass or Foam: Which Insulation Is Best for Unheated Crawl Spaces?
Pipes running through unheated or poorly heated areas like crawl spaces, basements, and attics are prime candidates for freezing. Insulation is the obvious answer, but choosing the wrong type can be useless or even counterproductive. The decision between options like fiberglass batts and spray foam isn’t just about temperature; it’s a strategic choice based on moisture resistance, R-value, and budget.
Fiberglass is cheap and easy to install, making it a tempting DIY solution. However, its major flaw is its poor performance when wet. In a damp Montreal basement, fiberglass can absorb moisture, compress, and lose its insulating properties entirely. It can also promote mold growth. It’s only suitable for areas that are guaranteed to be bone-dry.
For the damp, cold reality of a Montreal crawl space, closed-cell spray foam is the superior, albeit more expensive, professional solution. It boasts a high R-value (around R-6.5 per inch) and, critically, acts as a vapour barrier. It’s water-resistant and creates an airtight seal, stopping both cold air infiltration and moisture wicking. A professional spray foam job for a typical 800-square-foot area could cost between $2,000 to $5,000, but it’s a permanent solution that also helps control summer humidity.
For direct pipe wrapping, foam pipe sleeves are a good, affordable DIY option that offers decent insulation. But for protecting an entire space, the analysis is clear. As a detailed comparison of insulation options highlights, the right choice depends on the specific environmental conditions.
| Insulation Type | R-Value per inch | Cost per sq ft (CAD) | Moisture Resistance | Best Use Case |
|---|---|---|---|---|
| Closed-cell Spray Foam | 6.5 (2 inches = R-13) | $1.00-$1.50/board foot | Water-resistant & airtight | Humid basements, maximum efficiency |
| Open-cell Spray Foam | 3.5 (2 inches = R-7) | ~$0.50-$0.80/board foot | Limited moisture resistance | Dry interior spaces |
| Fiberglass Batts | 2.9-3.8 | Most affordable option | Poor – clumps when wet, may need replacement | Accessible dry areas only |
| Foam Pipe Sleeves | 3.0-4.0 | $0.20-$1.35/linear foot | Good | Direct pipe wrap, DIY-friendly |
This table, with data adapted from sources like cost analyses by RenoQuotes, makes the trade-offs explicit. For a new homeowner looking for a long-term, worry-free solution for a problematic crawl space, the upfront cost of closed-cell foam is a sound investment in asset protection.
The Mistake of Ignoring Pipes on Exterior Walls That Costs $5,000
One of the most common and costly mistakes is assuming all indoor pipes are safe. Pipes running inside an exterior wall, especially in older, poorly insulated homes, are extremely vulnerable. A kitchen sink or bathroom on an outside wall can be a major point of failure, and the damage is often hidden until it’s too late. According to HomeAdvisor, a simple burst pipe repair might cost around $500, but the subsequent water damage to drywall, flooring, cabinetry, and the potential for mold growth can easily exceed $5,000 or more.
When you can’t add more insulation to a finished wall, your best bet is a targeted heating solution. Heat tape, or a heat cable, is an electrical product that you wrap directly around the pipe to keep it above freezing. However, this is not a solution to be taken lightly. It introduces an electrical element and, if installed incorrectly, can be a serious fire hazard. It is a tool for specific, high-risk situations and requires meticulous adherence to safety protocols.
Installing heat tape is a targeted solution, but it comes with a significant fire risk if not handled with meticulous care. Before you even consider this option, you must be able to monitor the installation.
Your 5-Point Safety Audit for Heat Tape Installation
- Accessibility Check: Is the pipe fully accessible and visible for regular inspection? Never install heat tape on pipes hidden inside walls or ceilings.
- Product Specification: Have you read the manufacturer’s instructions? Confirm the product is approved for your pipe type (e.g., plastic vs. metal) and follow wattage specifications exactly.
- Installation Integrity: During installation, ensure the tape never overlaps or touches itself, as this creates a dangerous hot spot. Do not cover the heat tape with any other insulation unless explicitly permitted by the manufacturer.
- Electrical Safety: Is the outlet a Ground Fault Circuit Interrupter (GFCI) protected outlet? This is mandatory. A GFCI will shut off the power in case of a fault, preventing a fire.
- Annual Inspection: Before each winter, will you commit to visually inspecting the entire length of the tape for signs of wear, cracks, or damage? A damaged cable must be replaced immediately.
If you cannot confidently say “yes” to all five points, do not attempt to install heat tape yourself. The risk is too high. In that case, consulting a professional plumber to re-route the pipe or find an alternative solution is the only responsible course of action.
When to Shut Off Main Water: A Schedule for Snowbirds Leaving Quebec
For Montrealers who head south for the winter—the “snowbirds”—leaving a home unattended for weeks or months requires a higher level of diligence. A furnace failure or a localized power outage can quickly lead to frozen pipes and catastrophic flooding in an empty house. Your insurance policy has specific requirements for extended absences, and failure to comply will result in a denied claim.
Let’s be clear: if you are leaving for more than a few consecutive days (the exact number, often 4 to 7, is in your policy), you have two choices to remain compliant:
- Shut It Down Completely: This is the safest method. You shut off the main water supply, then open every faucet (hot and cold) at every level of the house to completely drain the entire system. Flush toilets to empty their tanks and bowls. This removes the “water” element from the equation entirely.
- Arrange for Competent Supervision: You can leave the heat and water on, but you MUST have a competent person (a neighbor, friend, or professional service) physically enter and check your home daily or every 48 hours to ensure the heat is working. A quick drive-by is not sufficient.
To ensure you’re covered, documentation is key. Email your insurance provider with your dates of absence and a summary of the preventative measures you’ve taken. If someone is checking the house, keep a log of their visits. For those looking for a modern solution, smart home technology offers a powerful third option. A smart water monitor and automatic shutoff valve can detect a leak or a drop in temperature and automatically close the main water supply, then send an alert to your phone. While Moen Flo smart water shutoff systems retail from $499-$799 CAD, that cost is a fraction of the bill for a flooded basement.
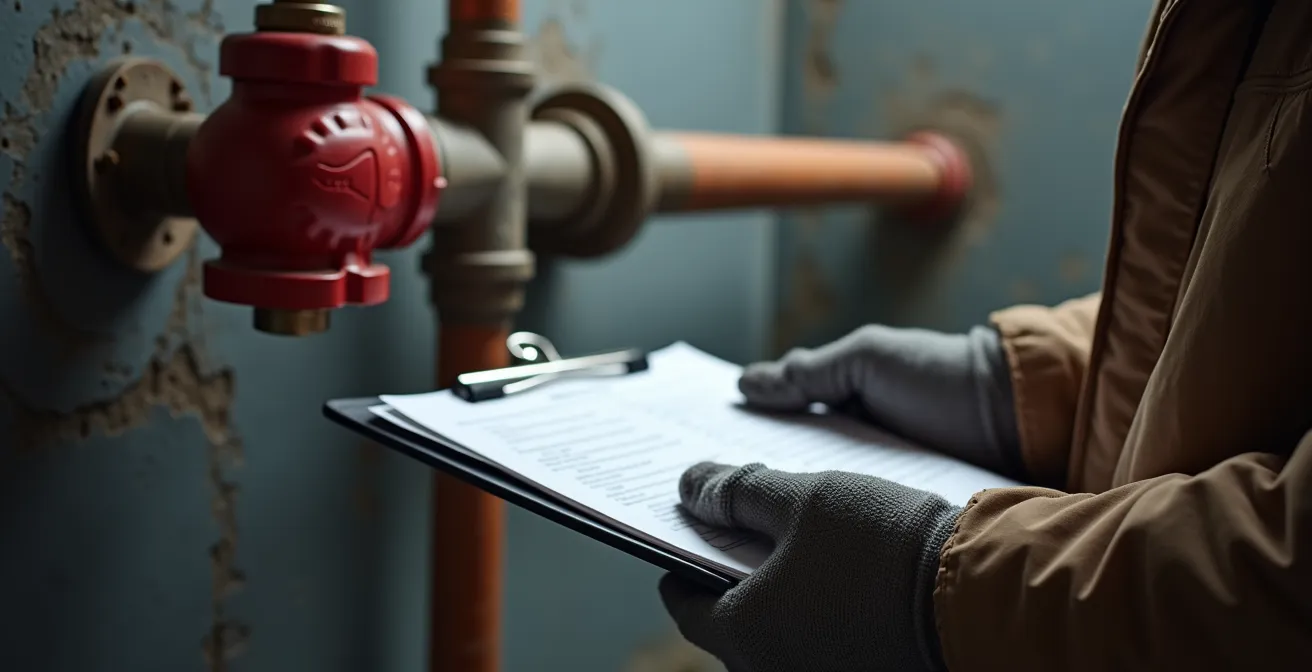
Ultimately, the decision to shut off the water depends on the length of your trip and your risk tolerance. For any absence longer than a week, the complete shutdown method offers the best protection for both your home and your insurance coverage.
Why Your Insurance May Deny Claims if You Left Heat Below 15°C?
This is the section every Quebec homeowner needs to read twice. Your home insurance policy is not a blank check. It is a contract with a crucial clause about “due diligence.” In the context of winter, this means you must take reasonable steps to prevent foreseeable damage, like frozen pipes. If you fail to do so, your insurer has every right to deny your claim, leaving you responsible for the entire cost of repairs.
The most common reason for claim denial is failure to maintain adequate heat. While you might be tempted to set the thermostat to 10°C to save energy while you’re away, most policies specify a minimum temperature. This is typically 15°C (60°F), though some insurers may require as high as 18°C. Dropping below this threshold is seen as negligence. As Rob de Pruis, National Director at the Insurance Bureau of Canada, states, coverage is provided on the condition that “reasonable steps are taken to maintain heat.”
Standard home insurance policies cover the resulting damage caused by freezing and burst pipes, provided the pipes are in the heated portion of your home and reasonable steps are taken to maintain heat.
– Rob de Pruis, Insurance Bureau of Canada, National Director
The stories of denied claims are cautionary tales. Square One Insurance shares real-life examples that are chilling:
Case Study: Real Insurance Denials in Canada
In one case, a couple’s townhouse sprinkler system froze and burst while they were on vacation. Their claim was denied because they had not shut off and drained all water systems, including the fire sprinklers. In another heartbreaking case, a woman was hospitalized for emergency cancer treatment for three weeks. Her furnace failed, pipes burst, and the claim for the extensive water damage was denied because the neighbor tasked with checking the house did not physically enter it daily to confirm the heat was on and conditions were stable.
These examples underscore a critical point: your insurer expects you to be proactive. Setting your thermostat correctly and arranging for verifiable daily checks aren’t suggestions; they are fundamental obligations of your policy during the heating season.
Why Does Condensation Form on Pipes During Summer Heat Waves?
A true seasonal management plan for your plumbing doesn’t end when the snow melts. The same pipes you worked to protect from cold can cause a different kind of water damage in the summer: condensation. During a hot, humid Montreal summer, the cold water running through your pipes cools their exterior surface. When the humid basement air comes into contact with these cold pipes, the moisture in the air condenses into water droplets—a phenomenon known as “pipe sweating.”
While a few drops might seem harmless, persistent condensation can lead to significant problems. The constant dripping can pool on the floor, damage drywall or ceilings below, and create the perfect damp environment for mold and mildew growth. It can also accelerate rust and corrosion on the pipes themselves and their fittings. This is not just a maintenance issue; it’s an air quality and structural integrity issue.
The solution, fortunately, is the same one we use for winter: insulation. Insulating your cold water pipes, particularly in the basement and crawl space, serves a dual purpose. In winter, it keeps the cold out. In summer, it keeps the cold *in*, preventing the pipe’s surface from becoming cold enough to cause condensation. Foam pipe insulation is perfect for this. It’s inexpensive and incredibly easy for a homeowner to install themselves.
Here’s a simple action plan for summer protection:
- Identify all accessible cold water pipes in your basement, crawl space, and utility rooms.
- Purchase foam pipe sleeves from any hardware store. They are pre-slit for easy application.
- Measure your pipe lengths, cut the foam sleeves to size, and snap them into place over the pipes. Secure the seams with duct tape or zip ties.
- Pay special attention to areas with poor ventilation, as this is where humidity will be highest.
This simple, low-cost project will not only prevent water damage but also slightly improve your home’s energy efficiency by reducing heat gain into your cold water lines. It’s a prime example of how thinking about your home’s systems year-round pays dividends.
Key Takeaways
- Think Like an Insurer: Your primary goal is risk mitigation. Every action should be weighed against the potential cost of failure and the requirements of your insurance policy.
- Identify Your Points of Failure: Systematically map out the vulnerable parts of your home—outdoor faucets, crawl spaces, exterior walls—and address them one by one.
- Control the Variables: You can’t control a Montreal winter, but you can control water, temperature, and pressure within your home. Shutting off water, maintaining heat, and draining lines are your key levers.
How to Handle a Frozen Pipe Emergency Before It Bursts?
Despite your best efforts, you might one day face a frozen pipe. You turn on a faucet and only a trickle—or nothing—comes out. This is a plumbing emergency. The clock is ticking, and the pressure is building inside that pipe. Your immediate actions can determine the difference between a simple thaw and a devastating burst. The first sign is usually a faucet that won’t run, or runs at a very low pressure, on a very cold day.
If you suspect a frozen pipe, do not panic. Follow this emergency procedure precisely:
- Turn Off the Main Water Supply: Before you do anything else, locate and shut off your main water valve. This will not reduce the pressure already in the pipe, but it will prevent a catastrophic flood if the pipe is already cracked or bursts during the thawing process.
- Open the Affected Faucet: Open the tap of the faucet that isn’t working. This will relieve pressure as the ice plug begins to melt and will allow the thawing water to escape. If it’s a hot water line, make sure the hot water tap is open.
- Apply Gentle Heat: Locate the frozen section of the pipe. It will likely be near an exterior wall or in an unheated space. Apply GENTLE heat to the area. Your best tools are a hairdryer on a low setting, a space heater (kept a safe distance away), or towels soaked in hot water. Start near the faucet and work your way back toward the ice blockage.
- Absolutely No Open Flames: Never, under any circumstances, use a blowtorch, propane heater, or any kind of open flame. This is an extreme fire hazard and can instantly damage the pipe, causing it to burst.
- Monitor for Leaks: As the water begins to flow again, check the entire length of the thawed pipe for small cracks or bulges. If you see any signs of damage, keep the main water off and call a plumber immediately. Canada’s Restoration Services often guarantees response within 45 minutes, and you’ll need that speed.
Knowing this procedure is your last line of defense. If you cannot find the frozen section, if it’s inside a wall, or if you are not comfortable with the process, shut off the main water and call an emergency plumber without delay. It’s better to pay for a professional’s time than for a full-scale water damage restoration.
For peace of mind this winter, the next logical step is to perform a systematic audit of your own home’s vulnerabilities using these guidelines. A few hours of proactive work in the autumn can save you thousands of dollars and immense stress when the temperature drops.