In summary:
- Black mold is a symptom of uncontrolled moisture, not just a surface issue.
- Effective waterproofing requires a continuous, sealed system that manages both liquid water and water vapor.
- Proper ventilation isn’t just having a fan; it’s about verified airflow (CFM) ducted correctly to the exterior.
- In a Montreal climate, managing condensation (dew point) on cold surfaces is as crucial as stopping leaks.
- Sealing every penetration in the bathroom’s “envelope” is the final step to a truly moisture-proof space.
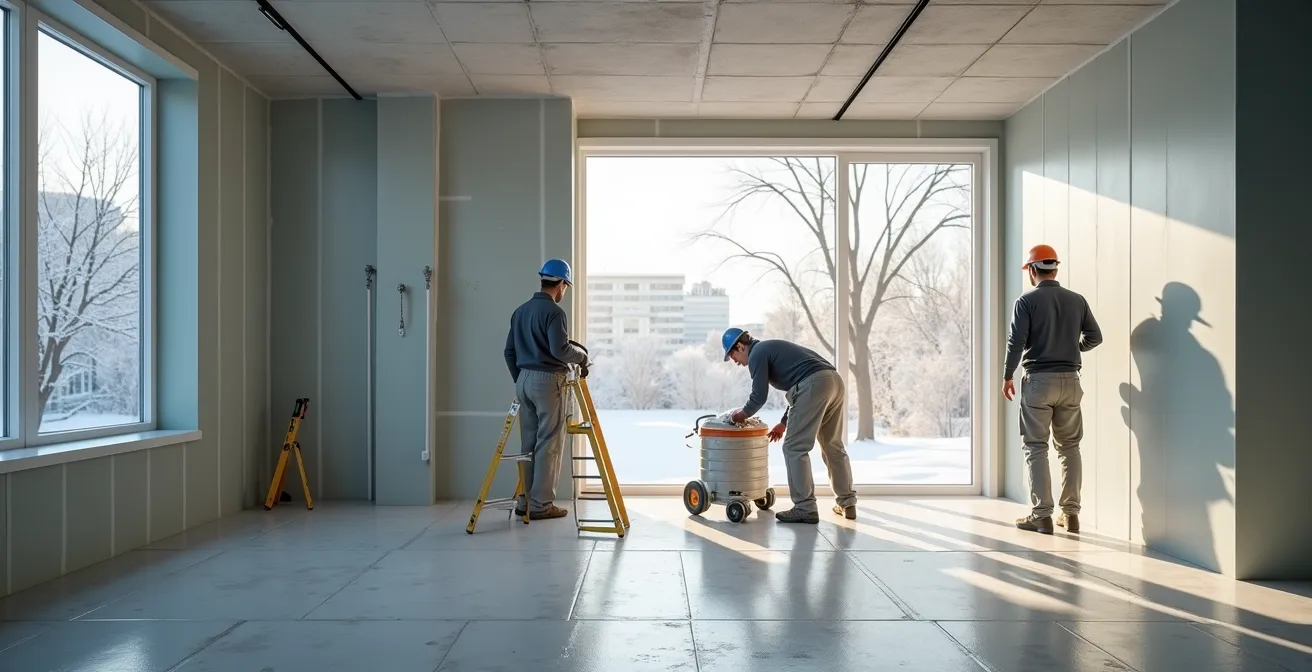
For any Montreal homeowner with a windowless bathroom, the battle against black mold can feel like a frustrating, endless cycle. You scrub away the dark spots on the grout and ceiling corners, armed with the strongest cleaners, only to see that familiar, musty mildew creep back within weeks. The common advice is often to “improve ventilation” or “use a mold-resistant paint,” but these are merely bandages on a much deeper wound. Mildew is a symptom; the disease is uncontrolled moisture.
The persistent dampness isn’t just about the water from your shower. It’s a complex interplay of physics happening within your walls, especially given Montreal’s climate of humid summers and frigid winters. The real problem lies in hidden condensation, air leakage, and thermal bridges—concepts that are rarely addressed by simple DIY fixes. Tackling black mold for good requires moving beyond surface treatments and adopting the mindset of a building scientist. It means understanding how warm, moist air behaves when it meets a cold surface and how to build a robust, sealed system to control it.
This guide will not give you another recipe for a bleach solution. Instead, it will walk you through a systematic approach to creating a truly waterproof and healthy bathroom. We will explore the science of condensation behind your walls, compare modern waterproofing technologies, detail the critical requirements for effective ventilation that actually work, and uncover the often-overlooked weak points where moisture—and pests—find their way in. By understanding the ‘why’ behind the moisture, you can finally implement the ‘how’ to eliminate it permanently.
To navigate this comprehensive guide, the following summary outlines the key systems and scientific principles we will deconstruct. Each section builds upon the last, providing a complete framework for waterproofing your bathroom from the inside out.
Summary: A Systematic Guide to a Mold-Free Bathroom
- Why Does Warm Air Condense Behind Your Shower Walls?
- How to Apply Liquid Waterproofing Membranes in Corners Correctly?
- Kerdi or Schluter: Which Membrane Is Easier for First-Time Renovators?
- The Error of Venting Bathroom Fans Into the Attic
- When to Upgrade Your Fan CFM Calculation for Larger Showers?
- How to Spot Temperature Anomalies That Indicate Wet Insulation?
- Why Does Condensation Form on Pipes During Summer Heat Waves?
- How to Seal Pipe Penetrations to Stop Water and Pest Entry?
Why Does Warm Air Condense Behind Your Shower Walls?
The persistent dampness in a windowless bathroom is often caused by a hidden phenomenon: interstitial condensation. This occurs when the warm, moisture-laden air from your shower migrates through the drywall and cools rapidly upon contact with a cold surface inside the wall cavity, like an uninsulated exterior wall or a cold framing stud. When the air cools below its dew point, it can no longer hold the moisture, which then turns back into liquid water—directly onto your insulation and wood framing.
This process is especially aggressive in Montreal, where winter temperatures create a significant temperature differential between your heated bathroom and the outside. A standard drywall-and-tile assembly is not a vapor barrier; water vapor can and does pass through it. Without a proper ventilation system to exhaust this moist air, you are essentially pressurizing the room with humidity, forcing it into the building envelope. An exhaust fan is not a luxury; it’s a critical component of moisture management.
The fan’s job is to create negative pressure, actively pulling the moist air out before it has a chance to penetrate the walls. For this to be effective, it must move a sufficient volume of air. The baseline standard is critical; Montreal building code requirements set a minimum of 50 CFM (Cubic Feet per Minute) for bathroom exhaust capacity. Anything less, and you’re fighting a losing battle against the physics of condensation.
How to Apply Liquid Waterproofing Membranes in Corners Correctly?
Once you understand that moisture moves as vapor, not just liquid, the goal of waterproofing becomes clear: you must create a continuous, monolithic barrier. Liquid-applied waterproofing membranes (like RedGard or AquaDefense) are excellent for this, especially in older Montreal homes with uneven plaster-over-lath walls. However, their effectiveness hinges on correct application, particularly at the most vulnerable points: the corners and seams.
A simple coat of paint-on membrane is not enough. The professional standard is the “three-course method,” which mechanically reinforces these weak points. First, a liberal coat of the liquid membrane is applied to the corner. Second, while the membrane is still wet, a strip of reinforcing fabric (typically fiberglass mesh) is embedded into it, ensuring there are no air bubbles. Third, another coat of the membrane is applied over the fabric, completely saturating it. This creates a flexible, seamless, and incredibly strong joint that can accommodate the minor structural shifts common in buildings.
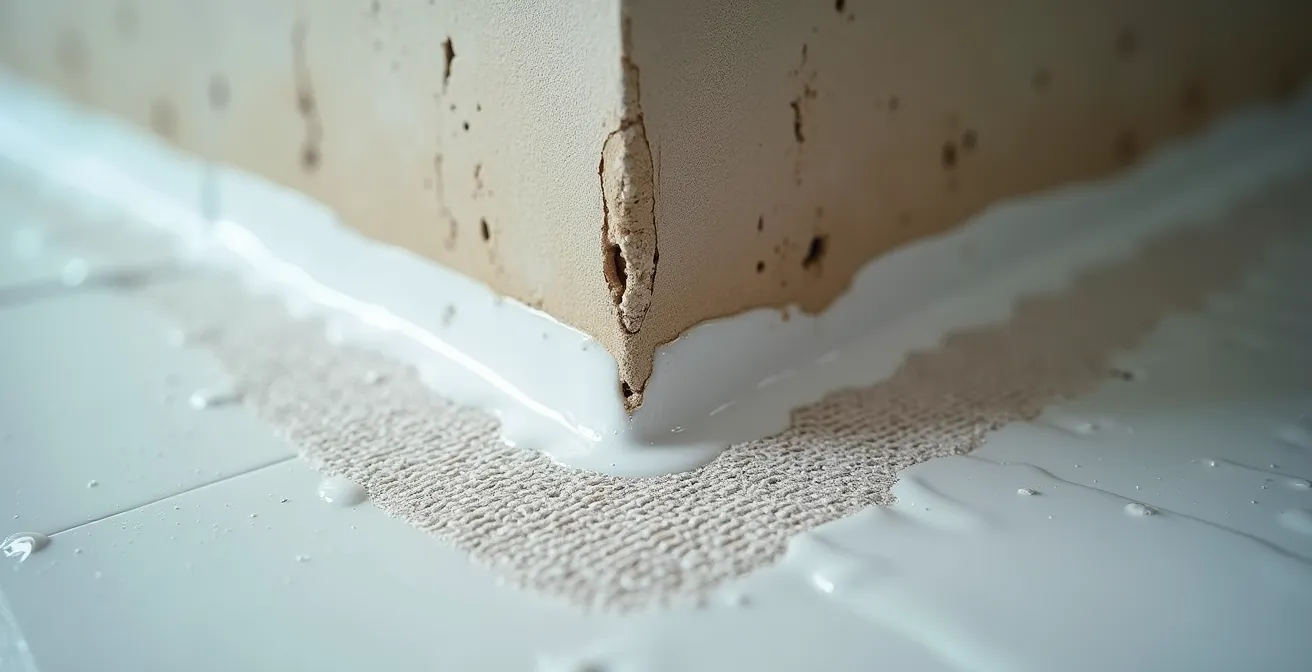
As this detailed view shows, the fabric acts like rebar in concrete, giving the membrane tensile strength and preventing it from cracking at the joint between two backer boards. Every corner—vertical, horizontal, and where the walls meet the shower pan or tub—must receive this treatment. Failing to reinforce these transitions is the most common failure point for liquid-applied systems, creating a direct path for water to get behind your tiles.
Kerdi or Schluter: Which Membrane Is Easier for First-Time Renovators?
When choosing a waterproofing system, renovators are often faced with two primary options: sheet membranes, like the well-known orange Schluter-Kerdi, and liquid-applied membranes. Both can create an effective barrier, but they have distinct differences in application and are suited for different scenarios, especially for a first-time renovator. Kerdi is a polyethylene sheet that is applied to the wallboard using thin-set mortar, creating a uniform, factory-controlled thickness. Liquid membranes are painted or rolled on, and their final thickness depends on the applicator’s skill.
The decision often comes down to the project’s specifics and the renovator’s comfort level. As one expert from Shoe Makes New explains, the choice depends on the scope and skill of the user:
For a beginner who’s done a few projects like patching drywall or replacing a light fixture and only needs to re-tile a tub surround, I’d probably start with Redgard because it’s so much more straightforward (and affordable). But if you’re going to be rebuilding a whole down-to-the-studs shower or are more comfortable with remodeling, Schluter having a whole system and line of products is probably going to give a more consistent (and cleaner) result.
– Shoe Makes New, Redgard vs. Schluter Shower Waterproofing Comparison
For many older Montreal homes, a liquid membrane’s ability to conform to imperfect, non-plumb walls is a significant advantage. A sheet membrane requires a much flatter, more regular substrate to adhere properly. The following table breaks down the key considerations:
| Feature | Schluter Kerdi (Sheet) | RedGard (Liquid) |
|---|---|---|
| Installation Difficulty | More complex, requires precise cutting | Straightforward paint-on application |
| Best For | New-build condos with flat surfaces | Uneven plaster-over-lath walls in older homes |
| Cost (Montreal Market) | Higher initial investment | More affordable upfront |
| System Components | Complete system with drain and valve seals | Membrane only, separate drain needed |
| Final Surface | Smoother, tile-ready surface | May require additional prep for tiling |
The Error of Venting Bathroom Fans Into the Attic
Installing a powerful bathroom fan is useless if it’s not ducted correctly. A shockingly common and dangerous mistake is terminating the exhaust duct in the attic. This doesn’t remove moisture from the building; it simply relocates it to a cold, unconditioned space where it can cause far more damage. During a Montreal winter, this warm, humid air will immediately condense on cold roof sheathing and trusses, leading to wood rot, saturated insulation, and rampant mold growth. In summer, it increases the attic’s humidity, adding to the load on your home’s cooling system.
The ductwork itself is a critical part of the system. The path to the exterior must be as short and straight as possible, using rigid, smooth-walled ducts. Every bend and every foot of flexible, ribbed ducting adds static pressure, which drastically reduces the fan’s actual airflow. The problem is so pronounced that research shows some bathroom fans provide no airflow at all when connected to a typical, convoluted exhaust system, despite their high CFM rating on the box. The fan simply can’t overcome the resistance.
To ensure proper function in a cold climate, the ducting run through the attic must be insulated to prevent condensation *inside the pipe*. The duct should also be sloped slightly downwards towards the exterior vent cap to drain any condensation that might form. Finally, the exterior termination—whether on the roof or a side wall—must be a high-quality vent cap with a damper to prevent cold air and pests from entering, sealed meticulously against the elements.
When to Upgrade Your Fan CFM Calculation for Larger Showers?
The standard recommendation for fan sizing is 1 CFM per square foot of bathroom area (or a minimum of 50 CFM). However, this simple rule breaks down in modern bathrooms with popular features like high ceilings, large walk-in showers, or steam generators. These elements dramatically increase the volume of air and the amount of moisture that needs to be exhausted, demanding a more robust calculation based on the room’s total volume, not just its footprint.
For bathrooms with ceilings higher than the standard 8 feet, a volume-based calculation is essential. This method ensures the fan can achieve an adequate number of air changes per hour (ACH), with the industry standard being at least eight. A powerful fan is also louder, so paying attention to the Sone rating is key for comfort. A rating of 1.0 Sone or less is considered quiet, comparable to the hum of a modern refrigerator. A fan with a high CFM but also a high Sone rating will likely not be used, defeating its purpose entirely.
Case Study: CFM Calculation for a High-Ceiling Bathroom
As detailed in a guide by the experts at Engineer Fix, a volume-based approach is necessary for non-standard rooms. For instance, a 10×12 foot bathroom with a 10-foot ceiling has a volume of 1,200 cubic feet. To achieve the recommended eight air changes per hour, the calculation is: (1,200 cubic feet × 8 ACH) / 60 minutes = 160 CFM. A standard 110 CFM fan would be grossly undersized for this space, allowing humidity to build up.
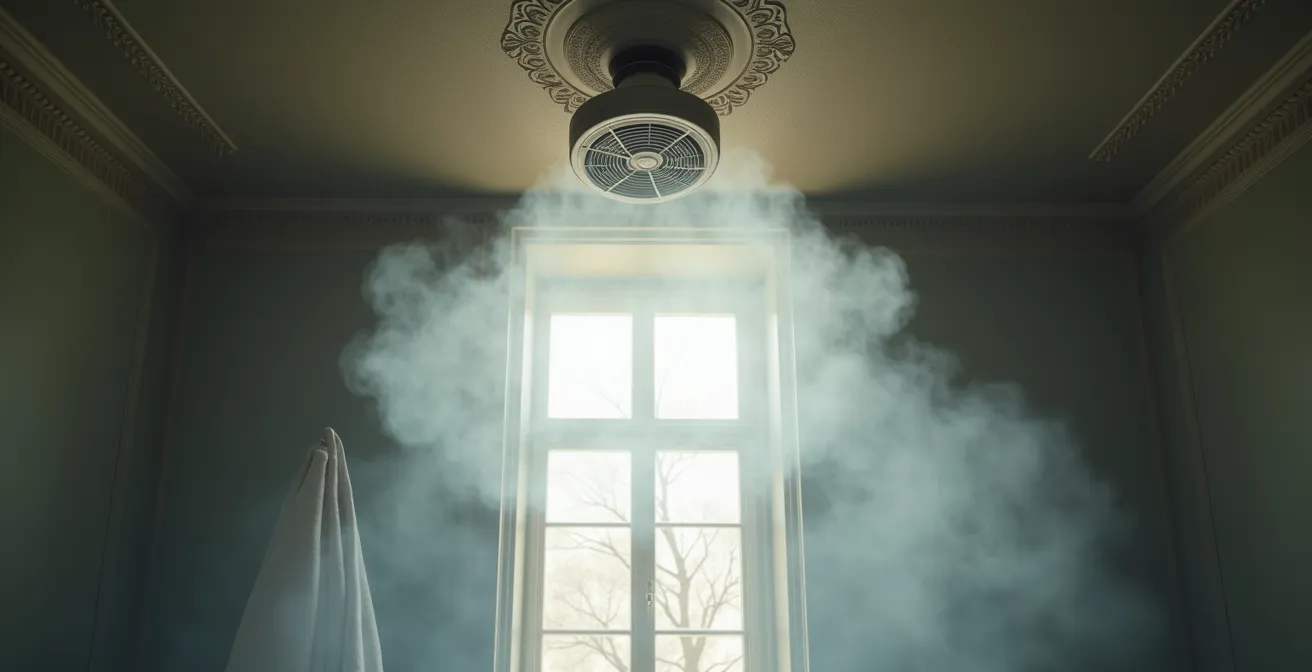
This visualization of air movement highlights why volume matters. In a tall room, steam and moisture stratify and fill the entire space. A fan must be powerful enough to create a clear circulation pattern, pulling moist air from the source and exhausting it efficiently before it spreads and condenses on cooler surfaces.
How to Spot Temperature Anomalies That Indicate Wet Insulation?
Even with a good waterproofing system, a small failure can introduce moisture into a wall cavity, where it becomes trapped in the insulation. Wet insulation is a double-edged sword: not only does it become a breeding ground for mold, but it also loses its thermal resistance (R-value). This creates a thermal bridge—a cold spot on your interior wall that attracts even more condensation, exacerbating the problem in a vicious cycle.
Finding these hidden wet spots before mold becomes visible is key. The most effective tool for a homeowner is a non-contact infrared (IR) thermometer. On a cold winter day, systematically scan the interior surfaces of your bathroom walls, especially exterior walls and corners. A properly insulated wall will have a relatively uniform surface temperature. A significant, localized cold spot (a drop of several degrees) is a major red flag. It indicates a breach in the thermal envelope, very often caused by compressed, missing, or wet insulation.
These temperature anomalies are the invisible clues to your moisture problem. Another critical tool is a hygrometer to monitor the room’s relative humidity (RH). To effectively inhibit mold growth, the CDC recommends keeping humidity levels no higher than 50%. If your fan runs for 30 minutes after a shower and the RH remains stubbornly high, it’s a clear sign your ventilation is inadequate or moisture is re-evaporating from a hidden source within the walls.
Why Does Condensation Form on Pipes During Summer Heat Waves?
Moisture problems aren’t exclusive to winter. During a classic Montreal summer heat wave, you may notice your cold water pipes “sweating” profusely. This isn’t a leak; it’s the same condensation principle we saw in walls, but in reverse. The air inside your home is warm and laden with humidity, while the municipal water is very cold. When this warm, humid air makes contact with the cold pipe, the air temperature drops below its dew point, and condensation forms on the pipe’s surface.
Case Study: Montreal Summer Pipe Condensation
During Montreal’s humid July heat waves, with ambient indoor temperatures reaching 30°C and 85% humidity, the cold municipal water drawn from the St. Lawrence River can arrive at a frigid 12°C. This significant 18-degree temperature differential creates an ideal scenario for inevitable, heavy condensation on cold water supply lines. This affects copper pipes most acutely due to their high thermal conductivity, but even PEX pipes will sweat at any exposed metal fittings.
This dripping can damage flooring, subflooring, and the ceiling below. The solution is to insulate the cold water lines, preventing the warm, moist air from ever touching the cold pipe surface. Not all insulation is created equal for this task. Basic foam sleeves may not provide a perfect seal, especially at fittings. Closed-cell rubber insulation (like Armaflex) is superior as it creates an airtight and vapor-tight seal. For severe cases, the ultimate solution is to lower the room’s overall dew point with a dehumidifier.
| Solution Level | Product | Effectiveness | Cost |
|---|---|---|---|
| Good | Basic foam pipe insulation (Canadian Tire) | Moderate protection | $ |
| Better | Closed-cell rubber (Armaflex) | Excellent seal, especially on PEX fittings | $$ |
| Best | Dehumidifier installation | Lowers room’s overall dew point | $$$ |
Key takeaways
- Mastering moisture is about controlling the dew point by managing the interplay of air temperature, humidity, and surface temperature.
- A successful waterproofing strategy relies on creating a continuous, unbroken sealed envelope, paying special attention to corners, seams, and penetrations.
- Effective ventilation is not about a fan’s rated power, but about its verified ability to exhaust a calculated volume of air through a low-resistance duct path to the exterior.
How to Seal Pipe Penetrations to Stop Water and Pest Entry?
After all the work of waterproofing membranes and engineering the perfect ventilation system, the entire effort can be undermined by small, unsealed gaps. Every spot where a pipe or wire penetrates a wall or floor—the water supply lines for the toilet and sink, the shower valve, the main drain stack—is a potential highway for moisture, air, and pests. Sealing these penetrations is the final, critical step in creating a truly isolated and protected bathroom envelope.
Simply caulking the gap is insufficient. A multi-layered approach is required for a robust and permanent seal. Large voids should first be filled with a pest-resistant expanding foam sealant. However, mice and other pests can chew through foam alone. Therefore, the second step is to install a metal escutcheon plate (the decorative trim ring) tightly against the wall or floor over the foam. This provides a hard barrier. The final step is to apply a high-quality, flexible sealant around the edge of the escutcheon and in the small gap between the pipe and the plate, creating the final airtight and watertight seal.
Action plan: Three-Step Pipe Penetration Sealing
- Fill large gaps around pipes with a pest-resistant expanding foam sealant to act as a primary air barrier.
- Install rigid metal escutcheon plates over the foam-filled gaps, as mice and insects can easily chew through foam alone.
- Seal the outer edges of the plates and the small gap around the pipes with a high-quality, flexible silicone sealant for the final airtight and watertight barrier.
- Verify that the room’s ventilation system remains operational to manage any residual ambient humidity after sealing.
- Document all sealed penetrations with photographs, especially in a condo, to maintain records for association liability and future maintenance.
By meticulously sealing every one of these penetrations, you close the final doors on moisture intrusion, completing the building science approach to waterproofing. This transforms your bathroom from a damp, problematic area into a clean, dry, and healthy space, finally putting an end to the recurring battle with black mold.
Now that you are equipped with this systematic approach, the next logical step is to conduct a thorough audit of your own bathroom, identify the weakest links in your moisture defense, and build a targeted plan for a permanent solution.