Stopping drafts and pests isn’t just about plugging visible holes; it’s about restoring the integrity of your home’s entire building envelope, especially in Montreal’s demanding climate.
- Unsealed gaps around pipes create pathways for major heat loss, moisture damage, and pest entry, driven by powerful air pressure dynamics like the “stack effect.”
- Using the correct sealant for each specific location (e.g., fire-rated in garages, UV-stable on exteriors) is critical for a durable and safe seal.
Recommendation: Adopt a systematic, whole-home approach, sealing penetrations from the basement rim joists to the attic to truly control air, water, and heat transfer.
If you’re a homeowner in Montreal, you’re familiar with the battle against icy drafts in winter and unwelcome pests in summer. You might trace these issues to a gap under the kitchen sink or a draft from an exterior wall outlet. The common response is to grab a tube of caulk and plug the hole. While this offers a temporary fix, it’s like putting a bandage on a systemic problem. Those small gaps are symptoms of a larger issue: breaches in your home’s building envelope. As a building envelope specialist, I can tell you that every pipe, wire, and vent that passes through your walls, floors, or roof is a potential weak point in this protective shield.
Simply filling these holes without understanding the underlying physics is a missed opportunity. In a climate with temperature swings like Montreal’s, these penetrations become conduits for significant energy loss, moisture intrusion, and pest highways. The real solution lies in viewing your home not as a collection of rooms, but as a single, integrated system where air pressure, temperature, and humidity are in constant flux. The “stack effect,” thermal bridging, and vapor drive are powerful forces that exploit every unsealed pinhole, undermining your expensive insulation and creating the very problems you’re trying to solve.
This guide moves beyond simple patching. We will explore the science behind why these gaps are so detrimental and provide a systematic approach to sealing them effectively. By understanding the specific requirements for different areas of your home—from the fire-rated needs of a garage to the high-moisture environment of a bathtub—you can create a robust, lasting seal. It’s about transforming your mindset from a reactive “hole-plugger” to a proactive manager of your home’s performance, ensuring comfort, efficiency, and durability for years to come.
This article will provide a comprehensive tour of your home’s critical pipe penetration points, from the attic down to the basement. You’ll learn not just how to seal them, but why a specific approach is necessary for each location to ensure a truly secure and efficient building envelope.
Summary: A Systematic Approach to Sealing Your Home’s Penetrations
- Why Do Unsealed Pipe Holes Cause Heat Loss in the Attic?
- How to Use Fire-Rated Caulk Around Pipes in Garages?
- Silicone vs. Polyurethane: Which Sealant Lasts Longer on Exteriors?
- The Error of Ignoring the Seal Behind the Escutcheon Plate
- When to Re-Caulk Bathtubs: The Signs of Adhesion Failure
- The Mistake of Ignoring Pipes on Exterior Walls That Costs $5,000
- Why Do Studs Feel Cold Even in Insulated Walls?
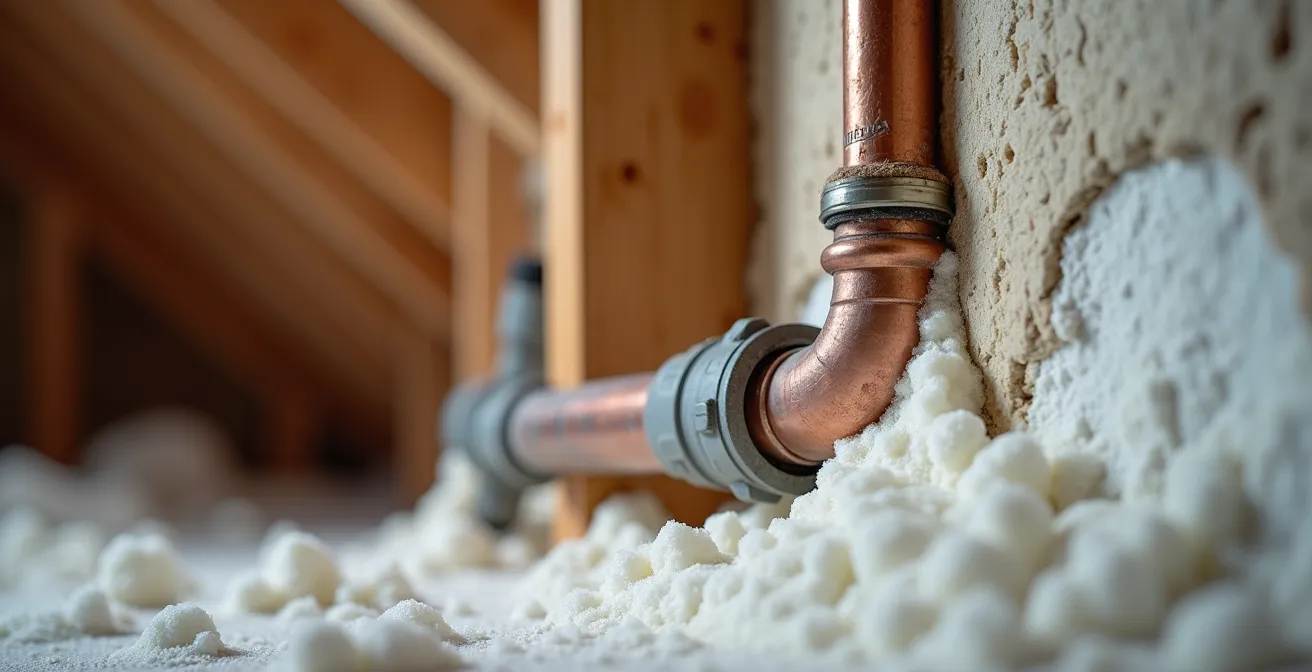
- How to Insulate Your Basement Header to Protect Pipes and Save Heat?
Why Do Unsealed Pipe Holes Cause Heat Loss in the Attic?
Unsealed pipe penetrations in your attic are far more than minor drafts; they are major highways for heat to escape your home. This is due to a powerful phenomenon known as the “stack effect.” In winter, the warm, buoyant air inside your house rises, creating higher pressure in the upper levels, like your attic. This warm air will force its way out through any available opening. An unsealed hole around a plumbing vent stack acts like an open chimney, actively siphoning expensive heated air out of your living space. This problem is especially pronounced in Montreal, where extreme winter temperatures create a massive pressure differential between the inside and outside of your home.
The Quebec building code often requires attic insulation levels of R-50 or more for new constructions in the Montreal area to combat this. However, a small, unsealed gap around a pipe can completely bypass thousands of dollars worth of insulation. Heat doesn’t just conduct through the gap; the airflow carries it away in massive quantities. According to building science experts, this air leakage is a primary driver of energy waste. In fact, Natural Resources Canada confirms that air leaks via chimneys, vents, and plumbing pipes can account for substantial heat loss. Simultaneously, this escaping air creates negative pressure in the lower levels of your house, actively pulling cold air in through gaps in your basement, compounding the problem.
Sealing these attic penetrations is the critical first step in managing your home’s building envelope. It’s not just about saving heat; it’s about controlling the air pressure engine that drives infiltration throughout the entire structure. A proper seal here reduces the force pulling cold air into your basement and living areas, making your entire home more comfortable and efficient.
How to Use Fire-Rated Caulk Around Pipes in Garages?
When sealing pipe penetrations, the location dictates the material. In a garage, especially along the wall shared with your home’s living space, fire safety becomes the paramount concern. This shared wall is a “fire separation,” a critical barrier designed to slow the spread of fire and smoke from the garage to the house. Any hole drilled through it for pipes or wires compromises this barrier. Simply filling it with standard acrylic or silicone caulk is a dangerous mistake, as these materials will quickly melt or burn away in a fire, creating an open channel for flames and toxic gases to pour into your home.
This is where fire-rated caulk, also known as firestop sealant, is non-negotiable. This specialized product is an intumescent material, meaning it is designed to swell and char when exposed to high heat. This expansion seals the penetration, maintaining the integrity of the fire separation for a specific duration (e.g., 1-3 hours), giving your family precious time to escape. You can typically identify fire-rated caulk by its distinct color, often red or orange, which makes it easily visible to building inspectors.
Applying it correctly is crucial for it to perform as intended. First, the area must be clean and free of dust and debris. For larger gaps, a fire-rated backing material like mineral wool should be packed into the opening first. The fire-rated caulk is then applied over this, ensuring it makes full contact with both the pipe and the surrounding wall material (drywall, concrete block). The goal is to achieve the correct depth and a complete, seamless seal with no voids.
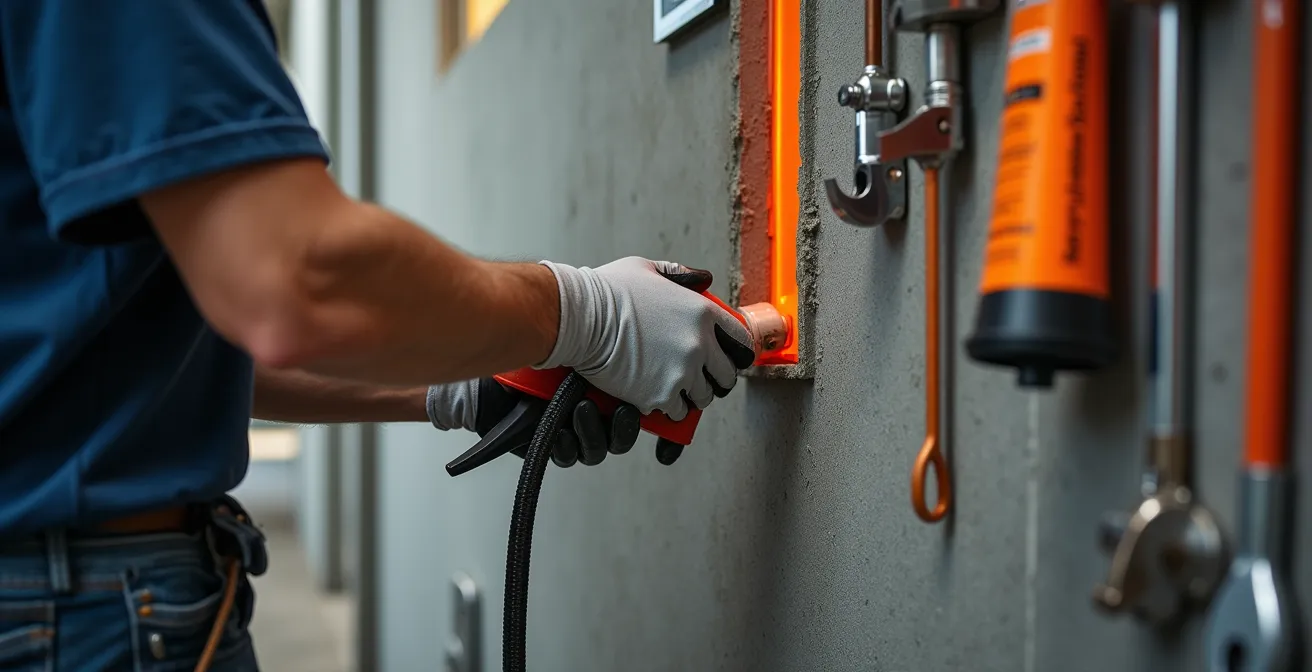
As you can see, the application requires precision to fill the entire annulus around the pipe. This isn’t just about stopping drafts; it’s a life-safety installation. Always check the product specifications to ensure it is rated for the specific type of pipe (e.g., plastic vs. metal) and wall assembly you are working with.
Silicone vs. Polyurethane: Which Sealant Lasts Longer on Exteriors?
For pipe penetrations on your home’s exterior, the challenge shifts from fire resistance to weather endurance. Sealants here are exposed to Montreal’s full climatic range: intense summer UV radiation, driving rain, high humidity, and deep winter freezes. The choice between the two most common high-performance sealants, silicone and polyurethane, depends on balancing flexibility, durability, and the specific materials involved. Neither is universally “better”; they have distinct strengths and weaknesses.
100% Silicone sealant is renowned for its exceptional flexibility and UV resistance. It remains pliable across a vast temperature range, which is critical for accommodating the expansion and contraction of building materials during freeze-thaw cycles. Its inorganic composition makes it highly resistant to degradation from sunlight and water, giving it a very long service life in exposed conditions. However, its primary drawback is that it cannot be painted, and it struggles to adhere to certain porous surfaces like unprimed wood or concrete. Its slick surface can also make it difficult to tool into a clean bead.
Polyurethane sealant, on the other hand, is known for its incredible toughness and adhesion. It forms a tenacious bond to a wider variety of materials, including concrete, masonry, and wood, making it a workhorse for general construction. Polyurethane is also paintable, allowing it to be blended seamlessly with your home’s exterior finish. Its main vulnerability is UV radiation. Over years of sun exposure, it can become brittle and crack, especially if it is not painted. While modern formulations have improved UV stability, it generally has a shorter lifespan than silicone in direct, unpainted sunlight.
So, which is best? For a black plastic plumbing vent on a sunny roof, silicone’s superior UV resistance and flexibility make it the winner. For a pipe penetration through a painted wood siding or a brick wall that you want to color-match, a high-quality, paintable polyurethane sealant is the superior choice. The key is matching the sealant’s properties to the specific location and materials to ensure a seal that lasts for decades, not just a single season.
The Error of Ignoring the Seal Behind the Escutcheon Plate
The escutcheon plate—that small decorative chrome ring at the base of a faucet or where a pipe comes out of the wall under your sink—is one of the most deceptive components in a home. It provides a clean, finished look, leading homeowners to assume it also provides a seal. This is a critical misunderstanding. The escutcheon is purely cosmetic; it does not, and is not designed to, create a waterproof or airtight barrier. The real work is meant to happen in the gap it conceals.
Over time, due to pipe vibration, cleaning, and thermal expansion, these plates often separate slightly from the wall or floor surface. This creates a hidden gap that becomes a perfect entry point for moisture, small pests like ants and cockroaches, and airborne mold spores. In high-moisture areas like kitchens and bathrooms, water can wick into this gap, saturating the drywall or subfloor and leading to rot and mold growth that you won’t see until the damage is extensive. Research from building professionals confirms that these hidden gaps are a common failure point, especially in the dense urban environment of Montreal where pest pressure is high.
The core of the problem is that air is the primary transport vehicle for moisture into wall cavities. In fact, building science research indicates that over 98% of water vapor entering wall cavities comes from air movement through unsealed penetrations, not vapor diffusion through solid materials. That tiny, hidden gap behind the escutcheon is an open door for humid air. A truly hygienic and permanent seal must be made directly on the pipe-to-wall junction itself, using a quality waterproof sealant like silicone. The escutcheon plate is then installed over this functional seal. Ignoring this step means you are relying on a loose piece of trim for protection, a mistake that often leads to costly hidden water damage and persistent pest problems.
When to Re-Caulk Bathtubs: The Signs of Adhesion Failure
The bead of caulk around your bathtub is a frontline defender against water damage, but it’s not a permanent fixture. It’s a flexible joint designed to absorb movement between the tub and the surrounding tile. In a high-moisture, high-use environment, this sealant degrades over time, eventually leading to adhesion failure. This is when the caulk pulls away from the tub or tile, opening up a pathway for water to seep into your walls, causing rot, mold, and structural damage. Recognizing the early signs of this failure is key to preventing a major repair bill.
Don’t wait for a water stain to appear on the ceiling below. The warning signs are usually visible long before that. The most obvious is visible cracking or shrinking of the caulk line, creating clear gaps. Another tell-tale sign is the appearance of black spots of mold or mildew, which indicates that moisture is already being trapped in or behind the sealant. The caulk may also become soft, gummy, or lose its bond. If you can press on the caulk and it moves, or if you can peel it away easily with your fingernail, its seal is compromised.
In Montreal bathrooms, which can experience high humidity, a good quality silicone caulk should be inspected annually and is typically expected to last about five years before needing replacement. Waiting longer is a gamble. Proactive replacement is always cheaper than reactive water damage repair.
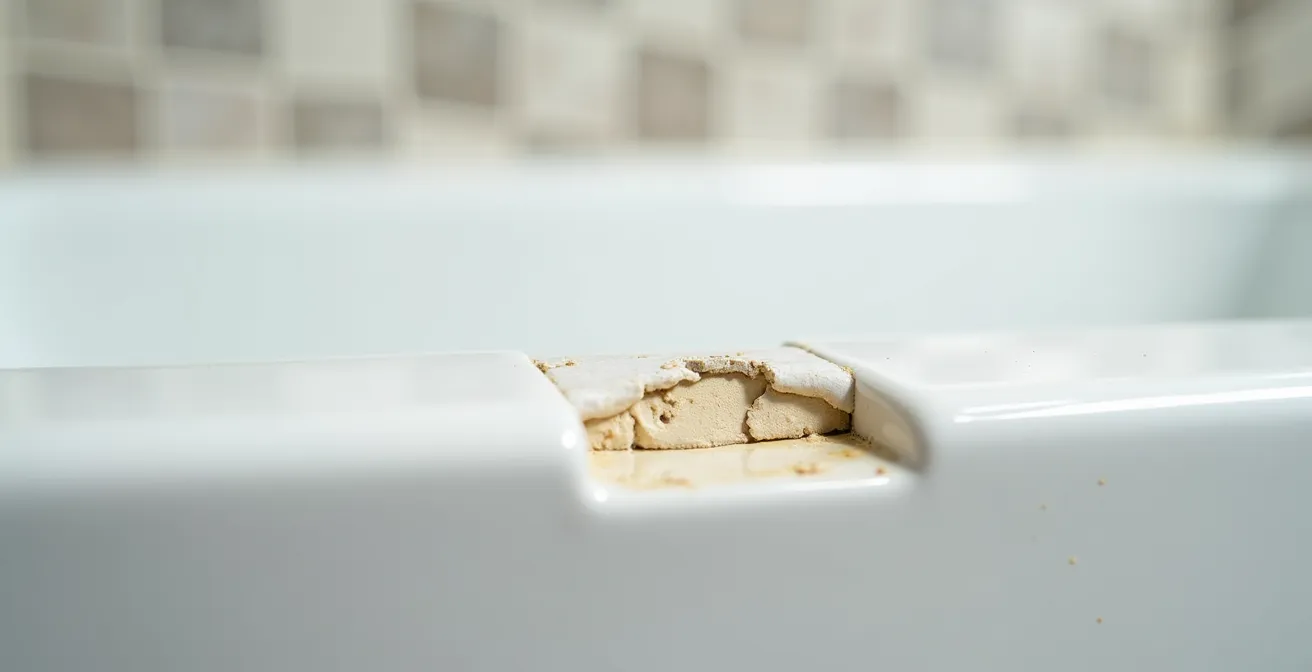
This close-up shows the classic signs of adhesion failure: the caulk is peeling away from the tub’s edge, creating a micro-gap where water can penetrate. This is the point where immediate replacement is necessary to protect the underlying wall structure.
Your Essential Bathtub Caulk Inspection Checklist
- Visual Inspection: Carefully look along the entire caulk line for any visible cracks, gaps, or dark discoloration. Use a flashlight to highlight imperfections.
- Press Test: Gently press on the caulk with your finger in several spots. If it feels soft, gummy, or moves under pressure, the bond has failed and it needs replacement.
- Check for Mold: Identify any black or dark spots growing on or at the edge of the caulk. This is a clear sign that moisture is trapped and the seal is no longer hygienic.
- Water Test: After a shower, run a dry cloth along the caulk joint. If the cloth picks up moisture that seems to be coming from behind the line, you have an active leak.
- Age Assessment: If you live in a high-moisture Montreal home and the caulk is over 5 years old, plan to replace it proactively, even if it looks acceptable.
The Mistake of Ignoring Pipes on Exterior Walls That Costs $5,000
Ignoring an unsealed pipe penetration on an interior wall might lead to a draft or a bug problem. Ignoring one on an exterior wall in a Montreal winter can lead to a catastrophic flood. The financial stakes are dramatically higher because these penetrations expose your plumbing directly to sub-zero temperatures. A small gap around an outdoor hose bibb, an air conditioning line, or a gas pipe can allow a constant stream of freezing air to blow directly onto the pipe inside your wall cavity.
This creates a localized deep freeze that your home’s heating system can’t overcome. Even with proper wall insulation, this concentrated cold spot can be enough to freeze the water inside the pipe, causing it to expand and burst. The resulting flood can cause thousands of dollars in damage to drywall, flooring, insulation, and furnishings—a cost that often reaches or exceeds $5,000 after water mitigation and repairs. This is an incredibly common and entirely preventable issue in climates where temperatures regularly drop to -20°C or -30°C.
Properly addressing these penetrations requires a two-part approach: air sealing and insulation. First, the gap around the pipe must be completely sealed from both the interior and exterior with a durable, weather-resistant sealant (like polyurethane or silicone, as discussed earlier). This stops the movement of cold air. Second, the pipe itself inside the wall cavity should be protected. While Quebec building codes recommend certain insulation levels for walls, such as R-20 for basements, the pipe needs direct protection. Packing mineral wool insulation around the pipe inside the wall provides an excellent non-combustible thermal and fire barrier, ensuring the pipe stays on the warm side of your building envelope.
Why Do Studs Feel Cold Even in Insulated Walls?
You’ve insulated your walls, yet on a frigid Montreal day, you can still feel cold spots if you touch certain areas of the drywall. If you use a thermal camera, you’ll see a clear grid of cold lines corresponding to the studs inside your walls. This phenomenon is called thermal bridging, and it’s a key concept in building science that demonstrates why insulation alone is not a complete solution. A thermal bridge is a pathway of least resistance for heat, made of a material that is more conductive than the insulation around it.
Wood studs, while better insulators than metal, are still significantly more conductive than fiberglass or foam insulation. Heat will always choose the easiest path to escape, so it flows out of your home through the “bridge” created by the wood studs, bypassing the insulation in the wall cavities. This is why the surface of the wall over a stud feels colder. An unsealed pipe penetration acts as a super-highway for this process. A copper or steel pipe is vastly more conductive than a wood stud, creating a powerful thermal bridge that can chill a large section of your wall.
This is compounded by air leakage. As building science experts often point out, air movement is the real enemy of an efficient building envelope. This is perfectly captured in a foundational principle of building science:
Air movement is responsible for over 98% of water vapor entering wall cavities.
– Building Science Research, Canada’s R-Value Insulation Chart Study
This same air movement also carries heat. When cold air leaks in around a pipe, it doesn’t just chill the pipe; it chills the stud and the surrounding drywall, making the thermal bridge even more pronounced. Sealing the penetration stops the airflow, which is the first and most critical step. The second step is to create a “thermal break” by ensuring insulation is continuous over or around the conductive element, which is why insulating pipes within walls is so important.
Key Takeaways
- Effective sealing is about controlling air, moisture, and heat transfer across the entire building envelope, not just plugging holes.
- The “stack effect” in cold climates like Montreal’s makes sealing high (attic) and low (basement) penetrations a top priority for energy efficiency.
- The choice of sealant must match the location: fire-rated for garages, UV-stable for exteriors, and waterproof for baths to ensure a durable, safe seal.
How to Insulate Your Basement Header to Protect Pipes and Save Heat?
After addressing the top of the house, we close the loop at the very bottom: the basement header, also known as the rim joist. This area, where the wooden structure of your house rests on top of the concrete foundation, is notoriously leaky. It’s a complex intersection of different materials, and it’s often poorly sealed and completely uninsulated. For a homeowner in Montreal, this is a major source of winter drafts and a critical vulnerability for any pipes that run through it.
As the stack effect pulls warm air out of your attic, cold replacement air is sucked into the basement through these gaps in the rim joist area. As insulation experts note, rim joists can account for significant heat loss in Canadian basements, creating cold floors above and putting any nearby water pipes at high risk of freezing. Sealing and insulating this zone is one of the most cost-effective energy efficiency upgrades you can make, and it’s a crucial step in protecting your plumbing.
The most effective method for this area is the “cut and cobble” technique using rigid foam insulation and expanding foam sealant. This creates a robust air and thermal barrier. Here is a proven, step-by-step process tailored for a Montreal home:
- Step 1: Clean the Area: Thoroughly clean the rim joist cavities, removing all cobwebs, dust, and debris. A clean surface is essential for the sealant to adhere properly.
- Step 2: Block Pests: For any larger gaps, particularly where the wood sill plate meets the foundation, stuff steel wool into the openings before sealing. This creates a physical barrier that mice and other pests common in Montreal cannot chew through.
- Step 3: Cut Rigid Foam: Cut pieces of rigid foam insulation (like XPS or polyisocyanurate) to fit snugly inside each joist bay. The cut should be about 1/2 inch smaller than the cavity on all sides to leave room for the foam sealant.
- Step 4: Air Seal with Foam: Place the rigid foam against the rim joist and use a can of low-expansion spray foam to seal all four edges. The expanding foam will fill the gap completely, creating a perfect, continuous air seal.
- Step 5: Seal the Sill Plate: Finally, run a bead of caulk or spray foam along the crucial junction where the wooden sill plate rests on top of the concrete foundation wall. This final step seals one of the most common air infiltration pathways.
By treating your home as a complete system and methodically sealing these critical penetration points from top to bottom, you move beyond temporary fixes. You are taking control of your building envelope to ensure long-term energy efficiency, comfort, and protection against water and pests. To properly assess your own home’s vulnerabilities, the next logical step is to conduct a thorough inspection with these principles in mind.