The secret to a stunning windowless bathroom isn’t more light, but the right light, planned with artistic precision and technical expertise.
- Warm, 3000K high-CRI LEDs create a flattering, spa-like ambiance, not the clinical feel of cooler lights.
- Coordinating electrical and plumbing work from the start is the single biggest money-saving strategy in a Montreal condo renovation.
Recommendation: For a successful project, think like a designer: treat light as a building material and integrate its planning into the earliest stages of your renovation.
Transforming a windowless bathroom in a Montreal condo often feels like a losing battle against the dark. The common instinct is to flood the space with the brightest, coldest light possible, hoping to mimic a daylight that isn’t there. The result is rarely a serene escape; it’s more often a cold, clinical space that feels more like a laboratory than a sanctuary. Homeowners are told to use large mirrors and glossy tiles, sound advice but incomplete. It treats lighting as a mere utility, a brute-force solution to a problem of darkness.
But what if the true art of lighting a windowless space wasn’t about fighting the dark, but about mastering light itself? The key isn’t simply to make the room bright, but to sculpt an atmosphere. This requires a shift in perspective: from merely illuminating a room to designing an experience. It involves understanding how the warmth of light affects our mood, especially during long Montreal winters, and how technical specifications are not just regulations, but tools for creating beauty and safety.
This approach moves beyond generic tips and delves into the specific, integrated strategies that define a high-end renovation. It’s about a holistic vision where light is a material, just like tile or stone. This guide will walk you through the artistic and technical decisions required to achieve this vision. We will explore why the right color temperature is non-negotiable, how to ensure safety without sacrificing style, and crucially, how to choreograph your renovation so that lighting and plumbing work in concert, saving you time, money, and future headaches.
This article details the essential strategies for turning your windowless bathroom into an efficient, spa-like retreat. The following sections provide a complete roadmap, from foundational aesthetic choices to advanced planning and smart home integration.
Summary: How to Plan Lighting for a Windowless Bathroom Renovation?
- Why Does 3000K Light Look Better Than 5000K in Bathrooms?
- How to Choose Safe Light Fixtures for Shower Zones (IP65)?
- Integrated LED vs. Replaceable Bulbs: Which Is a Better Investment?
- The Error of Using Halogens in Small Powder Rooms
- The Error of Tiling Directly on Drywall in Wet Zones
- When to Install Dimmers: Creating Ambiance in Utility Spaces
- How to Program a “Vacation Mode” for Water and Heat?
- How to Move a Toilet Location in a Condo Without Raising the Floor?
Why Does 3000K Light Look Better Than 5000K in Bathrooms?
The single most impactful decision in your lighting plan is the color temperature, measured in Kelvin (K). Many assume that a “daylight” bulb (5000K or higher) is best for a windowless room, but this is a critical error in bathroom design. A 5000K light is harsh, blue-toned, and clinical. It renders skin tones in an unflattering, pale light and creates a sterile atmosphere—the exact opposite of a relaxing, spa-like environment. The goal is not to replicate a surgical suite, but to create a warm and inviting sanctuary.
The designer’s choice is almost always 3000K, or “warm white.” This temperature mimics the soft, golden glow of the late afternoon sun. It’s incredibly flattering to skin tones, making tasks like applying makeup easier and more accurate. This “thermal comfort” of light provides a psychological warmth that is especially welcome during Montreal’s cold, grey winters. It transforms the bathroom from a purely functional space into a personal retreat. Furthermore, when selecting your bulbs, look for a high Color Rendering Index (CRI) of 90 or above. A high CRI ensures that colors—from your skin to your towels—appear true and vibrant, not washed out.
This focus on quality light doesn’t mean sacrificing efficiency. Modern LED technology can reduce energy consumption by up to 90% compared to old incandescent bulbs, a significant saving on your Hydro-Québec bill. Choosing ENERGY STAR® certified products can also make you eligible for provincial rebates, further enhancing the return on investment.
Your Action Plan: Choosing the Right Color Temperature
- Choose 3000K warm white for comfort and relaxation, especially in Montreal’s cold winters.
- Look for high CRI (90+) bulbs for accurate skin tone rendering at the vanity.
- Check for ENERGY STAR® certification to see if you are eligible for Hydro-Québec rebates.
- Test bulbs in-store at local retailers like RONA or Patrick Morin to see the actual color temperature before committing.
- Plan to install dimmer switches for adjustable ambiance, allowing you to transition from bright task lighting to a soft evening glow.
By prioritizing the quality and warmth of light over sheer, cold brightness, you lay the aesthetic foundation for a bathroom that truly feels like an escape.
How to Choose Safe Light Fixtures for Shower Zones (IP65)?
In a bathroom, water and electricity are in close proximity, making safety a non-negotiable priority. This is especially true inside a shower or near a bathtub. Simply choosing a “bathroom” light fixture is not enough; you must understand and specify its IP rating. The IP (Ingress Protection) rating is a two-digit code that defines a fixture’s resistance to solids (first digit) and liquids (second digit). The higher the numbers, the better the protection.
For wet zones, such as the area directly within a shower enclosure, the Quebec Building Code and all electrical safety standards mandate fixtures with a high level of water resistance. Specifically, bathroom fixtures must meet a minimum IP65 rating. This means the fixture is completely dust-tight (the ‘6’) and protected against jets of water from any direction (the ‘5’). Using a fixture with a lower rating, like IP44 (splash-proof), in a shower is a serious code violation and a safety hazard.
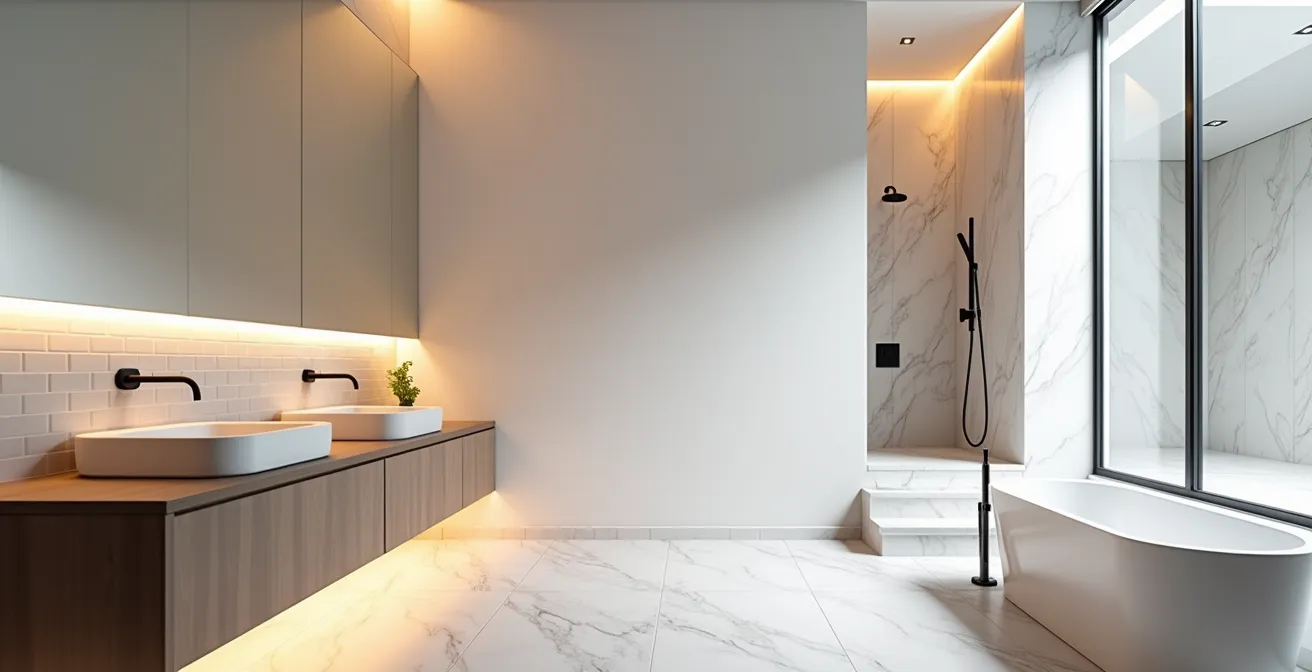
This technical requirement doesn’t limit your design choices. A recent renovation of a 6×10 foot windowless bathroom successfully used IP65-rated LED strip lighting recessed into the ceiling and in a shower niche to create a seamless, modern look. The project also incorporated a specialized shower light fan kit, which combines powerful ventilation with IP-rated lighting, ensuring both safety and effective moisture control. This demonstrates that you can achieve sophisticated, layered lighting effects while adhering to the strictest safety protocols. When planning, always insist on IP65-rated fixtures for all lighting inside the shower and tub area.
Ultimately, specifying IP65 is not a limitation; it’s the mark of a professional, durable, and safe design that protects both your family and your investment.
Integrated LED vs. Replaceable Bulbs: Which Is a Better Investment?
As you select your fixtures, you’ll face a key decision: choose fixtures with replaceable LED bulbs or opt for “integrated” LED fixtures where the light source is built-in. While fixtures with replaceable bulbs seem practical, a closer look at the total cost of ownership, especially in a Montreal context, reveals that integrated fixtures are often the superior long-term investment. An integrated fixture is engineered as a single, optimized system, often resulting in better performance, a longer lifespan, and sleeker designs.
Integrated LEDs are designed to last for up to 50,000 hours, which can translate to over 20 years of typical use. In contrast, even high-quality replaceable LEDs last up to 25 times more durable than traditional bulbs but generally have a lifespan closer to 25,000 hours. While you save on the initial fixture cost with a replaceable-bulb model, you will have to buy new bulbs at least once over the life of an integrated fixture. This also generates more waste, as only the failed bulb is discarded, but the accumulation of waste over the years is still higher.
The following table breaks down the 10-year total cost of ownership for a typical bathroom lighting setup in Montreal, considering local retail prices and Hydro-Québec electricity rates. It clearly shows that while the upfront cost of an integrated fixture may be higher, the long-term cost is often lower due to its longevity and efficiency.
| Factor | Integrated LED Fixture | Replaceable LED Bulbs |
|---|---|---|
| Initial Cost (Home Depot Canada) | $150-300 | $80-150 fixture + $20-40 bulbs |
| Lifespan | 50,000 hours (entire unit) | 25,000 hours (bulbs only) |
| 10-Year Electricity Cost (Hydro-Québec rates) | $48 | $52 |
| Replacement Cost Over 10 Years | $0 (if lasts) | $40-80 (bulbs only) |
| ENERGY STAR® Rebate Eligibility | Yes | Yes (bulbs only) |
| Waste Generated | Entire fixture if fails | Bulbs only |
For a condo owner seeking a low-maintenance, high-performance, and cost-effective solution, the integrated LED fixture represents a smarter, more sustainable investment in the future of their home.
The Error of Using Halogens in Small Powder Rooms
While most new renovations embrace LED technology, some homeowners are still tempted by the low initial cost of halogen bulbs, particularly for small spaces like a powder room. This is a significant design and efficiency error. Halogen bulbs are fundamentally outdated technology that work directly against the goals of creating a comfortable, serene, and energy-efficient bathroom. Their two primary drawbacks—immense heat output and high energy consumption—make them particularly ill-suited for confined, windowless areas.
First, halogens are notoriously inefficient, converting only a small fraction of electricity into light and wasting the rest as heat. This intense heat output can make a small powder room uncomfortably warm. It also poses a safety risk if fixtures are too close to flammable materials or cabinetry. In contrast, LEDs run significantly cooler, contributing to a more comfortable ambient temperature and a safer installation. As a Montreal condo renovation project noted, switching to LED pot lights is crucial to keep rooms bright and functional while avoiding unnecessary heat buildup.
Second, the energy waste is substantial. According to Hydro-Québec, lighting typically accounts for 5-10% of household power consumption, and using inefficient halogens drives this number up unnecessarily. Switching to ENERGY STAR® certified LEDs can drastically reduce this consumption, leading to direct savings on your monthly bill and potentially qualifying you for Hydro-Québec rebates. The minimal savings on the initial purchase of a halogen bulb are quickly erased by higher energy costs and the need for more frequent replacements.
For a modern, spa-like bathroom, the choice is clear: avoiding halogens in favor of cool-running, energy-efficient LEDs is not just an upgrade, it’s a necessity.
The Error of Tiling Directly on Drywall in Wet Zones
A superior lighting plan can be completely undermined by a flawed structural foundation. One of the most common and costly errors in bathroom renovation is failing to install a proper waterproofing membrane before tiling, especially in wet zones like showers and tub surrounds. Many contractors, seeking to cut corners, will tile directly onto moisture-resistant drywall (“green board”). This is a recipe for disaster, leading to mold, rot, structural damage, and ultimately, the failure of your beautiful new bathroom—including your carefully chosen lighting fixtures.
A proper renovation requires a complete waterproofing system, such as the widely recognized Schluter-Kerdi membrane or an equivalent product. This creates an impenetrable barrier that protects the wall structure from any water that might seep through grout lines. This isn’t just about preventing damage; it’s also a critical component of your lighting strategy. A study on bathroom renovations found that when glossy, reflective tiles are installed over a proper waterproofing membrane, they can make a windowless bathroom appear up to 30% brighter. The secure, stable foundation allows you to use materials that maximize light reflection without fear of future failure.
Protecting your lighting investment means ensuring the entire envelope is sound. This includes installing a powerful mechanical air extractor to manage humidity, using IP65-rated fixtures in all wet zones to prevent moisture from getting into the electronics, and applying mold-resistant sealants around all fixture mounting points. Adhering to the Quebec Building Code for all electrical and waterproofing work is not just a suggestion; it’s essential for the safety, longevity, and performance of your renovation.
Ultimately, excellent lighting design does not exist in a vacuum. It must be built upon a foundation of expert waterproofing and structural integrity.
When to Install Dimmers: Creating Ambiance in Utility Spaces
Lighting is not a binary, on-or-off system. The ability to control its intensity is what transforms a functional space into an atmospheric one. Dimmers are not a luxury add-on; they are the essential tool for what can be called “atmospheric engineering.” By installing dimmers on every light circuit in your bathroom, you gain the power to instantly shift the room’s mood from bright and energizing for your morning routine to soft and tranquil for a relaxing evening bath. This level of control is the hallmark of a high-end, spa-like design.

The evolution of dimmers has moved into the smart home realm, offering even greater control and efficiency. By choosing a Hilo-compatible smart dimmer system, such as Lutron Caséta, you can integrate your bathroom lighting into your Hydro-Québec energy management strategy. This allows you to program automated dimming schedules, particularly during peak winter challenge periods, to reduce your energy load without sacrificing comfort. In fact, active Hilo participants can save up to 20% on their Hydro-Québec bill. Installation must be done by a certified CMEQ (Corporation des maîtres électriciens du Québec) electrician to ensure safety and insurance compliance.
Implementing a smart dimmer system involves a few key steps. You must first choose a Hilo-compatible system and verify that your selected LED bulbs are compatible with that dimmer’s technology (e.g., rated for ELV/MLV). Once installed by a certified professional, you connect it to your Hilo smart home hub and can begin programming schedules and monitoring your savings directly through the Hydro-Québec app. This approach elevates your bathroom from a simple room to an intelligent, responsive part of your home’s ecosystem.
By embracing dimmers, you are no longer just lighting a space; you are giving yourself the power to paint with light, creating the perfect atmosphere for any moment.
Key Takeaways
- For a true spa-like atmosphere, prioritize 3000K “warm white” LEDs with a high CRI (90+) to ensure flattering, accurate light.
- Adhere to safety codes by mandating IP65-rated fixtures for all lighting within shower and tub zones to protect against water ingress.
- The most significant cost-saving and quality-enhancing strategy is holistic planning: choreograph your plumbing and electrical work together from the start to avoid redundant demolition and labor.
How to Program a “Vacation Mode” for Water and Heat?
A truly intelligent bathroom renovation extends its efficiency and functionality even when you are not home. While the title suggests water and heat, the most dynamic aspect you can control for security and savings is your lighting system. By integrating smart lighting, you can program a “vacation mode” that not only minimizes energy waste but also enhances your home’s security. This is the final layer of “integrated efficiency,” transforming your bathroom into a responsive part of your smart home ecosystem.
Programming a vacation mode is straightforward with modern smart lighting systems like Philips Hue or a Hilo-connected setup. The primary security benefit is presence simulation. Instead of leaving a light on for two weeks straight, you can create a randomized schedule where bathroom and other lights turn on and off at various intervals, mimicking the patterns of someone being home. This is a far more effective deterrent than a dark or constantly lit condo. In systems like Hydro-Québec’s Hilo, this can often be configured through a simple “Away” mode setting.
Beyond security, this feature is about eliminating “phantom load”—the small amount of electricity consumed by devices even when they’re turned off. A smart system ensures all lights and associated electronics, like exhaust fan timers, are in a true “off” state, contributing to incremental but meaningful energy savings over time. For Montrealers, the incentive to upgrade to such systems is significant. For eligible LED conversion projects, financial assistance can cover up to 90% of eligible costs through Hydro-Québec’s programs, making the investment in a smart, secure, and efficient system incredibly compelling.
This level of control ensures your bathroom works for you, providing comfort when you’re there, security when you’re away, and efficiency at all times.
How to Move a Toilet Location in a Condo Without Raising the Floor?
In a condo renovation, no decision exists in isolation. A seemingly unrelated task, like moving a toilet, can present the single greatest opportunity for achieving a sophisticated, high-end lighting plan. The challenge of relocating plumbing in a concrete-slab condo often requires opening up walls and ceilings to access the main plumbing stack. From a designer’s perspective, this is not a problem—it is a golden opportunity. This is the moment for “structural choreography,” where plumbing and electrical plans merge to create a seamless, integrated, and cost-effective result.
Attempting to install complex lighting—such as recessed pot lights, LED strips in niches, or multiple zoned circuits—in an existing concrete ceiling is difficult, messy, and expensive. However, when the walls and ceilings are already open for plumbing work, the cost and complexity of running new electrical lines plummet. This is the ideal time to execute your ambitious lighting design without compromise.
Case Study: Montreal Condo Renovation with Coordinated Plumbing and Lighting
A comprehensive bathroom renovation in Montreal by contractor RÉNO M3 demonstrated this principle perfectly. The project required relocating plumbing fixtures, which necessitated opening the walls. This was leveraged as the optimal time to install a complex lighting system, including LED strip lighting in custom niches, multiple lighting zones, and new ventilation. By coordinating the trades, the team was able to execute a high-end design while the infrastructure was exposed, avoiding the extreme challenges and costs typically associated with retrofitting such systems into Montreal’s concrete condo buildings.
The financial argument for this coordinated approach is undeniable. As the following data shows, tackling plumbing and electrical work as two separate projects is significantly more expensive and time-consuming than planning them as a single, coordinated phase.
| Approach | Plumbing Cost | Electrical/Lighting Cost | Total Cost | Time Required |
|---|---|---|---|---|
| Coordinated Installation | $3,000-5,000 | $1,500-2,500 | $4,500-7,500 | 2-3 weeks |
| Separate Projects | $3,000-5,000 | $3,000-4,500 | $6,000-9,500 | 4-5 weeks |
| Savings with Coordination | – | $1,500-2,000 | $1,500-2,000 | 2 weeks less |
As this analysis of Montreal renovation costs reveals, coordinating these two trades can save you thousands of dollars and weeks of project time.
For any condo owner planning a renovation, the ultimate advice is this: view any major plumbing work as your invitation to finally create the lighting design you’ve always wanted. Plan holistically from day one, and you will achieve a superior result for less money.