The persistent moisture from sweating pipes in your basement is not a simple plumbing annoyance; it’s a symptom of a systemic climate control failure that generic solutions won’t fix.
- Condensation occurs when the pipe’s surface temperature drops below the air’s dew point, a common scenario in Montreal’s humid summers with cold St. Lawrence river-fed water.
- True prevention requires achieving 100% insulation integrity, as even a single exposed elbow or valve acts as a “thermal bridge” that defeats the entire system.
Recommendation: Shift from merely covering pipes to performing a diagnostic audit of your entire plumbing system to identify and hermetically seal every thermal bridge, thereby solving the problem at its source.
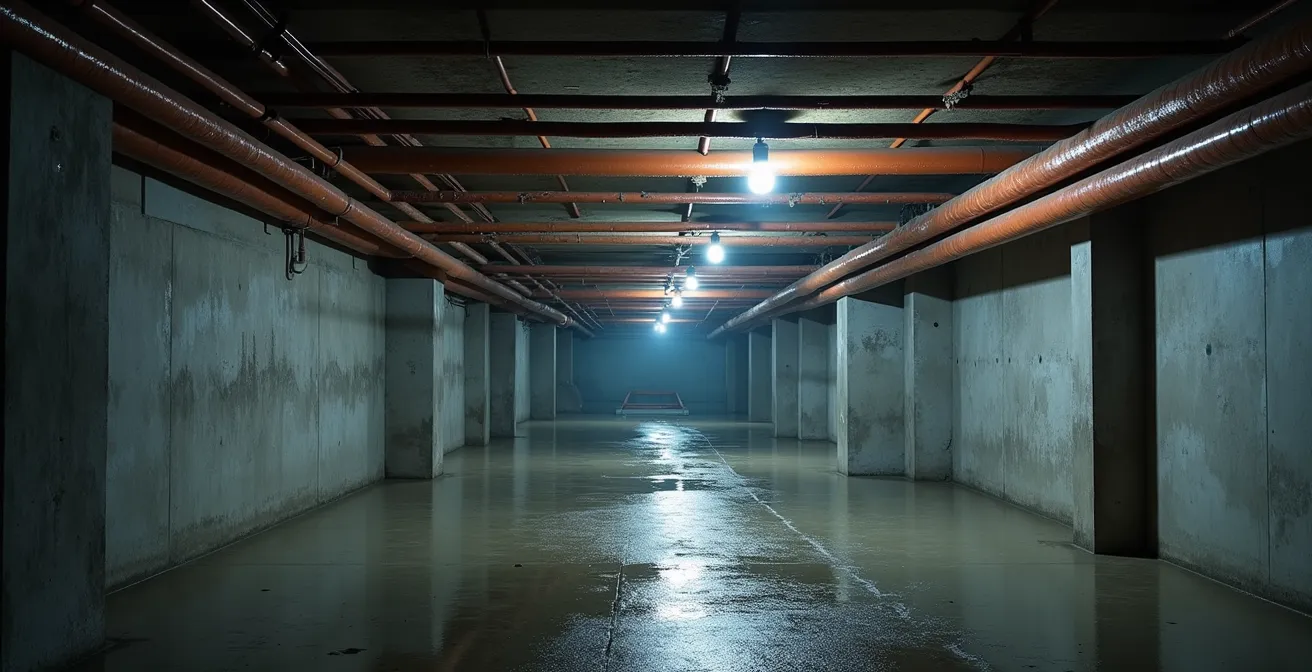
That familiar puddle on your Montreal basement floor during a summer heatwave is a source of constant frustration. You’ve confirmed it’s not a leak; it’s the pipes themselves, dripping as if they’re crying. This phenomenon, known as “pipe sweating,” is a common battle for homeowners in humid climates. The usual advice is to wrap the pipes in insulation or run a dehumidifier nonstop, but often, the dripping persists, especially around fittings and valves. These recurring damp spots are not just a nuisance; they create a constant moisture load that can lead to musty odours, structural damage, and the perfect breeding ground for mould on and around your home’s fieldstone foundation.
The problem is that conventional wisdom treats pipe sweating as an isolated issue. It focuses on the symptom—the water—rather than the root cause. But what if the true solution wasn’t just about covering the pipes, but about understanding the building science behind why they sweat in the first place? The key lies in shifting your perspective. Instead of seeing a “sweating pipe,” you need to see a “thermal bridge”—a weak point in your home’s climate control system that is funneling cold into the warm, humid air of your basement. This is a diagnostic approach, treating the basement as an integrated system where air quality and thermal integrity are intrinsically linked.
This guide will walk you through that diagnostic process. We will dissect the science of condensation in the specific context of a Montreal basement, compare the right and wrong materials for the job, and reveal the critical installation errors that render most insulation efforts useless. By the end, you will have a clear, strategic plan to eliminate pipe sweating for good by achieving total insulation integrity, protecting your home and your peace of mind.
To navigate this comprehensive guide effectively, the summary below outlines the key diagnostic and preventative stages we will cover. Each section builds upon the last, providing a complete strategy to resolve pipe condensation issues at their source.
Summary: A Diagnostic Guide to Curing Pipe Condensation
- Why Does Condensation Form on Pipes During Summer Heat Waves?
- How to Cut and Seal Foam Insulation Around Valve Handles?
- Rubber vs. Polyethylene Foam: Which Insulates Hot Water Better?
- The Error of Leaving Elbows Exposed That Negates Insulation Benefits
- When to Insulate Recirculation Lines: The Impact on Boiler Efficiency
- Fiberglass or Foam: Which Insulation Is Best for Unheated Crawl Spaces?
- Why Do Studs Feel Cold Even in Insulated Walls?
- Why Is Your Water Heater Losing 20% of Its Heat to the Basement Air?
Why Does Condensation Form on Pipes During Summer Heat Waves?
Condensation on your cold water pipes is a direct result of a simple law of physics: when a surface’s temperature drops below the dew point of the surrounding air, moisture in that air will condense into liquid water on the surface. During a humid Montreal summer, this process is supercharged. The air in your basement might be 24°C (75°F) with a relative humidity of 60%. Under these specific conditions, the dew point is approximately 15.8°C (60.4°F), according to technical documentation. Meanwhile, the water flowing through your pipes, often sourced from the cold St. Lawrence River, can be as low as 8°C. This significant temperature difference ensures the pipe’s exterior is well below the dew point, turning it into a condensation magnet.
This process unfolds in a predictable sequence. First, the cold water flowing through the copper pipes chills the metal. Second, basements and crawl spaces, being below ground, naturally stay cooler and more humid than the rest of the house, creating a high-moisture environment. Third, limited ventilation, especially in older Montreal homes with enclosed crawl spaces, traps this humidity, preventing it from dissipating. The result is an environment primed for condensation.
Understanding this is the first step in a diagnostic approach. The problem isn’t that the pipe is “leaking” or defective; it’s that it’s an exposed, cold surface in a warm, moist room. The only way to stop this process is to create a barrier that prevents the humid air from ever touching the cold pipe surface. This is the fundamental role of insulation, but as we’ll see, its effectiveness depends entirely on how it’s applied.
How to Cut and Seal Foam Insulation Around Valve Handles?
Valves, T-fittings, and elbows are the most common failure points in any pipe insulation project. A perfectly insulated straight run of pipe is rendered useless if the complex geometry of a valve handle is left exposed. Achieving a hermetic seal around these fittings is non-negotiable for ensuring total insulation integrity. This requires a precise, methodical approach to cutting and sealing the foam insulation, ensuring no gaps are left for humid air to infiltrate.
The process is more craft than simple installation. It begins before you even make a cut. You must first measure the pipe’s circumference to purchase the correctly sized insulation; a loose fit is an immediate failure. For existing pipes, you’ll need to slice the foam tube lengthwise. The critical step is creating miter cuts to wrap around the contours of elbows and valves seamlessly. This involves cutting angled sections that meet perfectly, leaving no part of the metal exposed. Once the foam is fitted, every single joint, seam, and end must be sealed with high-adhesion insulation tape. This tape creates the final, crucial vapor barrier.
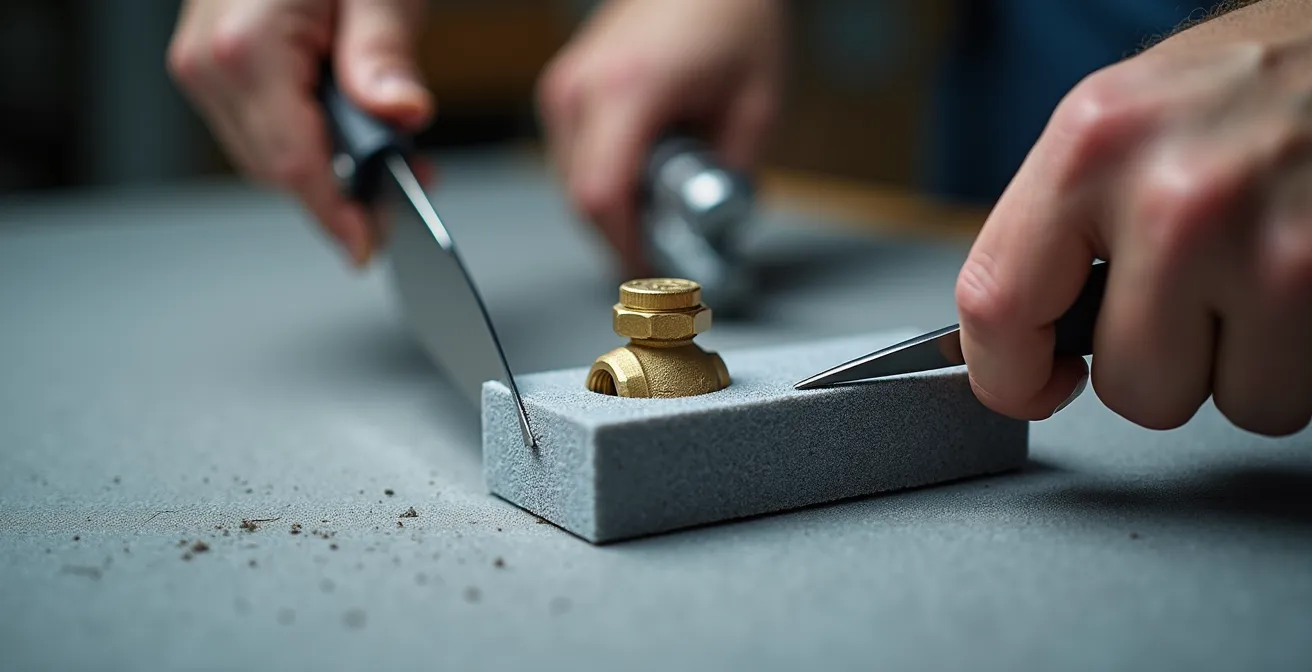
As this image demonstrates, precision is paramount. The goal is to create a continuous, unbroken sleeve of insulation. After taping, you must conduct a final check, carefully feeling for any gaps or areas where the seal is incomplete. A single small opening is enough to allow moisture to get behind the insulation, where it will condense unseen, potentially leading to corrosion and mould growth. This meticulous attention to detail is what separates a professional, effective job from a purely cosmetic one.
Rubber vs. Polyethylene Foam: Which Insulates Hot Water Better?
While the title asks about hot water, the choice of insulation material is even more critical for preventing condensation on cold water lines. The two most common options available at Canadian retailers like RONA or Home Depot are black elastomeric rubber (like Armaflex) and gray polyethylene foam. While polyethylene is more economical, rubber insulation is technically superior for the demanding, humid conditions of a Montreal basement. The key difference lies in its moisture resistance and built-in vapor barrier. Rubber foam has a closed-cell structure that is inherently resistant to moisture penetration and often includes antimicrobial properties to inhibit mould growth.
A case study of humid conditions highlights this. In an environment with 90% relative humidity, insulation thickness requirements can double with just a 10% increase in humidity. For Montreal’s St. Lawrence River water supply at 8°C, the insulation must be robust enough to keep the outer surface temperature above the high dew point. Rubber’s superior thermal properties (R-value) and integrated vapor barrier make it far more effective at achieving this than standard polyethylene.
The following table, based on typical product specifications found at retailers like Canadian home improvement stores, breaks down the key differences:
| Feature | Rubber (Armaflex) | Polyethylene Foam |
|---|---|---|
| Vapor Barrier | Built-in, excellent | Good closed-cell structure |
| Temperature Range | -297°F to 220°F | -90°F to 180°F |
| Moisture Resistance | Superior with antimicrobial protection | Good CFC-free option |
| Installation | Self-seal system | Self-adhesive available |
| Cost at RONA/Home Depot | Higher premium | More economical |
For a hot water line, where the goal is simply to reduce heat loss, polyethylene is often adequate. But for a cold water line in a damp basement, where the goal is to create an impermeable barrier against condensation, the higher upfront cost of rubber insulation is a worthwhile investment in long-term protection.
The Error of Leaving Elbows Exposed That Negates Insulation Benefits
The single most common and critical error in pipe insulation is achieving perfect coverage on straight runs while leaving the elbows, tees, and fittings completely bare. This isn’t a minor oversight; it’s a fundamental failure that negates the benefits of the entire job. Uninsulated metal fittings act as powerful thermal bridges, conducting the cold from the water directly to the humid basement air. This creates concentrated points of condensation that can drip just as much, if not more, than a fully uninsulated pipe.
This is where the concept of systemic climate control becomes tangible. Your insulation is a system, and it’s only as strong as its weakest link. In fact, insulation experts warn that one exposed elbow can compromise an entire insulation system. The cold spot created by the fitting can even cause moisture to creep back under the adjoining insulation, trapping water against the pipe and accelerating corrosion. To do the job right, you must use pre-molded foam elbows and T-fittings that are designed for a perfect fit. Every edge where an insulation piece meets a fitting cover must be sealed with mastic or high-adhesion tape to ensure there are absolutely zero gaps.
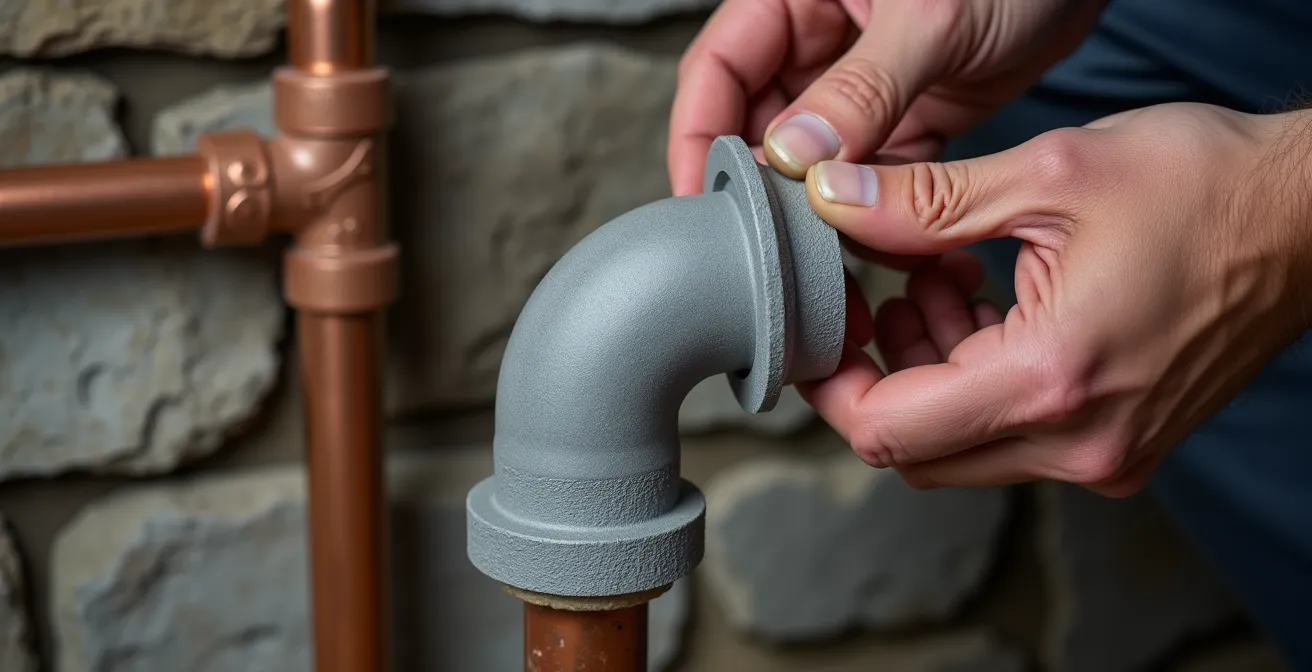
As shown here in a setting reminiscent of a classic Plateau Mont-Royal basement, the pre-molded foam elbow fits snugly over the copper joint. This complete coverage is what defines insulation integrity. The goal is to create an unbroken thermal barrier, leaving no pathway for the cold pipe to interact with the warm, humid air. Without this meticulous attention to fittings, your insulation efforts are largely a waste of time and money.
When to Insulate Recirculation Lines: The Impact on Boiler Efficiency
While the primary focus is often on cold water pipes to prevent sweating, insulating hot water and recirculation lines is equally important from an energy efficiency standpoint. In a typical Montreal home, uninsulated hot water pipes running through a cool basement are constantly losing heat to the surrounding air. This forces your water heater to work harder to maintain the desired temperature, leading to wasted energy and higher bills from Hydro-Québec. Properly insulated pipes keep the heat where it belongs—in the water.
This creates a dual benefit: you prevent condensation year-round on cold lines while simultaneously reducing heat loss from hot lines. This holistic approach aligns with energy conservation recommendations. For hot water recirculation lines, which are designed to provide instant hot water at the tap, insulation is not just recommended; it’s essential. An uninsulated recirculation loop is a perpetual heat-loss machine, constantly radiating energy into your basement. Insulating these lines dramatically improves your boiler’s efficiency and can lead to noticeable savings on your energy bill.
To tackle this systematically, it’s best to follow a clear order of operations that prioritizes both condensation prevention and energy savings.
Action Plan: Priority Checklist for Your Montreal Basement Pipe Insulation
- Cold Water Lines: Insulate all accessible cold water pipes first. This is your top priority to prevent condensation, moisture damage, and mould growth.
- Hot Water Lines (Initial Run): Insulate the first 6 to 10 feet of hot water pipes coming directly from the water heater. This is where the most significant heat loss occurs.
- Water Pressure Tanks: If you have a well system with a pressure tank, address it with a dedicated insulation blanket to stop tank sweating.
- Basement Ventilation: Ensure you have adequate air circulation to help reduce the overall basement humidity level. This makes your insulation’s job easier.
- Dehumidification: If ambient humidity consistently exceeds 55%, install a dehumidifier as a supplementary measure to manage the overall moisture load in the air.
By following this priority list, you address the most critical issues first while building a comprehensive system that is both moisture-resistant and energy-efficient.
Fiberglass or Foam: Which Insulation Is Best for Unheated Crawl Spaces?
In the aisles of a hardware store, you’ll see two main types of pipe insulation: foam sleeves and fluffy fiberglass wraps. For an unheated and potentially damp crawl space or basement, choosing fiberglass is a catastrophic mistake. While it has insulating properties when dry, it is highly absorbent. When it comes to a sweating pipe, fiberglass insulation does more harm than good. It fails to provide a proper vapor barrier and quickly becomes saturated with the condensation it’s supposed to prevent.
This creates a dangerous situation. As one home improvement expert bluntly puts it, the material’s failure is total and absolute. In the Home Improvement Guide, the Natural Handyman warns:
Fiberglass acts like a sponge. When wrapped around a sweating pipe, it becomes saturated, loses all insulating value.
– Natural Handyman, Home Improvement Guide
Once wet, the fiberglass not only stops insulating but becomes a heavy, dripping mess that holds moisture directly against the pipe, promoting rust and corrosion. Worse, this perpetually damp, dark environment is an ideal incubator for mould growth. Inspections of Montreal properties have revealed severe hidden mould contamination in basements where water pressure tanks were wrapped in fiberglass. For the inherently damp conditions of many local foundations, solid, closed-cell foam insulation is the only appropriate choice. Its non-absorbent structure acts as a true vapor barrier, keeping the humid air completely separate from the cold pipe surface.
Why Do Studs Feel Cold Even in Insulated Walls?
If you’ve ever touched an interior wall on a cold day, you may have noticed that the spots where the studs are located feel colder than the spaces between them. This phenomenon is caused by thermal bridging. The wood stud is a less effective insulator than the fiberglass or foam insulation in the wall cavity, so it creates a path—a “bridge”—for cold to travel from the outside sheathing to the interior wall surface. This exact same principle applies to your plumbing system.
An uninsulated pipe fitting, elbow, or valve is a thermal bridge in your insulation system. Just as a stud funnels cold into a wall, that small piece of exposed metal funnels the cold from the water directly out to the humid basement air, creating a localized “cold spot” where condensation is guaranteed to form. Understanding this building science concept is the key to realizing why 100% coverage is the only effective strategy. Leaving even a single small fitting exposed is like leaving a window open in a heated house; it compromises the integrity of the entire system.
This is also why simply running a dehumidifier is an incomplete solution. While it reduces the amount of moisture in the air, it doesn’t eliminate the thermal bridge itself. To truly solve the problem, you must address both components of the systemic climate control: insulate every thermal bridge and manage the ambient humidity. For basements, building science experts recommend maintaining basement humidity below 55% to prevent conditions conducive to mould and condensation. This creates a less demanding environment, making your perfectly sealed insulation even more effective.
Key Takeaways
- Pipe sweating is a symptom of a thermal problem (dew point), not a plumbing leak.
- Achieving 100% insulation coverage is mandatory; a single exposed fitting (a “thermal bridge”) causes the entire system to fail.
- In humid Montreal basements, choose non-absorbent closed-cell foam insulation (rubber or polyethylene), never fiberglass, which acts like a sponge for condensation.
Why Is Your Water Heater Losing 20% of Its Heat to the Basement Air?
The conversation about pipe sweating is ultimately a conversation about managing energy and preventing costly damage. The same lack of insulation that causes cold pipes to sweat allows hot pipes to passively radiate heat into your basement, effectively turning your plumbing into an inefficient space heater. This constant heat loss means your water heater must fire more often, consuming more energy and increasing your Hydro-Québec bill. A fully insulated plumbing system, therefore, provides a dual return on investment: it prevents water damage from condensation and delivers tangible energy savings.
Ignoring persistent pipe condensation is a costly gamble. The daily moisture load forces your dehumidifier to work harder and longer, increasing electricity costs. Over time, that constant dripping can cause structural damage to joists, subflooring, and drywall. Most significantly, it creates the perfect conditions for mould, which poses health risks and can be incredibly expensive to remove. According to Montreal area contractors, professional mould remediation can cost thousands of dollars, a sum that vastly exceeds the modest investment in proper pipe insulation.
By viewing your basement’s plumbing not as a set of individual pipes but as a complete thermal system, you can see that the small effort required to seal every joint and fitting is the most cost-effective preventative maintenance you can perform. It protects your home’s structural integrity, improves its energy efficiency, and safeguards your family’s health.
The next logical step is to move from understanding to action. Perform a systematic audit of your basement’s plumbing, from the water main to the furthest tap, to identify and map out every single pipe, valve, and fitting that needs to be sealed against the humid air.