In summary:
- System pressure naturally drops in the cold; consistent loss, however, signals a leak that requires a CMMTQ-certified technician.
- Montreal’s soft water is corrosive; testing pH and using inhibitors is crucial to prevent pinhole leaks in mixed-metal systems.
- Bleeding trapped air from cast-iron radiators is essential for eliminating cold spots and ensuring even heating.
- Upgrading an old boiler offers significant savings, with a payback period often under 5 years thanks to Quebec’s Rénoclimat rebates.
- Converting from oil to electric heat is heavily incentivized in Quebec and can cut annual heating costs by nearly half.
The deep, radiant warmth of a hydronic system is a hallmark of comfort in a refined Montreal home, especially during a biting January cold snap. Yet, for many homeowners, this comfort is shadowed by a persistent fear of maintenance. The thought of a complex network of cast-iron radiators, pipes, and a temperamental boiler can be intimidating. The common advice—”check the pressure,” “bleed the radiators”—often feels inadequate, a superficial patch on a system that seems to have a mind of its own. This anxiety leads to neglect, which ironically creates the very problems homeowners dread.
Many guides discuss boiler maintenance in generic terms, failing to address the specific challenges of Montreal’s housing stock and extreme climate. They don’t explain why your boiler pressure plummets when the temperature hits -25°C, or how the city’s famously soft water can silently corrode your pipes. They mention upgrading for efficiency but rarely provide a concrete return on investment that accounts for Énergir’s rates and Quebec’s generous Chauffez Vert program.
But what if the key to peak efficiency wasn’t a reactive checklist, but a proactive understanding of your home’s unique heating ecosystem? The secret to maintaining a heritage hydronic system lies in mastering the interplay between vintage cast-iron, modern components, and our specific climate. This is not about becoming a technician overnight; it’s about learning to perform a systemic diagnosis to catch small issues before they become costly emergencies. It’s about preserving the character and superior comfort of your radiators while optimizing for modern efficiency standards.
This guide provides that expert perspective. We will move beyond generic tips to offer a detailed, Montreal-centric approach. We will dissect common problems, explore the financial case for strategic upgrades, and provide the actionable knowledge you need to manage your system with confidence, ensuring decades more of reliable, radiant warmth.
This article provides a detailed roadmap for every aspect of your system, from routine checks to major conversion decisions. The following summary outlines the key areas we will cover to empower you with expert-level knowledge.
Summary: A Complete Guide to Your Hydronic Heating System
- Why Does Your Boiler Pressure Drop When the System Is Cold?
- How to Bleed Cast Iron Radiators to Remove Trapped Air?
- Combi-Boiler vs. System Boiler: Which Saves Space and Money?
- The Error of Ignoring Water Quality in the Heating Loop
- When to Replace an Old Cast Iron Boiler: Efficiency vs. Durability
- Why Do Cast-Iron Pipes Crack Vertically After 60 Years?
- When to Balance Your Circulation Lines: Signs of Uneven Heating
- How to Convert an Oil Heating System to Electric in Quebec?
Why Does Your Boiler Pressure Drop When the System Is Cold?
One of the most common sources of anxiety for a hydronic system owner is a dropping pressure gauge, especially when the heating system is cold. The first thing to understand is that water contracts as it cools. A pressure drop of a few PSI (pounds per square inch) is a normal physical reaction as the water in your radiators and pipes cools down overnight or between heating cycles. A system set to 15 PSI when hot may naturally fall to 12 PSI when cold. This fluctuation is managed by the expansion tank, a critical component designed to absorb these pressure changes.
The real concern arises when the pressure continues to drop and requires you to frequently add more water to the system. This is not normal fluctuation; it is a clear sign of a leak. In Montreal’s older homes, these leaks are often microscopic and insidious. They can occur at radiator valve packings or in joints that only weep water when the metal contracts in extreme cold. A steady loss of more than 2 PSI per month is a definitive indicator that your closed-loop system has a breach that needs professional attention from a CMMTQ-certified technician.
Case Study: The Plateau Mont-Royal Triplex Pressure Mystery
A century-old Plateau triplex was experiencing alarming 5 PSI pressure drops during -25°C cold snaps. A thorough investigation revealed microscopic cracks in the original cast-iron radiator joints. These cracks were so small they only leaked when the metal contracted significantly in the extreme cold, making them invisible during milder weather. The solution involved replacing 12 radiator valve packings and upgrading to a modern diaphragm expansion tank, which stabilized winter pressure fluctuations to a normal and manageable 1-2 PSI range.
Before calling for service, you can perform a preliminary diagnosis to gather valuable information for your technician. A methodical check helps differentiate between normal operation and a genuine problem, empowering you to have a more informed conversation about the repair.
Your 5-Step Diagnostic Checklist for Cold Weather Pressure Drops
- Record Baseline Pressure: Note the current pressure reading on your boiler’s gauge and compare it to the manufacturer’s recommended cold system baseline. This is typically between 12-15 PSI at a water temperature of 20°C.
- Inspect for Visible Leaks: Carefully check for any signs of moisture or rust stains at all radiator valves, pipe fittings, and around the boiler itself. Pay close attention to older cast-iron connections, which are common weak points in Montreal plexes and triplexes.
- Test the Expansion Tank: Gently tap on your expansion tank. A properly functioning tank should sound hollow on the top (where the air cushion is) and solid on the bottom (where the water is). A dull thud all over suggests the tank is waterlogged and has lost its air charge, preventing it from absorbing pressure changes.
- Monitor the Drop Rate: After noting the pressure, monitor how quickly it drops. A loss of more than 2 PSI per month indicates an active leak somewhere in the system that requires professional leak detection.
- Document Outdoor Temperature: Keep a log of the outdoor temperature when you check the pressure. It’s normal to see a 1-2 PSI drop for every 20°C decrease in the ambient temperature of the space where the pipes are located. This context helps differentiate thermal contraction from a real leak.
How to Bleed Cast Iron Radiators to Remove Trapped Air?
If you notice that some radiators are hot at the bottom but cold at the top, or if you hear gurgling sounds from your pipes, the culprit is almost always trapped air. Air rises in water, so it accumulates at the highest points of your system—typically the top of your radiators. This trapped air acts as an insulator, preventing hot water from circulating through the entire radiator and severely reducing its heat output. Bleeding your radiators is a simple but essential maintenance task that any homeowner can perform to restore even heating and system efficiency.
For vintage cast-iron radiators common in Montreal apartments, you will need a special radiator key, which can be found at any hardware store. Modern radiators may use a flathead screwdriver instead. The process involves slowly opening a small valve, called a bleeder valve, at the top of the radiator to allow the trapped air to escape. It’s a task that requires patience more than technical skill.
Before you begin, it’s critical to turn off the circulation pump and wait for the system to settle. If you bleed the radiators while the pump is running, you risk drawing more air into the system. You’ll want to start with the radiators on the lowest floor of your home and work your way up, as air naturally migrates to the highest point in the system. Prepare for a small amount of water to escape by having a rag or small container ready.
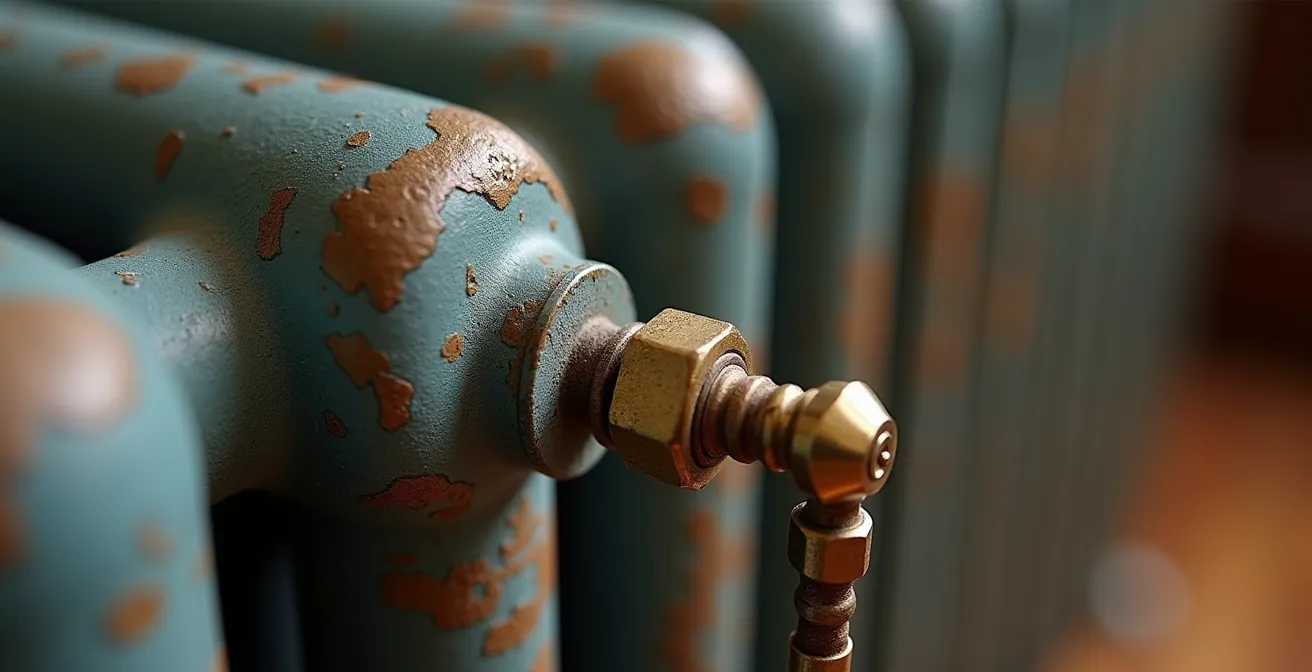
As you can see in the image, the process is straightforward. Engage the radiator key with the valve and turn it counter-clockwise, typically no more than a half-turn. You will hear a hissing sound as the trapped air begins to escape. Keep the valve open until the hissing stops and a steady stream of water begins to trickle out. At this point, promptly close the valve by turning it clockwise. Be careful not to overtighten it. After bleeding all necessary radiators, you may need to check your boiler’s pressure gauge and, if it has dropped below the recommended 12-15 PSI cold-fill level, add water to the system.
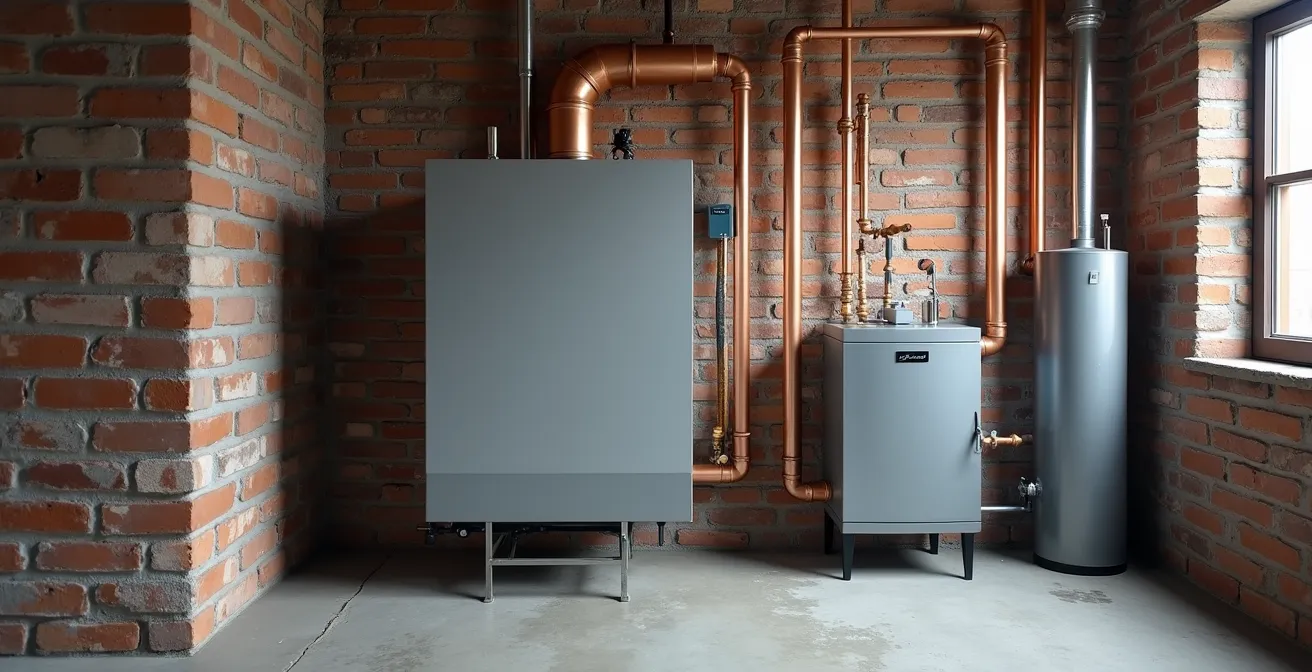
Combi-Boiler vs. System Boiler: Which Saves Space and Money?
When considering a boiler upgrade, homeowners in Montreal are often faced with a choice between two main types of high-efficiency units: the combination (combi) boiler and the system boiler. The decision hinges on your home’s size, your family’s hot water needs, and your budget. Understanding the fundamental differences is key to making a wise investment that aligns with your lifestyle and property type, from a Griffintown condo to a larger Outremont home.
A combi-boiler is a single, compact, tankless unit that provides both central heating and on-demand domestic hot water. Its primary advantage is its small footprint, making it ideal for smaller spaces like condos or apartments where a large storage tank is impractical. It heats water directly from the mains as you need it, offering an unlimited supply. However, its flow rate is limited, meaning it may struggle to supply hot water to multiple taps (e.g., a shower and a dishwasher) simultaneously.
A system boiler, on the other hand, works with a separate hot water storage tank. It heats the water in the tank, ensuring a large volume of hot water is always ready for use. This makes it the superior choice for larger homes with multiple bathrooms, as it can easily handle high, simultaneous demand without a drop in pressure or temperature. While it takes up more space and has a slightly higher installation cost, it often runs more efficiently for heating-only cycles. Modern gas-fired condensing boilers can reach an impressive 95% efficiency, a significant jump from older models.
The financial and practical trade-offs are specific to the Montreal market, factoring in installation costs, available space, and potential rebates like Rénoclimat. The following table breaks down the key differences for a typical 4½ apartment to help clarify the decision.
| Factor | Combi-Boiler | System Boiler |
|---|---|---|
| Installation Cost | $4,500-$6,500 | $5,500-$7,500 (includes tank) |
| Space Required | 4 sq ft wall mount | 15-20 sq ft (boiler + tank) |
| Annual Gas Cost (Énergir rates) | $1,200-$1,400 | $1,100-$1,300 |
| Hot Water Availability | Unlimited on-demand | Limited by tank size (40-60 gal) |
| Efficiency Rating | 92-96% AFUE | 85-90% AFUE |
| Rénoclimat Rebate | Up to $1,275 | Up to $1,000 |
| Best For | Griffintown condos, small spaces | Outremont homes with multiple bathrooms |
The Error of Ignoring Water Quality in the Heating Loop
Perhaps the most overlooked aspect of hydronic system maintenance is the quality of the water circulating within it. Homeowners assume that since it’s a closed loop, the water is a “set it and forget it” component. This is a critical and potentially costly mistake, especially in Montreal. Our municipal water presents a unique challenge: it is very soft, with a low mineral content. While this is great for preventing the scale buildup that plagues areas with hard water, it creates a different, more insidious problem: corrosion.
Soft water is naturally more aggressive and corrosive, particularly in systems that mix different metals, such as the original cast-iron radiators in a heritage home connected with modern copper piping. Without proper treatment, the water will slowly eat away at the inside of your pipes and boiler, leading to pinhole leaks, premature component failure, and the formation of sludge (magnetite) that clogs the system and reduces efficiency. The key to preventing this is to regularly test the water’s pH level and treat it with a corrosion inhibitor.
Case Study: The Westmount Soft Water Corrosion Challenge
A Westmount home with a beautiful system combining original 1920s cast-iron radiators and modern copper piping began developing mysterious pinhole leaks after just five years. The cause was traced back to Montreal’s naturally soft municipal water (30-50 ppm hardness), which had become acidic inside the heating loop. Because the system was never treated with an inhibitor, the corrosive water attacked the metal components. The solution involved a professional system flush and the addition of a specialized corrosion inhibitor (like Hercules Cryo-Tek), which stabilized the pH at an ideal 8.0 and successfully halted any further degradation.
Monitoring your system’s water quality is a proactive step that can save you thousands in future repairs. You can perform a basic water test yourself to check the health of your system.
- Collect a Sample: After the system has been running for at least 30 minutes, drain about 500ml of water from the boiler’s drain valve into a clean container.
- Test the pH Level: Use simple pH test strips (available at pool supply or hardware stores). For a mixed-metal system (copper and iron), the pH should be maintained between 7.5 and 8.5. A pH below 7.0 is acidic and highly corrosive.
- Check Total Dissolved Solids (TDS): Use a digital TDS meter. Readings above 2500 ppm suggest the water is full of contaminants and the system needs to be flushed.
- Visual Inspection: Look at the water sample. Is it clear, or is it discolored? A dark or rusty color indicates active iron corrosion occurring inside your radiators and pipes.
- Take Action: If your pH is below 7.0 or above 9.0, or if the water is heavily discolored, it’s time to schedule a professional flush and treatment with a quality boiler cleaner and inhibitor.
When to Replace an Old Cast Iron Boiler: Efficiency vs. Durability
The old cast-iron boiler in the basement of a Montreal home is often a source of debate. These units are legendary for their durability, with many still operating reliably after 50 years or more. However, their inefficiency is equally legendary. A vintage boiler may have an Annual Fuel Utilization Efficiency (AFUE) rating as low as 50-60%, meaning nearly half of the fuel it burns is wasted up the chimney. In contrast, a modern high-efficiency condensing boiler can achieve an AFUE of 95% or higher. The decision to replace isn’t just about a working appliance; it’s a financial calculation weighing durability against staggering energy waste.
The tipping point often comes when the annual repair costs begin to mount. If you are spending hundreds of dollars each year to keep an old boiler running, that money could be redirected towards the investment in a new unit. According to Natural Resources Canada, homeowners can see up to 30% energy savings annually simply by upgrading from a mid-efficiency to a high-efficiency boiler. In a city with high heating demands like Montreal, these savings accumulate quickly.
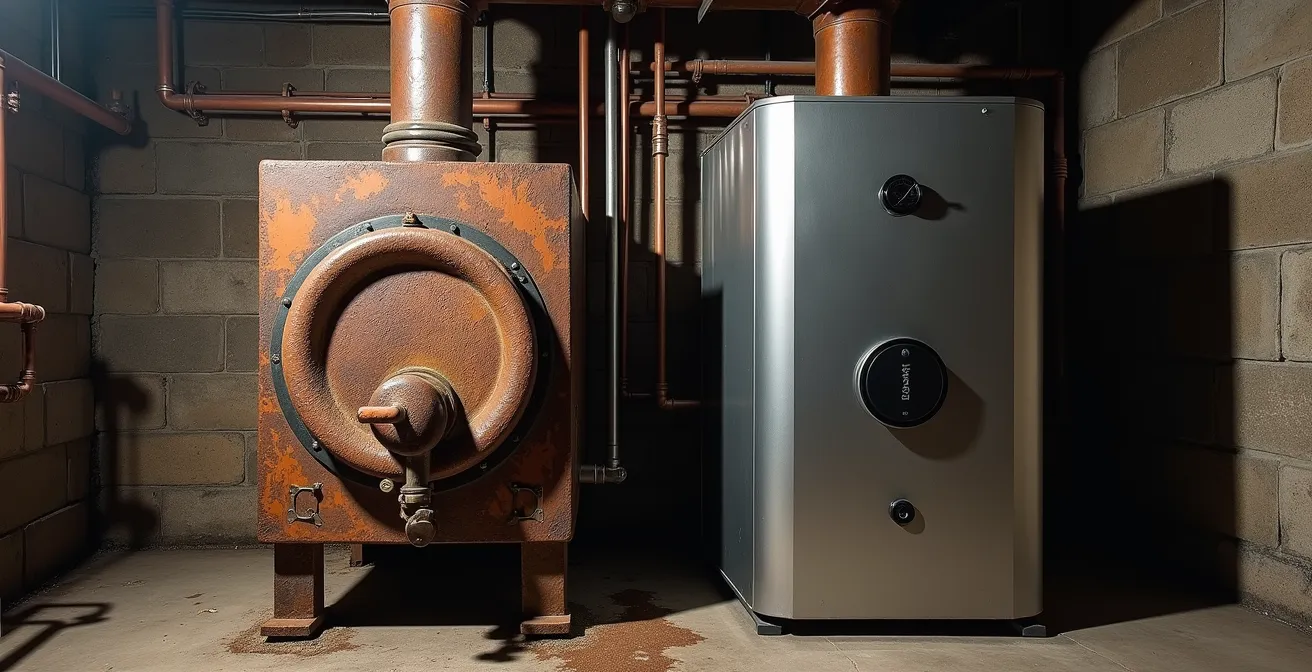
The visual contrast between the old and new technology is stark. The best part of an upgrade is that you can pair a sleek, modern condensing unit with your home’s existing cast-iron radiators. This “heritage integration” allows you to keep the superior comfort and aesthetic of radiant heat while benefiting from 21st-century efficiency. The key is to calculate the payback period for your specific situation.
Case Study: The NDG Heritage Home Boiler Upgrade Decision
A homeowner in a 1950s NDG house was spending $3,200 annually on heating with their original cast-iron boiler, plus an average of $800 per year on repairs. They invested in a 95% efficient condensing boiler for a net cost of $6,225 after receiving a $1,275 Rénoclimat rebate. Their annual heating cost immediately dropped to $2,100. By eliminating the $800 repair bill and saving $1,100 on fuel, their total annual savings were $1,900. This resulted in a simple payback period of just under 3.5 years, a financially compelling argument for making the switch.
Why Do Cast-Iron Pipes Crack Vertically After 60 Years?
The cast-iron pipes and radiators in Montreal’s heritage homes are remarkably robust. With proper maintenance, these components can easily last 80-100 years, providing generations of reliable service. However, even these titans of plumbing are not immune to the effects of time and environment. When they do fail, it’s often in a specific way: long, vertical cracks. This failure mode isn’t random; it’s typically the result of a slow degradation process called graphitization, often exacerbated by external factors unique to our region.
Graphitization is a process where the iron in the cast iron slowly leaches out over decades, leaving behind a brittle graphite structure. The pipe may look intact from the outside, but it has lost its structural integrity. This weakened state makes it extremely vulnerable to external stress. In Montreal, a primary source of this stress is the clay-rich soil around many home foundations. This soil expands and contracts dramatically with moisture changes, exerting immense pressure on foundation walls and the pipes running through or near them. A sudden shift or settling can be enough to fracture a 60-year-old, graphitized pipe.
Another factor is chronic external moisture. Improper grading or downspouts that discharge too close to the foundation create persistently damp conditions. This moisture accelerates external corrosion on the cast-iron pipes, further weakening them. An annual inspection of any visible cast-iron plumbing in your basement is a wise preventive measure. Look for white, flaky residue or blistering on the pipe’s surface, which can be early signs of graphitization. Proactive measures are the best defense against a catastrophic failure.
- Ensure Proper Grading: The ground around your foundation should have at least a 2% slope away from the house to direct rainwater and snowmelt away.
- Extend Downspouts: Make sure your downspouts discharge water a minimum of 6 feet from the foundation. This is critical in areas with clay soil to prevent water pooling.
- Control Basement Humidity: Maintain basement humidity levels below 50%. High humidity accelerates internal and external corrosion of pipes.
- Annual Visual Inspection: Once a year, inspect any visible sections of cast iron drain pipes for the tell-tale white residue or blistering that indicates graphitization.
- Consider Preventive Relining: If your home is approaching the 50-60 year mark, consider having a professional inspect your pipes with a camera. Preventive pipe relining can create a new structural pipe within the old one before cracks develop, saving you from a much more disruptive and expensive replacement later.
When to Balance Your Circulation Lines: Signs of Uneven Heating
A perfectly maintained boiler is only half the battle. If the hot water it produces doesn’t distribute evenly throughout your home, you’ll still have frustrating cold spots and wasted energy. This is where system balancing comes in. In a hydronic system, water is lazy; it will always follow the path of least resistance. This means radiators closest to the boiler often get more than their fair share of hot water, becoming intensely hot, while radiators at the far end of the loop are left lukewarm. The result is an uncomfortable home and a boiler that runs longer than necessary. Balancing is the process of fine-tuning the flow to each radiator to ensure every room gets the heat it needs.
The signs of an unbalanced system are easy to spot:
- Some rooms are consistently much hotter or colder than others.
- You have to turn the thermostat up to an uncomfortably high temperature just to get the coldest room warm enough.
- Certain radiators are too hot to touch while others are barely warm.
This is a common issue in Montreal duplexes and multi-level homes where the piping runs are long and complex. While a professional can perform a precise balancing service, often for a cost of $350 to $500 in the Montreal area, a patient homeowner can achieve excellent results with a DIY approach and an inexpensive infrared thermometer.
The goal is to add resistance to the “hottest” radiators, forcing more hot water towards the “coldest” ones. This is done by partially closing the lockshield valve on each radiator—this is the valve on the opposite side from the main control knob, often covered by a plastic cap. The process is iterative and requires patience.
- Establish a Baseline: With the heating system fully warmed up, use an infrared thermometer to measure and record the surface temperature of each radiator.
- Begin Adjustments: Start with the radiators that are the hottest. Partially close their lockshield valves by about a quarter-turn. This slightly restricts the flow.
- Wait and Re-measure: Wait at least 30 minutes for the system to stabilize after your adjustment. Do not rush this step. Then, re-measure the temperature of all radiators.
- Repeat the Process: Continue making small, quarter-turn adjustments to the hottest radiators, waiting, and re-measuring. Your goal is to get the temperature of all radiators to within 5°C of each other.
- Mark the Positions: Once you are satisfied with the balance, mark the final position of each lockshield valve with a permanent marker so you can easily return to this setting in the future.
This fine-tuning transforms your home’s comfort, ensuring every room receives the perfect amount of radiant warmth. It is the final touch in optimizing your system for both comfort and efficiency.
Key Takeaways
- Proactive maintenance, focusing on diagnostics and water quality, is more effective than reactive repairs for Montreal’s heritage hydronic systems.
- Understanding the financial case, including local energy rates and Quebec-specific rebates (Rénoclimat, Chauffez Vert), is crucial when deciding to upgrade a boiler or convert from oil.
- Simple DIY tasks like bleeding air from radiators and performing basic system balancing can dramatically improve comfort and efficiency without the need for a service call.
How to Convert an Oil Heating System to Electric in Quebec?
For many Montreal homeowners, the old oil tank in the basement is a costly relic. With the Quebec government’s aggressive push to phase out oil heating, coupled with generous incentives, converting to an electric or dual-energy system has become one of the smartest financial decisions a homeowner can make. The Chauffez Vert program offers substantial rebates for removing an oil furnace or boiler, making the transition more affordable than ever. An electric system is not only cleaner and requires less maintenance, but it can also significantly reduce your annual heating bill, especially when paired with Hydro-Québec’s dual-energy rates.
The conversion process involves more than just swapping out the boiler. It’s a multi-step project that requires coordination with several certified professionals. You’ll need an RBQ-licensed heating contractor to install the new system, a certified environmental contractor to safely remove and dispose of the old oil tank, and potentially an electrician to upgrade your home’s electrical panel to handle the new load. Navigating the process and the available rebates requires careful planning.
The financial argument for conversion is compelling. The following table compares the typical annual heating costs for a 2,000 sq ft home in the Montreal area, highlighting the dramatic savings potential. The combination of government rebates and long-term energy savings makes the initial investment pay for itself in just a few years.
To give you a clear picture of the financial implications, here is a breakdown of the costs and incentives based on a typical Montreal home. Note that a heat pump paired with an electric backup offers the lowest running costs and highest available rebates.
| Heating Type | Annual Cost (2000 sq ft home) | Available Rebates |
|---|---|---|
| Oil Heating (current) | $3,500-$4,200 | None (phase-out mandated) |
| Electric Boiler | $2,200-$2,800 | Chauffez Vert: up to $5,000 |
| Natural Gas (Énergir) | $1,800-$2,400 | Énergir: up to $2,000 |
| Heat Pump + Electric Backup | $1,600-$2,200 | Combined: up to $10,000 |
The path to converting your system is clear and well-supported in Quebec. Following a structured plan ensures you maximize your rebates and complete the project smoothly.
- Get Quotes: Obtain at least three quotes from RBQ-licensed heating contractors for your desired system (e.g., electric boiler, heat pump).
- Apply for Rebates First: You must apply for and be approved by the Chauffez Vert program before you begin any installation work to be eligible for the rebates.
- Schedule Oil Tank Removal: Hire a certified environmental contractor for the oil tank removal. This process costs between $1,500 and $3,000 but is often partially covered by the rebate.
- Coordinate with Hydro-Québec: Your contractor will determine if your home needs a service upgrade, typically to a 200-amp electrical panel, and will coordinate this with Hydro-Québec.
- Complete and Document: After the installation is complete, submit all required documentation to the rebate program within the specified timeframe (usually 90 days).
- Register for Dual-Energy Rate: If you install a heat pump with an electric backup, register for Hydro-Québec’s Rate DT to unlock additional savings on your electricity bill.
To ensure your hydronic system operates at peak efficiency for years to come, the next logical step is to schedule a comprehensive assessment with a CMMTQ-certified technician. They can validate your DIY findings, perform advanced diagnostics, and provide a tailored plan for your home’s specific needs.