In summary:
- Identify and eliminate thermal bridges, especially at sill plates and anchor bolts, which are the primary source of cold transfer.
- Use two-component closed-cell spray foam (froth paks) on rim joists for a superior air and vapor barrier, crucial for Montreal’s climate.
- Choose materials wisely: mineral wool is superior to fiberglass in damp areas, and never create a “moisture sandwich” with a double vapor barrier.
- Adopt a disciplined approach to air sealing every pipe, wire, and duct penetration to stop infiltration, which causes significant heat loss.
As a Montreal homeowner, you know the feeling. It’s mid-January, -20°C outside, and no matter how high you crank the thermostat, a persistent chill creeps across the floor from the baseboards. You’re tackling a basement renovation, aiming to create a comfortable, usable space, but that cold concrete and the drafts from the top of the foundation wall are a major concern. You’ve probably heard the standard advice: stuff some insulation in the gaps or get it professionally sprayed. While not wrong, this advice often misses the real enemy in a cold climate.
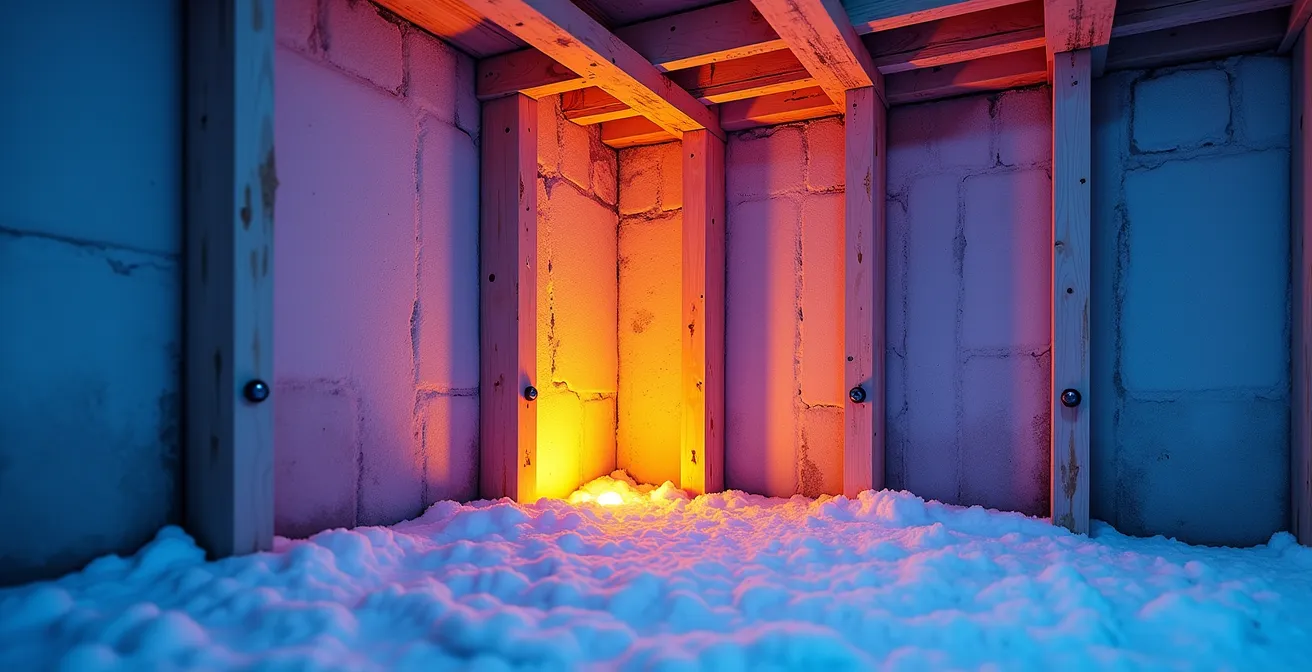
Insulating a basement, especially the header or rim joist area where the house frame meets the foundation, isn’t just about adding R-value. As a weatherization contractor, I can tell you it’s a strategic battle against two invisible forces: thermal bridging and air infiltration. The conventional wisdom often fails to address the physics of how cold actually bypasses your insulation, rendering it far less effective. Simply filling cavities without a plan can lead to condensation, mold, and persistent cold spots.
The key isn’t just to insulate; it’s to create a continuous, airtight, and moisture-proof barrier. This requires understanding why certain parts of your wall feel cold even when insulated, choosing materials based on their performance in damp, cold environments, and adopting a near-obsessive discipline when it comes to sealing every single hole. This guide will walk you through the process from a contractor’s perspective, focusing on the material science and hands-on techniques needed to properly winter-proof your Montreal basement for good.
This article provides a detailed roadmap for your project. You’ll learn to diagnose the weak points in your home’s envelope, select the right materials for our specific climate, and apply professional techniques to ensure your work is effective and durable. Explore the sections below to build a solid understanding of each critical step.
Summary: A Contractor’s Guide to Winter-Proofing Your Basement Header in Montreal
- Why Do Studs Feel Cold Even in Insulated Walls?
- How to Use Two-Component Froth Paks for Rim Joist Sealing?
- Mineral Wool vs. Fiberglass: Which Is Better for Wet Areas?
- The Error of Installing Double Vapor Barriers in Basements
- When to Insulate from the Exterior Instead of the Interior?
- Why Do Unsealed Pipe Holes Cause Heat Loss in the Attic?
- When to Perform a Thermal Camera Scan of Your Plumbing Wall?
- How to Seal Pipe Penetrations to Stop Water and Pest Entry?
Why Do Studs Feel Cold Even in Insulated Walls?
Studs and other framing members feel cold because they act as a “thermal bridge,” a pathway for heat to escape and cold to enter, effectively bypassing your insulation. While the insulated cavity between studs might have a high R-value, materials like wood, steel, and concrete conduct heat much more readily. A steel anchor bolt connecting your foundation to the wood sill plate can act like a straw, siphoning warmth out of your home and creating a frigid spot on your interior wall, often leading to condensation and frost.

This phenomenon is not trivial; its impact on your home’s overall energy efficiency is significant. In fact, studies show that thermal bridging can reduce a wall’s effective R-value by more than 50%. The solution is to create a thermal break. This involves installing a continuous layer of rigid foam insulation on the interior or exterior of the foundation wall before you frame your new wall. This blanket of insulation separates the framing from the cold concrete, breaking the bridge and allowing your entire wall system to perform as intended.
How to Use Two-Component Froth Paks for Rim Joist Sealing?
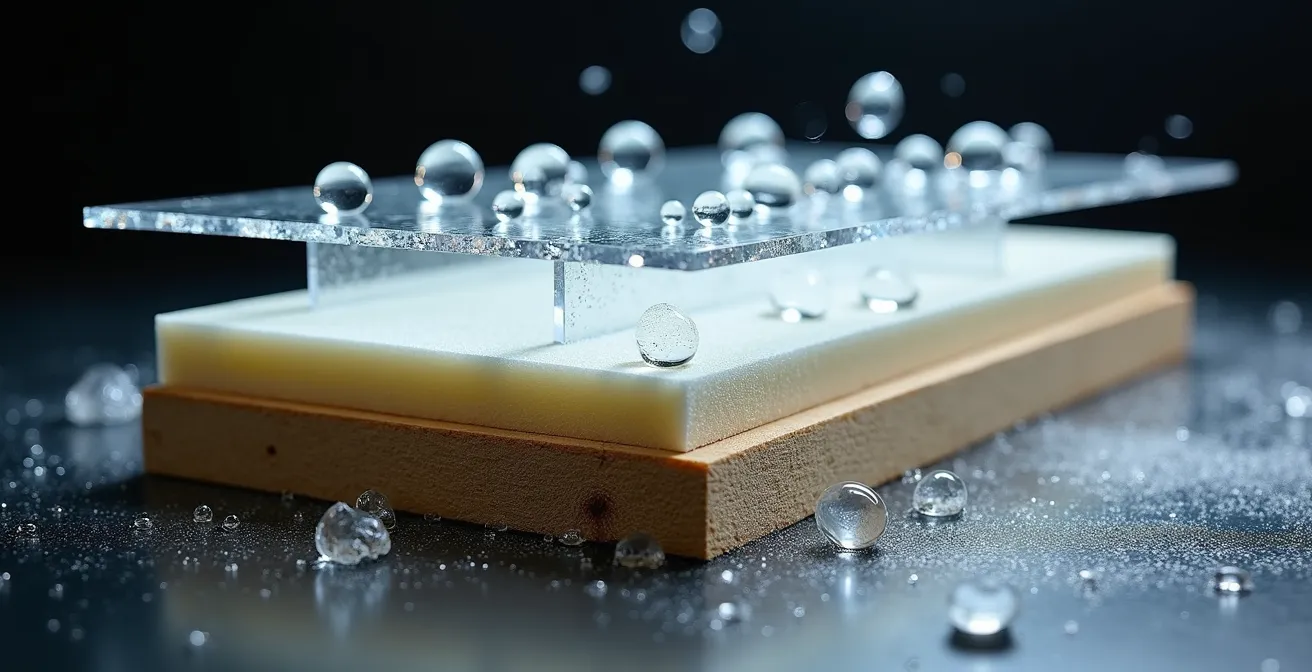
Two-component froth paks are DIY-friendly versions of the professional closed-cell spray foam used by contractors. They consist of two pressurized tanks (an “A” and a “B” component) that combine at the nozzle to create an expanding foam that hardens into a rigid, airtight, and waterproof insulation. To use them, you attach the hoses and nozzle, ensure the tanks are at the correct temperature (usually around 24°C), and spray directly onto the rim joist and surrounding sill plate, aiming for a thickness of about two inches to create both an air and vapor barrier.
For many older Montreal homes, like a 1961 split-level dealing with -20°C winters, this method is ideal for the notoriously leaky rim joist area. In cases where floor joists are embedded directly into concrete, creating extreme cold spots, sealing the accessible rim joist bays is a top priority. For a DIYer, the choice often comes down to cost and performance, as shown in the comparison below. While professional installation offers the highest R-value, a two-component kit provides a near-professional seal that is far superior to cutting and cobbling foam boards, especially around irregular shapes.
This table breaks down the common options for insulating rim joists in a cold climate like Montreal’s. As you can see, while fiberglass is the cheapest, it is not recommended because it fails to stop air infiltration, the primary source of heat loss in this area. Professional spray foam offers the best performance but at a significant cost, making two-component froth paks a strong compromise for the dedicated DIYer, as outlined in a comparative analysis for basement projects.
| Method | Cost | R-Value | Cold Climate Performance | DIY Friendly |
|---|---|---|---|---|
| Rigid Foam + Canned Foam | $200-400 | R-10 (2 inch) | Requires 2″ minimum for condensation control | Yes |
| Professional Spray Foam | $800-1500 | R-14 (2 inch closed-cell) | Superior air sealing and moisture barrier | No |
| Fiberglass Batts | $100-200 | R-11 | Not recommended – allows air infiltration | Yes |
Mineral Wool vs. Fiberglass: Which Is Better for Wet Areas?
For damp-prone areas like basements, mineral wool is unequivocally better than fiberglass. The primary reason is its relationship with water. Mineral wool is hydrophobic, meaning it naturally repels water and will not support mold growth. If it gets damp, it will dry out and retain its original R-value and shape. Fiberglass, on the other hand, acts like a sponge. Once wet, it loses its insulating properties, sags, and becomes a breeding ground for mold and mildew, a serious health hazard in a finished basement.
Furthermore, mineral wool offers superior fire resistance and sound dampening qualities. While both materials can help you meet the Quebec building code requirement for basement walls, which is typically R-20 to R-24, mineral wool provides a more resilient and durable solution for below-grade applications. If you are using rigid foam insulation against the concrete wall, you can use mineral wool batts in the stud cavities without a vapor barrier on the foundation side, as the foam already serves this function. When choosing rigid foam, a key professional tip comes from the technical experts at Family Handyman:
We chose 2-in.-thick (R-10) extruded polystyrene. Don’t use expanded polystyrene, which is a less effective air and moisture barrier.
– Family Handyman Technical Team, Family Handyman DIY Guide
This advice highlights the importance of material choice. Using extruded polystyrene (XPS), which is typically pink or blue, provides a more robust moisture barrier compared to the white expanded polystyrene (EPS), making it a better choice for direct contact with concrete foundation walls.
The Error of Installing Double Vapor Barriers in Basements
The most common and dangerous error in basement insulation is creating a “moisture sandwich” by installing two vapor barriers. This typically happens when a homeowner applies a waterproof coating to the concrete wall (vapor barrier #1) and then, after insulating, installs polyethylene sheeting over the studs before putting up drywall (vapor barrier #2). This traps the wall assembly between two impermeable layers, creating a perfect environment for rot and mold.
Here’s how it fails: in the winter, the setup might seem fine. However, in the spring and summer, warm, humid air from inside the basement will find its way into the wall cavity. When this moisture-laden air hits the now-cool foundation wall (or the first vapor barrier), it condenses into water. With a second vapor barrier on the interior side, this water has no way to dry out. It remains trapped, soaking the wood studs and insulation, leading to structural damage and hazardous mold growth. The rule in a cold climate like Quebec’s is simple: you need exactly one vapor barrier, and it must be on the warm-in-winter side of the insulation.
When to Insulate from the Exterior Instead of the Interior?
Insulating your basement from the exterior is the superior but more complex option, best considered during major renovations, when dealing with foundation issues, or when preserving interior space is paramount. This method involves excavating the soil around your foundation, applying a waterproof membrane, and then attaching a thick, continuous layer of rigid foam insulation directly to the outside of the concrete walls before backfilling. This approach is ideal if you have a finished basement with valuable brick, stone, or custom millwork you don’t want to disturb.
The primary advantage of exterior insulation is that it creates a continuous thermal blanket, completely eliminating thermal bridging through the foundation. It also keeps the concrete foundation mass within the conditioned part of your home, which helps moderate temperature swings. Because the insulation is outside, it protects the foundation from the freeze-thaw cycles that are so damaging in the Montreal climate. This is the gold standard for high-performance homes. While the upfront cost is higher due to excavation, the long-term energy savings and durability benefits are substantial. Furthermore, Quebec offers financial incentives for such projects; as of May 2024, grant amounts increased for insulation and airtightness retrofits under the Rénoclimat program, making this a more financially viable option.
Why Do Unsealed Pipe Holes Cause Heat Loss in the Attic?
While the title mentions the attic, the principle of heat loss from unsealed holes is even more critical in the basement due to the “stack effect.” In winter, warm air rises and escapes through leaks in your attic and upper floors. This creates negative pressure in the lower levels of your home, which pulls cold outside air in through any available opening in your basement or crawlspace. These openings are most often the unsealed penetrations around pipes, wires, vents, and conduits in your rim joist and foundation walls.
The cumulative effect of these small gaps is staggering. According to basement insulation specialists, the rim joist area can cause more air leakage than all the windows in your house combined. Every unsealed pipe for a hose bib, every cable TV wire, and every drain line becomes a direct conduit for frigid air. This constant infiltration of cold air forces your heating system to work overtime, negates the effectiveness of your insulation, and creates the uncomfortable drafts you feel along the floor. Sealing these penetrations is not a minor detail; it is a foundational step in any effective insulation strategy.
Your Action Plan: Hunting for Basement Penetration Holes
- Check all plumbing penetrations for water supply and drain lines.
- Inspect electrical conduit and cable entries through the rim joist.
- Locate HVAC ductwork penetrations and refrigerant lines.
- Find gas line entries and exhaust vents for furnaces or water heaters.
- Examine hose bib locations and outdoor faucet connections from the inside.
- Look for old, abandoned penetrations from previous renovations that may have been poorly sealed.
When to Perform a Thermal Camera Scan of Your Plumbing Wall?
A thermal camera scan is most valuable right before you begin a renovation or after the work is complete to verify its effectiveness. Performing a scan on your existing plumbing wall will reveal the invisible patterns of heat loss. Cold spots, which appear as dark blue or purple on the camera’s screen, will pinpoint exactly where you have air leaks or missing insulation around pipes. This diagnostic tool takes the guesswork out of your project, allowing you to target your efforts precisely where they are needed most, rather than insulating blindly.
The best time to do this in Montreal is on a cold winter day when the temperature difference between inside and outside is at least 15°C. This ensures the thermal contrast is sharp enough to be easily visible. While you can rent a thermal camera, for a truly comprehensive assessment, it’s better to invest in a professional energy audit. As the Quebec Energy Transition Ministry advises through its Rénoclimat program:
Instead of just renting a camera, hire a certified Rénoclimat advisor for an official energy audit including thermal scan and blower door test.
– Quebec Energy Transition Ministry, Rénoclimat Program Guidelines
A certified advisor will not only perform the thermal scan but also conduct a blower door test. This test depressurizes your home, making air leaks easier to find with the camera and providing a quantitative measure of your home’s overall airtightness. This provides a clear “before” picture and helps you qualify for Rénoclimat grants.
Key takeaways
- Thermal bridging is the real enemy: Your insulation is only as good as its weakest link. A continuous thermal break is essential.
- Material science matters: In a damp Montreal basement, hydrophobic mineral wool and closed-cell spray foam are superior to standard fiberglass and open-cell foams.
- Airtightness is non-negotiable: Sealing every single penetration in your rim joist is just as important as the insulation itself to stop heat-sapping drafts.
How to Seal Pipe Penetrations to Stop Water and Pest Entry?
Properly sealing pipe penetrations requires a multi-layered approach to create a durable barrier against air, water, and pests. The goal is to fill the entire gap from the exterior sheathing to the interior drywall with the right combination of materials for the Montreal climate. A simple squirt of interior caulk is not enough. For a robust seal, especially on something like an exterior hose bib, you should use a “belt-and-suspenders” method: seal the gap from the inside with a low-expansion spray foam, and then seal it from the outside with a high-quality, flexible polyurethane caulk rated for temperatures down to -40°C.
The choice of sealant is critical, as different products are designed for different applications, gap sizes, and temperature ranges. Using an interior-grade acrylic caulk on the exterior will cause it to crack and fail during its first winter. For a professional, long-lasting result, you must match the product to the job. The guide below, based on recommendations from sources like Natural Resources Canada for cold climates, provides a clear selection framework.
| Application | Recommended Product | Temperature Range | Longevity |
|---|---|---|---|
| Exterior Gaps | Polyurethane or Elastomeric Sealant | -40°C to +40°C | 10-20 years |
| Interior Rim Joist | Low-Expansion Window & Door Foam | -20°C to +30°C | 15+ years |
| Fire-Rated Areas | Firestopping Caulk | -30°C to +50°C | 20+ years |
| Small Gaps (<1/4″) | Acrylic Caulk with Silicone | -20°C to +30°C | 5-10 years |
Finally, after sealing, wrap any exposed water pipes with foam pipe insulation sleeves. This not only prevents heat loss but also provides the final layer of protection against freezing. For outdoor faucets, an insulated hard-shell cover should be installed before the first frost as the final step in your winter-proofing process.
For your Montreal home, doing the job right the first time saves money, prevents moisture damage, and ensures a comfortable living space for years to come. The next step is to grab a flashlight, perform your own penetration audit using the checklist provided, and choose the right materials to declare war on your cold basement.
Frequently Asked Questions on How to Insulate Your Basement Header to Protect Pipes and Save Heat?
Where should the vapor barrier be placed in a Montreal basement?
According to the Quebec Construction Code, vapor barriers must be placed on the warm-in-winter side of the insulation, typically on the interior face of the stud wall after insulation is installed and before the drywall goes up.
Can I use closed-cell spray foam instead of polyethylene sheeting?
Yes, closed-cell spray foam applied at a thickness of 2 inches (50 mm) or more acts as both insulation and a certified vapor barrier, meeting Quebec code requirements when properly installed. This makes it an excellent all-in-one solution for rim joists.
What happens if I have vapor barriers on both sides of my wall?
This creates a moisture trap, often called a “moisture sandwich.” Condensation can accumulate between the two impermeable barriers, especially during the spring thaw, leading to saturated insulation, wood rot in your wall studs, and dangerous mold growth.