In summary:
- Shift from a simple checklist to a “diagnostic mindset” to understand what plumbing signals mean in your Montreal home.
- Focus on material forensics: learn to identify early signs of failure in copper pipes, flexible hoses, and cast iron drains.
- Use a tiered response system for common issues like gurgling drains to know when to monitor and when to call a professional immediately.
- Track your plumbing components like assets with a digital log to predict their end-of-life and schedule proactive replacements.
- Leverage specific diagnostic tools and methods tailored to Montreal’s unique housing stock to make informed repair-versus-replacement decisions.
As a homeowner in Montreal, you are likely diligent about seasonal maintenance. You clear the gutters, check the furnace, and seal drafts. Yet, the complex network of pipes hidden within your walls often goes ignored until a small drip becomes a catastrophic flood. The fear isn’t just the inconvenience; it’s the cost. A significant water damage event can easily surpass $5,000 in repairs, and the average insurance claim is often much higher.
Most online checklists offer generic advice: “look for leaks” or “check your water heater.” This is insufficient. This approach is reactive, not preventative. It’s like checking for a fever but never understanding the infection causing it. From my experience inspecting hundreds of Montreal homes, from 1920s triplexes in the Plateau to 1960s bungalows in the West Island, the key to avoiding costly disasters is not just looking, but understanding what you’re seeing.
But what if the real strategy wasn’t about ticking boxes, but about developing a diagnostic mindset? What if you could learn to read the subtle signals your plumbing system sends—the small green spots, the faint gurgles, the texture of a hose—to predict failures before they happen? This is the approach of a professional inspector, and it’s a skill you can learn. It’s about understanding the ‘why’ behind each inspection point, not just the ‘what’.
This guide will walk you through that diagnostic process. We will dissect the common failure points, differentiate between minor issues and urgent warnings, and provide a framework for making smart, cost-effective decisions about your home’s most critical and overlooked system.
For those who prefer a visual summary, the following video provides a great overview of how to approach a home plumbing inspection with a professional’s eye, complementing the detailed diagnostic steps in this guide.
To help you navigate this in-depth guide, we’ve structured it around the core diagnostic questions you should be asking. The following summary outlines the key areas we will cover, moving from specific component analysis to system-wide strategic planning.
Summary: A Diagnostic Approach to Plumbing Inspection
- Why Do Small Green Spots on Copper Pipes Indicate Imminent Failure?
- How to Check Under-Sink Flex Hoses for Micro-Cracks?
- Standard Camera Inspection vs. Hydrostatic Test: Which Do You Need?
- The Error of Dismissing Gurgling Drains That Leads to Sewer Backups
- When to Call a Pro: The 3-Year Inspection Rule for 50-Year-Old Homes
- How to Track Plumbing Assets Digitally to Predict System Failures?
- When to perform a spot repair vs a full line replacement based on diagnostics?
- How to Find a Hidden Leak Without Tearing Down Your Walls?
Why Do Small Green Spots on Copper Pipes Indicate Imminent Failure?
That faint green or bluish-green patina you might see on your copper pipes, especially around joints and fittings, is not a decorative feature. It’s called verdigris, and in the world of plumbing diagnostics, it’s a critical warning sign. This staining is the result of oxidation, which occurs when water, oxygen, and copper interact. While a tiny amount on an old outdoor tap is one thing, seeing it on your indoor supply lines points to a persistent, slow leak. This is pitting corrosion in action, where the pipe is being eaten away from the inside out or due to a tiny, weeping leak at a solder joint.
What makes this so dangerous is its deceptive nature. The leak is often so slow that it evaporates before it can form a visible drip, leaving only the mineral deposit behind. You might not see water, but the damage is happening continuously. Over time, this localized corrosion thins the pipe wall until it can no longer withstand the water pressure, leading to a sudden burst. The failure is rarely gradual; it’s a pinhole leak one day and a flooded basement the next. Failures like these contribute to the immense costs associated with water infrastructure issues; a study from Utah State University noted that drinking water systems in the U.S. and Canada experience 260,000 water main breaks annually costing $2.6 billion, a problem that starts at the micro-level with pipe degradation.
During your annual inspection, don’t just glance at your pipes. Take a bright flashlight and closely examine every accessible joint, valve, and connection. Pay special attention to the undersides of horizontal runs where water might hang. If you see that tell-tale green, it’s not a future problem—it’s an active failure in progress that requires immediate attention from a professional.
How to Check Under-Sink Flex Hoses for Micro-Cracks?
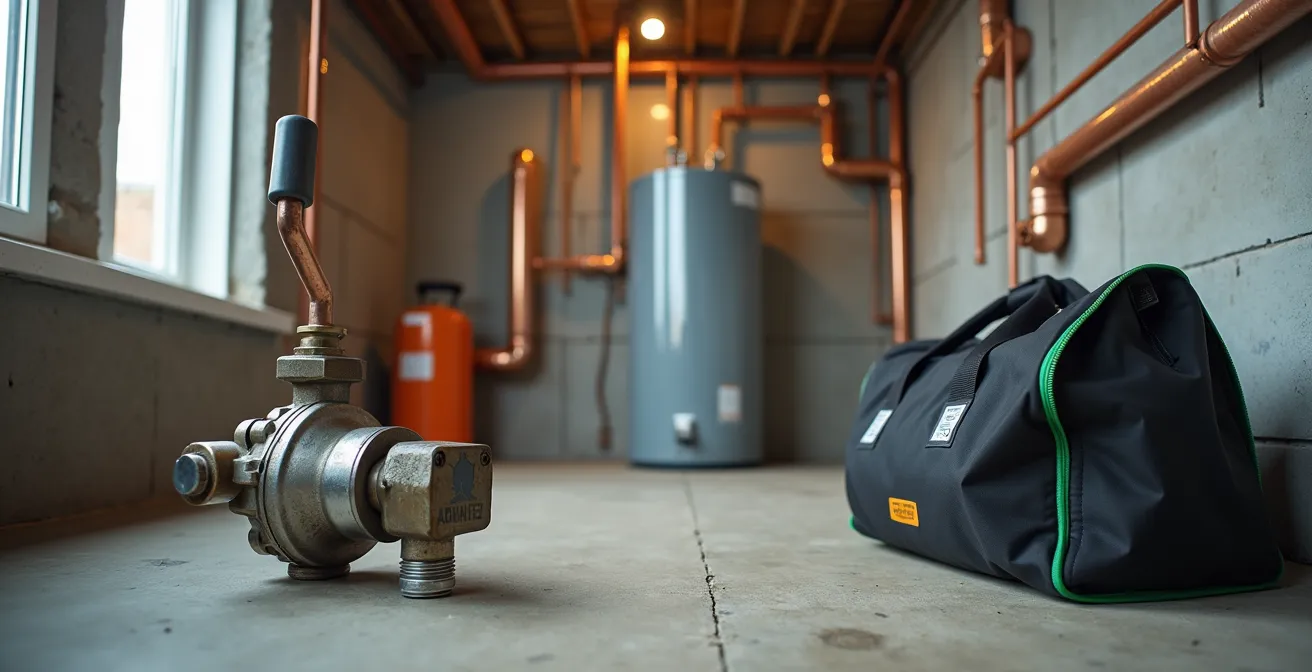
The braided stainless steel flex hoses connecting your faucets and toilets are the unsung heroes of your plumbing system, but they are also one of the most common points of catastrophic failure. While the steel braiding provides protection against bursting, it also cleverly hides the state of the rubber or vinyl tube inside. Homeowners often assume these hoses are invincible, but they have a finite lifespan, typically 5-7 years. The internal tube becomes brittle over time, developing micro-cracks due to constant pressure and exposure to cleaning chemicals.

You can’t see these cracks directly, so you must look for external clues. Run your fingers along the length of the hose. Do you feel any unusual stiffness, bulges, or irregularities beneath the braiding? Look closely at the crimped connection points at each end. Any sign of rust or discoloration on the fitting is a red flag indicating a slow, hidden leak. A common mistake is to only check for active drips. Instead, you should also look for signs of past moisture: faint water stains, warped cabinet wood, or a musty smell. These are the forensic clues that a hose is failing. The cost of such a failure can be staggering; data on water damage restoration in Montreal shows the average insurance claim is $13,954, often stemming from what started as a simple component failure.
A proactive inspector’s rule is simple: if a flex hose is over five years old, or if you don’t know its age, replace it. The cost of new hoses is negligible compared to the thousands of dollars in damage a single burst line can cause. When you replace them, write the date on a small piece of tape and attach it to the new hose. This is the first step in tracking your plumbing assets.
Standard Camera Inspection vs. Hydrostatic Test: Which Do You Need?
When problems arise in the parts of your plumbing you can’t see—the main drain line buried under your basement slab or lawn—you need more than a flashlight. You need diagnostic imaging. The two primary tools for this are the drain camera inspection and the hydrostatic test. They serve very different purposes, and choosing the right one depends on the symptoms your home is presenting. This is particularly crucial in Montreal, where the age of the home and soil conditions dictate the likely point of failure.
A drain camera inspection is your eyes inside the pipe. A technician feeds a high-resolution camera down the line to visually identify problems: cracks, root intrusion, blockages, or “channeling” in old cast iron pipes where the bottom has worn away. It tells you *what* and *where* the problem is. A hydrostatic test, on the other hand, is a pressure test. The line is plugged at the exit, filled with water, and monitored. If the water level drops, it confirms there is a leak *somewhere* in the system, but it doesn’t tell you where or why. As experts from Montreal Plumbing note, a proactive approach is best: “It’s recommended to have your drains inspected annually as part of regular home maintenance. This helps identify any potential issues early and prevent major blockages or damage.”
Choosing the right test is a matter of diagnosis. If your drains are slow or you hear gurgling, you start with a camera to find the obstruction. If you suspect a leak under your foundation due to unexplained dampness, a hydrostatic test provides definitive proof of a leak’s existence. The following table, based on common scenarios in Montreal, can help guide your decision.
| Feature | Camera Inspection | Hydrostatic Test |
|---|---|---|
| Purpose | Visual assessment to identify what the problem is (crack, root, blockage) | Confirms if there is a leak anywhere in a sealed system |
| Best For | 1920s Montreal homes with original cast iron stacks | 1960s bungalows on clay soil with potential foundation shifts |
| Cost Range | $180-$400 CAD in Montreal | $300-$600 CAD |
| Technology | High-resolution color camera with locator technology | Water pressure testing equipment |
| When Recommended | Annual inspection or when drain issues occur | Suspected leaks in inaccessible areas |
The Error of Dismissing Gurgling Drains That Leads to Sewer Backups
A gurgling sound from a drain is one of the most commonly ignored plumbing symptoms. Many homeowners dismiss it as a normal quirk of their house, but in reality, it’s your drainage system sending a clear distress signal. That “glug-glug” sound is caused by negative air pressure in the pipes. When water flows down, it should be replaced by air pulled through the vent stack (the pipe that runs up through your roof). If the drain gurgles, it means the vent is blocked or inadequate, and the draining water is siphoning air from the nearest P-trap instead. This not only releases unpleasant sewer gas into your home but is often a precursor to a much larger problem: a partial clog in the main line.
The gurgle is the sound of your system struggling to breathe. As the partial clog worsens, it restricts airflow even more, until one day—often during a heavy Montreal rainstorm when the city’s sewer system is at capacity—the flow reverses. Water from the municipal line, unable to proceed, takes the path of least resistance: up your floor drain and into your basement. This is a sewer backup, a messy, expensive, and hazardous event that is often preceded by weeks or months of gurgling warnings. This is why a properly functioning backwater valve is not just a recommendation but an essential piece of equipment for Montreal homeowners, designed to automatically close and prevent this backflow.
Interpreting the gurgle correctly requires a diagnostic approach. Does it happen with just one sink, or when the washing machine drains? Does it get worse during heavy rain? Each answer points to a different location and severity. Ignoring it is an error that turns a potentially simple drain cleaning into a full-blown flood restoration project.
Your Tiered Response Plan for Gurgling Drains
- Level 1 (Occasional Gurgle): If a drain gurgles infrequently, start with a monthly treatment of an enzymatic drain cleaner (not harsh chemicals) and flush with boiling water. This addresses minor buildup.
- Level 2 (Gurgles with Every Use): If a fixture gurgles every time it’s used, the problem is more significant. Schedule a professional camera inspection, as you likely have a partial clog or root intrusion in your line.
- Level 3 (Gurgles During Rain): This is an emergency warning. Immediately check that your backwater valve is clear of debris and functioning. Limit your water use, as the city main may be overwhelmed and backflow is imminent.
- Sensory Check (Listen): After water finishes draining from a sink, listen for a final “glug-glug.” This sound often indicates air being siphoned through the trap, pointing directly to a venting problem.
- System Load Test (Observe): Run the kitchen sink for a full minute, then check fixtures in the basement. If a floor drain or laundry sink shows signs of backing up, it confirms a blockage in the main stack.
When to Call a Pro: The 3-Year Inspection Rule for 50-Year-Old Homes
While a diligent homeowner can monitor the visible and audible signs of plumbing health, there’s a point where professional diagnostics become essential, especially in a city with an older housing stock like Montreal. For any home over 50 years old, I recommend a non-negotiable rule: a full professional diagnostic inspection every three years. Why? Because at this age, original materials like cast iron drainpipes and galvanized steel supply lines are reaching the end of their predictable service life. Their failure is not a matter of ‘if’, but ‘when’, and the signs are often invisible to the untrained eye.
A professional inspection goes far beyond what you can do. It involves testing water pressure throughout the system to find hidden restrictions, exercising every shut-off valve to ensure it hasn’t seized, testing the sump pump and backwater valve under load, and, most importantly, performing a camera inspection of the main drain line. This isn’t just about finding existing problems; it’s about forecasting future ones. The written report and video footage from this inspection become a crucial part of your home’s maintenance record. The cost of this proactive measure, with professional plumber rates in Canada typically ranging from $80 to $120 per hour for standard jobs, is a small investment to prevent a five-figure emergency.
When hiring for this critical task, your vetting process must be rigorous. Don’t just look for a plumber; look for a diagnostician. Before hiring, verify their credentials with the CMMTQ (Corporation des maîtres mécaniciens en tuyauterie du Québec) and the RBQ (Régie du bâtiment du Québec). Ask for references specifically for diagnostic work on older Montreal homes. A true professional will be able to interpret the findings and provide a strategic plan, not just a quote for immediate repairs.
How to Track Plumbing Assets Digitally to Predict System Failures?
The ultimate goal of a diagnostic mindset is to move from reactive repair to predictive maintenance. To do this, you must stop seeing your plumbing as a static system and start treating its components as assets with predictable lifespans. Your water heater, your sump pump, your flex hoses, and even your pipes have an expected service life. The most effective way to manage this is with a digital plumbing asset log. This can be as simple as a Google Sheet or a dedicated home maintenance app.
For every major component, your log should track: the component name (e.g., “Kitchen Sink Flex Hose”), its location, material type, installation date, expected lifespan (a quick online search can provide this), and the date of the next scheduled inspection. For example, a standard tank water heater has a lifespan of 8-12 years. If yours is 10 years old, your log should flag it for a priority inspection and budget planning for a replacement. This simple act transforms your maintenance. You are no longer surprised by a leaking water heater; you are planning its replacement on your own terms and timeline.
This proactive approach has significant financial benefits. Industry data shows that emergency plumbing work in major Canadian cities can cost $200-300 per hour, plus flat fees, which is 1.5 to 3 times the standard rate. By using a digital log to anticipate failures, you schedule work during regular hours at a much lower cost. In Quebec, maintaining such a detailed log offers another advantage: when you sell your home, attaching it to the Déclaration du Vendeur provides tangible proof of diligent upkeep, building immense confidence with potential buyers and potentially increasing your home’s value.
When to perform a spot repair vs a full line replacement based on diagnostics?
After a professional camera inspection reveals a problem in your main drain line, you’re faced with a critical decision: should you opt for a less expensive spot repair or invest in a full line replacement? The answer isn’t just about the upfront cost; it’s about the long-term cost per year of service, a concept central to the diagnostic mindset. According to specialists at Trans Canada Drain, a reliable rule of thumb is that if an inspection reveals more than three significant issues (like major cracks, root intrusions, or channeling) in a single line, or if the pipe is end-of-life cast iron, a full replacement is almost always the more economical choice over the long run.
A spot repair, which might involve digging up a small section of pipe, is ideal for a single, isolated issue in a pipe that is otherwise in good condition. It’s a targeted solution for a specific problem. A full replacement, while more expensive initially, provides a brand new system with a 50+ year lifespan, eliminating the risk of future breaks in other sections of the old pipe. A third option, trenchless pipe lining (CIPP), sits in the middle. It involves inserting a new epoxy-saturated liner into the old pipe, creating a new pipe-within-a-pipe. This avoids major excavation and is excellent for lines with multiple issues but that are still structurally sound enough to host the liner.
To make an informed decision, you must analyze the cost-per-year. A $750 spot repair that lasts 5 years costs you $150 per year. A $5,000 full replacement that lasts 50 years costs you only $100 per year. This long-term financial analysis, based on diagnostic data, is how you avoid throwing good money after bad.
| Repair Type | Cost Range (CAD) | Expected Lifespan | Cost per Year | Best For |
|---|---|---|---|---|
| Spot Repair | $250-$1,000 | 5-10 years | $50-$200/year | Single isolated issue, newer pipes |
| Trenchless Pipe Lining (CIPP) | $3,000-$6,000 | 30-50 years | $60-$200/year | Multiple issues, preserving landscaping |
| Full Pipe Replacement | $1,952-$5,206 | 50-70 years | $30-$104/year | End-of-life cast iron, 3+ major issues |
Key Takeaways
- An annual inspection is not a pass/fail test; it’s a data-gathering exercise to understand your plumbing’s health and predict its future.
- Small, seemingly minor symptoms like green spots on copper or faint drain gurgles are often the most critical early warnings of imminent, major failures.
- In older Montreal homes, a professional diagnostic every three years is a non-negotiable investment to manage the lifecycle of aging materials like cast iron and galvanized steel.
How to Find a Hidden Leak Without Tearing Down Your Walls?
Perhaps the most dreaded plumbing issue is the hidden leak—the one silently causing rot, mold, and structural damage behind a wall or under a floor. Your first sign might be a phantom musty odor, a patch of bubbling paint, or an unexpectedly high water bill. Before you start tearing down drywall, you can play detective using a few non-invasive techniques. The most powerful tool at your disposal is your own municipal water meter.
The water meter detective method is simple and definitive. First, ensure all water-using appliances in your home are turned off—no flushing toilets, running dishwashers, or active ice makers. Go to your water meter and take a clear photograph of the dial, paying close attention to the low-flow indicator (often a small red or black triangle or a tiny dial). Now, wait. Do not use any water for at least two hours. After the time has passed, go back and compare the meter to your photograph. If that low-flow indicator has moved at all, even slightly, you have a leak somewhere in the system. The meter is sensitive enough to register a slow drip you’d never see.

Once the meter confirms a leak, you can start to narrow down its location using your senses. Listen closely to the walls; sometimes you can hear a faint hissing or dripping. Feel the surfaces of drywall in bathrooms and the kitchen; look for cool, damp, or soft spots. During a cold Montreal winter, a thermal imaging camera (which can be rented) can be incredibly effective. A pipe leaking warm water will create a clear and distinct warm signature on a cold wall. These sensory clues, combined with the definitive proof from your water meter, can often pinpoint the leak’s location, allowing for a surgical repair rather than a destructive search.
By shifting your approach from a passive checklist to an active, diagnostic investigation, you transform your relationship with your home. You become its caretaker, not its victim. An annual inspection, done with this mindset, is your most powerful tool to ensure the health, safety, and financial stability of your property for years to come.
Frequently Asked Questions on Home Plumbing Maintenance
How often should I update my digital plumbing log?
It’s best to update your log after any plumbing work, inspection, or repair, and review it seasonally to plan upcoming maintenance.
What information is most critical to track?
Track component name, location, installation date, material type, CSA certification status, expected lifespan, and next inspection date.
Can a maintenance log increase my home’s value?
Yes, a detailed maintenance log attached to Quebec’s Déclaration du Vendeur demonstrates diligent upkeep and can build buyer confidence.