That unexplained spike on your water bill is a signal, not a mystery. Finding a hidden leak isn’t about destructive guesswork; it’s about using specialized technology to interpret invisible clues like sound, temperature, and tracer gases. This guide explains how professionals decode these signals within your walls, empowering you to pinpoint the problem accurately, avoid thousands in unnecessary demolition, and make informed repair decisions specific to Montreal’s unique housing stock.
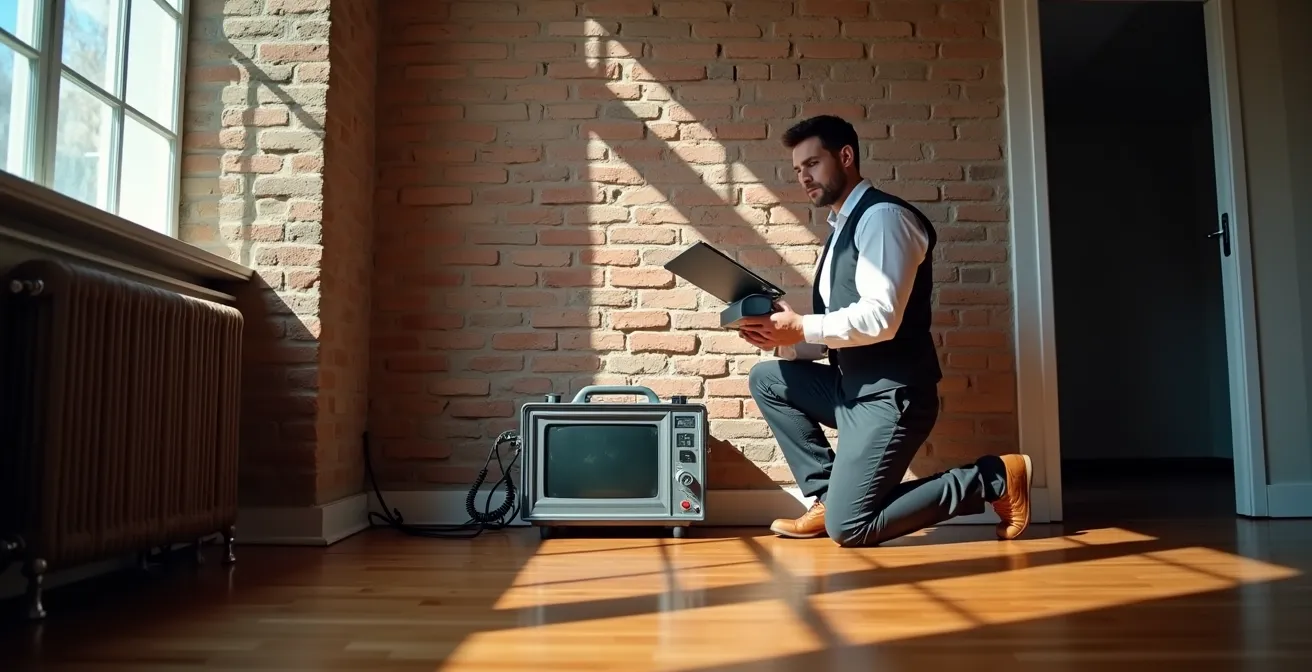
You’ve seen the bill from Hydro-Québec, and it makes no sense. Your water usage has skyrocketed, yet there are no damp spots on the ceiling, no puddles in the basement, and no mouldy smell. You’ve done the usual checks—shutting everything off and watching the water meter spin—and confirmed your suspicion: there’s a leak hiding somewhere in your home. The common advice is to look for visual signs, but what happens when there are none? The thought of a contractor blindly tearing down walls in your Plateau duplex or drilling into the concrete slab of your West Island home is a financial nightmare.
The traditional approach is a costly gamble. Many homeowners resign themselves to the idea that finding a leak requires demolition. But what if the real key wasn’t a sledgehammer, but a set of highly attuned senses? The secret to modern, non-invasive leak detection lies in listening for sounds you can’t hear, seeing temperature differences you can’t feel, and sniffing for gases you can’t smell. It’s about gathering intelligence before taking action.
This is the perspective of a leak detection specialist. We don’t guess; we diagnose. This guide will walk you through the advanced techniques we use to transform invisible signals into a precise map of the problem. We will explore how sound travels through concrete, how wet insulation reveals itself on a thermal camera during a Montreal winter, and when a microscopic amount of gas is the most powerful tool. You will learn not just what these technologies are, but how to interpret the data they provide, turning you from a worried homeowner into an informed project manager for your own property.
By understanding these non-invasive methods, you gain control over the situation. This article breaks down the specialist’s toolkit, showing you how each technology is applied to solve specific problems and what the results actually mean. Prepare to see your home’s plumbing system in a whole new light.
Summary: A Specialist’s Guide to Finding Hidden Leaks
- Why Can Microphones Hear Leaks Through Concrete Slabs?
- How to Spot Temperature Anomalies That Indicate Wet Insulation?
- Tracer Gas vs. Water Dye: Which Finds Micro-Leaks Faster?
- The Error of Confusing Condensation with Active Leaks on Thermal Images
- When to perform a spot repair vs a full line replacement based on diagnostics?
- Active Monitoring vs. Passive Heating: Which Strategy Saves More?
- Why Does Warm Air Condense Behind Your Shower Walls?
- How to Inspect Your Plumbing System Annually to Avoid $5,000 in Repairs?
Why Can Microphones Hear Leaks Through Concrete Slabs?
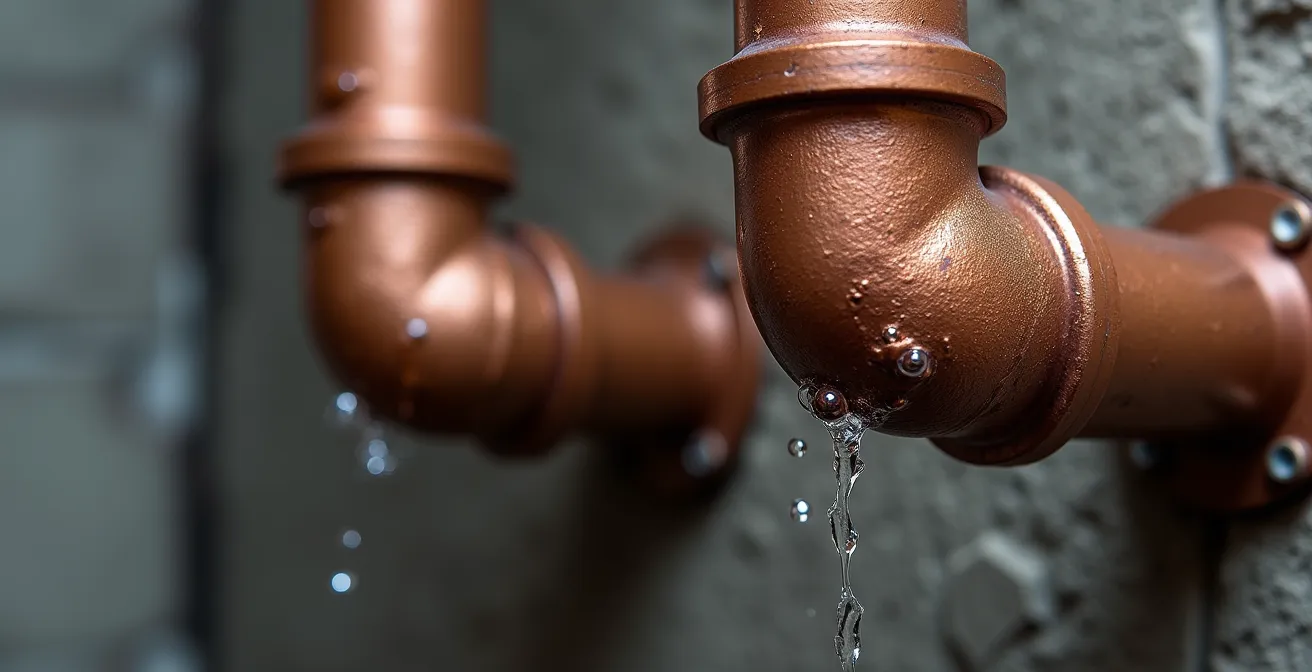
Water escaping a pressurized pipe creates a distinct sound—a high-frequency vibration that, while inaudible to the human ear, travels remarkably well through dense materials like concrete, wood, and soil. This is the fundamental principle of acoustic leak detection. We aren’t just “listening for a leak”; we are using sophisticated ground microphones and amplifiers to detect the specific acoustic signature of escaping water. The sound of a pinhole leak in a copper pipe has a different frequency than a cracked joint, and our equipment is tuned to distinguish these subtle differences from background noise.
In a city like Montreal, filtering out ambient noise from Metro lines, traffic, or even your own home’s appliances is critical. Professional equipment uses advanced filters to isolate the leak’s specific frequency range. The material of the pipe also plays a major role; the sound travels much more clearly and for longer distances through the metallic pipes (copper, galvanized steel) common in older Montreal homes than through newer PVC or PEX pipes. This makes acoustic detection an incredibly effective first-line diagnostic tool for finished basements and slab-on-grade foundations, allowing us to pinpoint a leak’s location to within a few feet before a single tile is lifted.
Your Action Plan: Understanding the Acoustic Detection Process
- Turn off all water-using appliances and ensure complete silence in your home. This creates a clean acoustic baseline for the technician.
- Professional technicians use ground microphones and acoustic amplifiers to methodically scan surfaces, listening for the leak’s sound through the concrete slab or walls.
- The equipment’s filters are configured to ignore Montreal’s specific ambient noise, such as vibrations from nearby Metro lines or heavy traffic, to isolate the leak’s frequency.
- Metallic pipes found in many older Montreal homes, like copper, produce clearer and stronger acoustic signals, making detection more precise compared to modern PVC pipes.
- For radiant floor heating systems, which are increasingly common in new Montreal condos, acoustic detection is often the only viable non-destructive method to find a leak.
Hiring a specialist for this service is an investment in precision. In fact, professional acoustic leak detection in Montreal typically costs between $100-$800, a fraction of the cost of exploratory demolition. This diagnostic step provides the intelligence needed to make a small, surgical repair instead of a large, destructive one.
How to Spot Temperature Anomalies That Indicate Wet Insulation?
A thermal imaging camera allows us to see the invisible world of heat. It doesn’t see moisture directly; instead, it detects the subtle temperature differences that moisture creates. This is especially powerful in Montreal’s climate, where the temperature differential between inside and outside is often extreme. When insulation inside a wall becomes wet, its thermal resistance (or R-value) is drastically compromised. Water replaces the trapped air pockets that give insulation its power, turning it into a thermal conductor instead of an insulator.
This creates a distinct thermal anomaly that a high-resolution camera can easily spot. In winter, a patch of wet insulation will appear as a dark, cold spot on your interior wall because heat from your home is rapidly escaping through it to the outside. Conversely, in the summer, that same wet area may appear as a warmer spot as outdoor heat penetrates the compromised wall more easily. As highlighted by Montreal’s Espace RenoVert, these inspections can reveal significant energy loss. By identifying where water has damaged your insulation, you’re not just finding a potential leak source; you’re also uncovering a major cause of high heating and cooling bills.

The impact of wet insulation on your energy costs is significant and quantifiable. Even a small amount of moisture can lead to a dramatic loss in R-value, forcing your heating system to work much harder to maintain a comfortable temperature. The following table breaks down the financial consequences.
| Insulation Condition | R-Value Loss | Annual Heating Cost Increase | Detection Method |
|---|---|---|---|
| Dry/Normal | 0% | Baseline | Visual inspection |
| 10% Moisture | 35% reduction | +$200-300 | Moisture meter |
| 25% Moisture | 60% reduction | +$400-600 | Thermal imaging |
| Saturated | 90% reduction | +$800-1200 | Visible damage |
This data, based on an analysis of home energy leaks, clearly shows that using thermal imaging to detect insulation with 25% moisture can help prevent an annual cost increase of hundreds of dollars, making the inspection pay for itself quickly.
Tracer Gas vs. Water Dye: Which Finds Micro-Leaks Faster?
When a leak is too small to create a discernible acoustic signature or a clear thermal anomaly, we turn to our most sensitive detection method: tracer gas. This technique is the gold standard for finding elusive, pinhole-sized leaks in pipes buried under concrete slabs or hidden deep within complex wall structures. The process involves draining the suspect water line, filling it with a non-toxic, inert gas mixture (typically 5% hydrogen and 95% nitrogen), and pressurizing the system. Hydrogen molecules are the smallest and lightest in the universe, allowing them to escape through the tiniest of cracks.
Once the gas permeates the leak, it rises to the surface, where a highly sensitive electronic “sniffer” detects its presence. Even through several feet of concrete, soil, or multiple layers of flooring, the gas finds a path. This method is exceptionally precise, allowing us to mark the exact spot on the floor where the repair needs to happen. For the copper pipes running under the finished basements of many Montreal homes, this is the definitive non-destructive solution. In contrast, dye testing is better suited for drain lines where the flow is not pressurized. It’s effective and fast for visible pipes or larger cracks in cast iron drains, common in Plateau-area duplexes, but it lacks the sensitivity for micro-leaks in supply lines.
The precision of tracer gas detection is not just about convenience; it’s about massive cost savings. Accurately locating a slab leak before any digging begins prevents a project from spiraling out of control. In fact, using tracer gas detection can save Montreal homeowners over $10,000 in potential costs associated with random excavation and structural repairs. It’s the ultimate application of surgical precision in plumbing.
The Error of Confusing Condensation with Active Leaks on Thermal Images
A common mistake for the untrained eye is misinterpreting condensation as an active leak on a thermal image. In a city with Montreal’s humidity and temperature swings, condensation is a frequent occurrence, especially on cold water pipes running through warm, humid basement air. Both a leak and condensation will appear cool on a thermal camera, but their patterns—their thermal signatures—are completely different. This is a critical distinction that separates a real emergency from a simple ventilation issue.
An active leak typically displays a distinct ‘plume’ shape. The water source is a single point, and the moisture spreads outward from it, often in a fan or dripping pattern. Condensation, on the other hand, shows a much more uniform and linear pattern. It will appear as a consistent cool line along the entire length of an exposed pipe or a diffuse, streaky pattern behind a wall where a vapour barrier has gaps. It’s a phenomenon of vapor dynamics, not a failure of the plumbing system itself. Before jumping to conclusions, a specialist will always cross-reference thermal data with other tools.
Differentiating between these two phenomena is a multi-step diagnostic process that combines technology with environmental awareness:
- Check Humidity Levels: Is condensation likely? This is common in Montreal when the indoor/outdoor humidity differential exceeds 30%.
- Use a Moisture Meter: A moisture meter provides definitive data. A pipe surface with condensation will show a low moisture content (under 15%), while an active leak will be saturated (over 20%).
- Analyze Thermal Patterns: Look for the signature. Is it a defined ‘plume’ shape spreading from a point (leak), or a uniform cool line along the entire pipe (condensation)?
- Cross-Reference with Water Meter: The ultimate test. Condensation is simply moisture from the air and will not cause your water meter to spin. An active leak, no matter how small, will.
When to perform a spot repair vs a full line replacement based on diagnostics?
Once a leak is accurately located, the next critical decision is the repair strategy. Is this a one-off failure that requires a simple spot repair, or is it a symptom of a systemic problem demanding a full pipe replacement? This is what we call diagnostic triage, and the answer almost always depends on the pipe’s material, its age, and its history. A single pinhole leak in a modern PEX or 1980s copper line is often an isolated event, making a targeted, less expensive spot repair the logical choice. This is a common scenario in many West Island homes.
However, if the leak is found in older galvanized steel pipes, the equation changes entirely. Galvanized pipes, prevalent in Montreal homes built before the 1960s, corrode from the inside out. The leak you found is likely not the only point of failure; it’s simply the first one to break through. Performing a spot repair on such a line is often a temporary fix, as another leak is likely to appear elsewhere in a matter of months. In these cases, a full line replacement is the more prudent and cost-effective long-term solution. An analysis of Montreal’s housing stock, such as that detailed by a study on slab leak repair costs, shows that a 1950s Rosemont bungalow with galvanized pipes often requires full replacement (costing $3,600-$8,000), while a single leak in newer copper can be spot-repaired for $200-$2,000.
The decision is based on evidence gathered during the diagnostic phase. Factors include:
- Pipe Material: Galvanized steel and old cast iron are candidates for replacement. Copper and PEX are candidates for spot repair.
- Age of System: If the pipes are nearing the end of their expected lifespan, replacement is a smarter investment.
- Water Chemistry: Even Montreal’s relatively soft water can cause pitting corrosion in older copper lines over decades.
- Number of Leaks: If diagnostics reveal multiple points of failure, replacement is the only logical choice.
This strategic decision, informed by technology, is what truly saves homeowners money, preventing them from paying for a series of small, frustrating, and ultimately more expensive repairs.
Active Monitoring vs. Passive Heating: Which Strategy Saves More?
Preventing a leak is always cheaper than repairing one, especially when it comes to the catastrophic damage from burst pipes during a Montreal winter. Homeowners traditionally rely on passive methods like pipe insulation or leaving a tap dripping. A more modern and effective strategy is active monitoring. Smart water monitoring systems, like the Flo Smart Water Monitor, act as a permanent security guard for your entire plumbing system. These devices are installed on your main water line and use sensors to learn your home’s typical water usage patterns.
When the system detects an abnormality—even a leak as small as a single drop per minute—it sends an alert to your smartphone. More importantly, in the event of a major pressure drop indicative of a burst pipe, it can automatically shut off the water main, stopping a flood in its tracks. During one of Montreal’s infamous -25°C cold snaps, this can be the difference between a simple pipe repair and a multi-level water damage claim. This proactive approach is so effective that many Quebec insurance providers now offer significant premium discounts for homes equipped with these systems, recognizing that water damage is the province’s leading cause of insurance claims.
While passive methods like heat trace cables are essential for pipes in unheated crawl spaces, they only protect specific sections. Active monitoring protects the entire home, 24/7. The ROI is not just in preventing a major disaster; it’s also in the early detection of the very same small, hidden leaks that cause your water bill to spike. It provides peace of mind and hard data, turning your plumbing system from a liability into a monitored asset.
Why Does Warm Air Condense Behind Your Shower Walls?
Not all moisture problems are leaks. A frequent source of dampness and mould behind shower tiles comes from internal condensation, a result of poor vapor barrier installation and inadequate ventilation. After a hot shower, the bathroom air is saturated with warm, moist water vapor. If your bathroom’s exhaust fan is weak or undersized, this vapor is not effectively removed. It gets pushed by air pressure into the wall cavity through any tiny gaps in the drywall, light fixtures, or plumbing cutouts. Once inside the wall, this warm, moist air hits the cooler surface of the exterior sheathing, causing the vapor to condense back into liquid water—a classic example of vapor dynamics.
Over time, this repeated wetting and drying can lead to mould growth and wood rot, mimicking the signs of a slow leak from the shower valve. The solution, however, is completely different. A thermal camera can help diagnose this; condensation often appears as diffuse, streaky cold patterns rather than the focused ‘plume’ of a leak. The ultimate fix isn’t a plumber; it’s improving your home’s building envelope and ventilation. To combat this, the Régie du bâtiment du Québec requires a bathroom fan capable of moving 50 CFM minimum, but for larger bathrooms or ones with steam showers, a much higher capacity is needed.
To diagnose this issue properly, a specialist would verify that your bathroom humidity drops below 60% within 30 minutes of a shower. If it doesn’t, your fan is either underpowered, improperly ducted, or simply not being run long enough. Ensuring your bathroom is properly sealed and ventilated is a critical step in preventing “phantom leaks” that are actually self-inflicted moisture problems.
Key Takeaways
- Non-invasive detection is not a single tool but a combination of methods (acoustic, thermal, gas) used to interpret different signals.
- The right diagnostic method depends on the leak type and pipe material, making professional assessment crucial for efficiency.
- Understanding your Montreal home’s construction era and pipe materials is key to making a smart, long-term decision between spot repair and full replacement.
How to Inspect Your Plumbing System Annually to Avoid $5,000 in Repairs?
Now that you understand the principles of detection and prevention, you can shift to a proactive mindset. An annual plumbing inspection, guided by your knowledge of your home’s specific characteristics, is the most powerful tool for avoiding costly surprises. You don’t need to be a plumber to do this; you just need to be an observant homeowner who knows what to look for. The goal is to catch small issues before they become catastrophic failures, and in Montreal, that means knowing the common failure points for your home’s construction era.
Your inspection should focus on visible pipes in the basement or crawl space, supply lines under sinks, and the area around your water heater. Look for any signs of corrosion (green or white buildup on copper or brass), rust on steel pipes, or even slow drips. Test all your shutoff valves to ensure they aren’t seized. Most importantly, use your home’s age as a guide. Different materials have different lifespans and typical problems, and knowing what you have is half the battle.
The following table, based on common plumbing materials found across Montreal, provides a clear roadmap for your annual inspection priorities. It helps you understand whether you should be monitoring for slow corrosion or preparing for a preventative replacement.
| Era | Common Pipe Material | Typical Issues | Expected Lifespan | Inspection Priority |
|---|---|---|---|---|
| Pre-1950 | Galvanized Steel | Rust, blockages | 40-50 years | High – replace |
| 1950-1970 | Cast Iron | Corrosion at joints | 50-75 years | Medium – monitor |
| 1970-1990 | Copper | Pinhole leaks | 50+ years | Low – spot repair |
| 1990-present | PEX/ABS | Joint failures | 25-40 years | Low – preventive |
By using this as a guide, you are performing your own version of diagnostic triage before a problem even occurs. An informed homeowner is a prepared homeowner, capable of making strategic upgrades that prevent emergencies rather than just reacting to them.
By combining this annual self-inspection with an understanding of non-invasive technology, you are no longer at the mercy of your plumbing. You have the knowledge to protect your investment, control costs, and ensure the long-term health of your home. For a professional assessment that utilizes these advanced technologies, the next logical step is to schedule a diagnostic consultation with a certified leak detection specialist.