In summary:
- If you suspect a frozen pipe, immediately locate and close your main water shut-off valve to prevent a potential flood.
- Apply gentle, indirect heat to the frozen area using a hairdryer or space heater; never use an open flame.
- Keep your home heated to at least 21°C during cold snaps and be aware that insurance may require it.
- Understand that pipes often burst during the thaw, not the freeze, due to immense pressure buildup.
- After thawing, slowly check all faucets and listen for hidden leaks before turning the main valve back on completely.
That moment of silence when you turn on a tap and nothing comes out is a uniquely Montreal winter experience. Your mind immediately races to the worst-case scenario: a frozen pipe. It’s a stressful situation, but panic is not a tool. As an emergency plumber who has seen this countless times in duplexes from the Plateau to Pointe-Claire, I can tell you that the next few minutes are critical. What you do right now can be the difference between a minor inconvenience and catastrophic water damage.
Most online advice will give you a generic list: turn off the water, use a hairdryer, call a plumber. This is correct, but it lacks the crucial context for our city’s unique housing and climate. It doesn’t explain the ‘why’ behind each step, which is essential for making smart decisions under pressure. Forget the simple checklists. Think of this as your guide on the ground, walking you through the immediate actions to take to protect your home while you wait for professional help.
This isn’t just about thawing a pipe; it’s about managing a crisis. We’re going to cover how to perform a strategic shutdown of your water supply, the physics of why pipes burst during a thaw, and how to apply heat safely without creating a fire hazard. We’ll also touch on the specific vulnerabilities in Montreal homes, from uninsulated garage pipes to those infamous cold rooms under the front porch, and why your smart thermostat might be working against you during a polar vortex. Your goal is to contain the threat and minimize the damage. Let’s get started.
This article will provide a clear, step-by-step plan. Follow this guide to navigate the emergency calmly and effectively, from immediate containment to long-term prevention strategies.
Summary: Your Step-by-Step Guide to Preventing a Plumbing Disaster
- Where Is Your Main Shut-Off Valve and How to Test It?
- Why Your Insurance May Deny Claims if You Left Heat Below 15°C?
- How to Thaw a Pipe Inside a Wall Without Starting a Fire?
- The Mistake of Leaving Garage Doors Open That Freezes Adjacent Pipes
- When to Override Your Smart Thermostat Settings During Polar Vortexes
- Why Do Pipes Burst More Frequently During Rapid Thaw Cycles?
- Why Can Microphones Hear Leaks Through Concrete Slabs?
- Active Monitoring vs. Passive Heating: Which Strategy Saves More?
Where Is Your Main Shut-Off Valve and How to Test It?
Okay, first thing’s first. Before we do anything else, we need to perform a strategic retreat. This means cutting off the water supply to your entire home. If the frozen pipe has already developed a hairline crack, water will pour out as soon as it thaws. Closing the main valve contains this threat completely. You absolutely must know where this valve is before an emergency strikes. It’s the single most important piece of plumbing knowledge a homeowner can have.
In most Montreal homes, especially older ones, the main shut-off valve is located in the basement, near the front foundation wall where the water service line enters the house from the street. Look for your water meter; the valve is usually right beside it. It might have a round, wheel-like handle (a gate valve) or a straight, lever-like handle (a ball valve). In condos or newer multiplexes, it could be in a utility closet or a designated mechanical room.
Here’s how to find and test your valve:
- Check near the water meter in the basement, as this is the most common location in Montreal homes.
- Look at the front wall where the main line visibly enters from the street.
- In condos, check utility closets, laundry rooms, or mechanical rooms.
- For duplexes/triplexes, the valve may be in a shared basement area; ensure you know which one is yours.
Once you find it, test it. Turn the handle clockwise (“righty-tighty”) until it stops. Don’t force it. Then, go to the lowest faucet in your house (like a basement laundry sink) and turn on the cold water. The flow should stop completely. If it does, your valve works. Remember to turn it back on (counter-clockwise) to restore water. Testing this annually ensures it won’t be seized up when you need it most.
Why Your Insurance May Deny Claims if You Left Heat Below 15°C?
While you’re managing the immediate plumbing crisis, another concern might be creeping in: your insurance. Water damage claims from burst pipes are extremely common, but they are not always approved. Insurers have specific expectations for homeowners during winter, and failing to meet them can be a costly mistake. It’s what we call a lack of “due diligence.”
Most home insurance policies in Quebec contain a clause that requires you to take reasonable steps to prevent freezing. This often includes maintaining an adequate temperature inside the house, even when you’re away. While the exact temperature isn’t always specified, a common industry standard is around 15°C to 17°C. If a pipe bursts and your thermostat logs show the heat was set to 10°C to save money, your insurer could argue you were negligent and deny the claim. The City of Montreal itself advises maintaining a minimum temperature of 10°C around water service lines, but your insurance policy likely holds you to a higher standard for the entire dwelling.
If you’re away during a cold snap, your policy may have even stricter requirements. To ensure your claim is protected, you should:
- Keep the temperature in your house above 21°C during periods of extreme cold.
- If you’re away, set the heating only a few degrees lower than usual, never turning it off completely.
- Have someone check on your house every 48-72 hours. Many insurers require this for any absence longer than a few days in winter.
- Document any preventive measures you’ve taken with photos and keep thermostat logs if possible.
Thinking you’re saving a few dollars on your Hydro bill by lowering the heat too much can end up costing you tens of thousands in uncovered damages. It’s a risk that is never worth taking.
How to Thaw a Pipe Inside a Wall Without Starting a Fire?
Now that the main valve is off, let’s try to locate the blockage. Turn on the faucet that isn’t working. If other faucets in the house work, the problem is isolated to that specific line. Trace the pipe back from the faucet as far as you can, feeling for sections that are significantly colder than the rest. Look for frost or condensation. If the pipe is exposed, the job is easier. If it’s inside a wall or ceiling, it’s trickier.
The cardinal rule of thawing is to use gentle, gradual heat. Your goal is to warm the pipe, not cook it. Never, ever use a blowtorch, propane heater, or any kind of open flame. This is an extreme fire hazard and can cause a steam explosion inside the pipe. It can also instantly crack a frozen copper pipe. Your primary tool here is patience and a common household appliance.
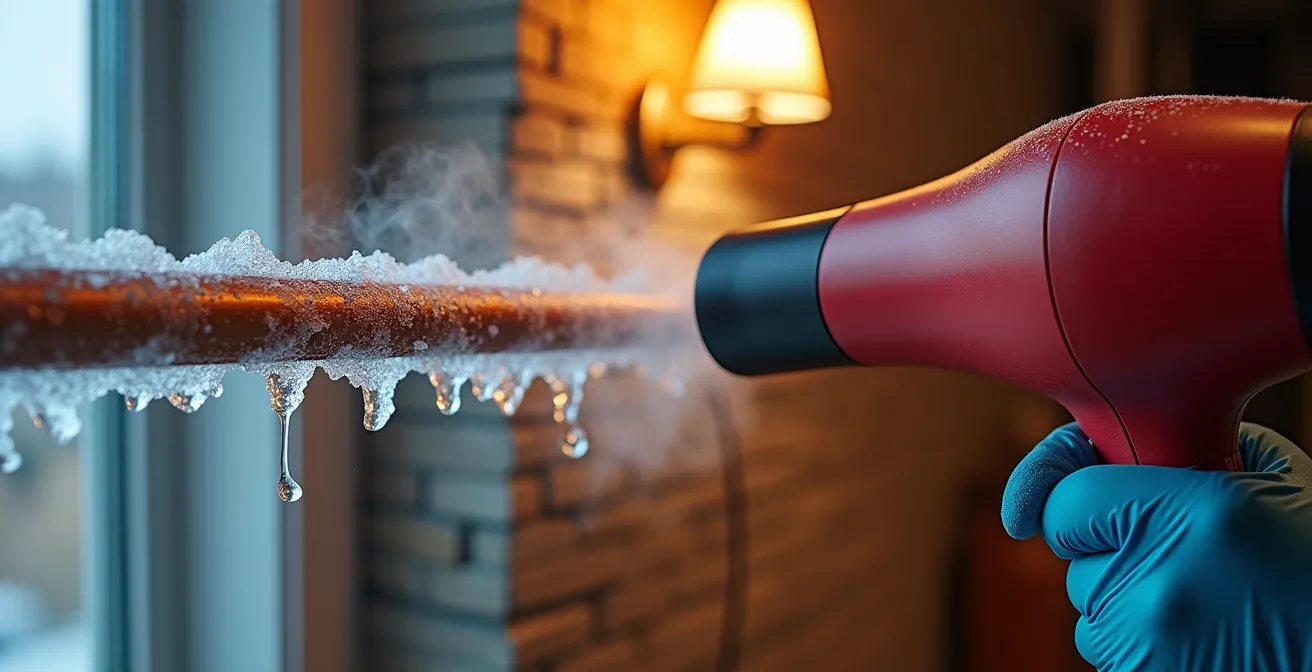
As you can see, the safest and most effective method is using a standard hairdryer. Set it to a medium or high heat setting and keep it moving back and forth along the frozen section. Start from the faucet end and work your way back towards the frozen blockage. This allows melting ice and steam to escape out of the open faucet. If the pipe is behind a wall, you can try warming the wall itself, but this is much less efficient. For pipes inside walls, the best non-destructive methods are:
- Crank up the room’s heat: Turn the thermostat for that specific room or zone up to 24°C or higher and wait a few hours. This is the slowest but safest method.
- Use a space heater: Place a certified space heater near the affected wall, ensuring it’s a safe distance from any flammable materials. Do not leave it unattended.
- Apply electrical heating tape: This product wraps around the pipe and uses a low-level current to gently warm it. It’s an excellent tool but must be used exactly according to manufacturer instructions.
Patience is key. Depending on how solid the freeze is, it could take anywhere from a few minutes to a few hours. Keep the faucet open throughout the process so you’ll know immediately when water starts to flow again.
The Mistake of Leaving Garage Doors Open That Freezes Adjacent Pipes
Once the immediate crisis is over, it’s time to play detective. Why did this specific pipe freeze? In Montreal, the culprits are often what I call “thermal blind spots” – areas of your home you don’t think of as being exposed to the cold. The number one offender is the attached garage. People often leave the garage door open for a “quick second” that turns into minutes, allowing frigid air to flood the space. Pipes for laundry rooms, kitchens, or powder rooms often run along or through the shared wall with the garage, making them extremely vulnerable.
Another classic Montreal architectural feature that creates a thermal blind spot is the “cold room” – the unheated concrete space under a front porch or steps, often accessible from the basement. Water lines are frequently routed through these spaces without adequate insulation. Any uninsulated pipe near an exterior wall, in a crawl space, or in an attic is at high risk.
You need to actively hunt for and eliminate these vulnerabilities. A small crack or opening where a dryer vent or electrical wire enters the house can funnel a surprising amount of cold air directly onto a pipe. To protect these vulnerable areas, especially your garage:
- Keep garage doors closed at all times during the winter, no exceptions.
- Insulate all water pipes located in the garage or near exterior walls with foam pipe covers or fibreglass insulation.
- Seal any cracks or openings in your walls, floors, and foundation, particularly around windows, doors, and utility entry points.
- Pay special attention to pipes that run along shared walls with any unheated spaces.
Taking an hour to inspect and insulate these areas in the fall can save you from a major headache in January. It’s the most effective preventative maintenance you can do.
When to Override Your Smart Thermostat Settings During Polar Vortexes
Smart thermostats are fantastic for saving energy and money most of the year. They learn your schedule and lower the temperature when you’re away or asleep. But during a deep freeze or polar vortex, their “smart” logic can become your enemy. A scheduled temperature drop to 17°C overnight might be fine when it’s -5°C outside, but it’s a recipe for disaster when the wind chill hits -40°C.
In these extreme conditions, you need to switch from “smart” mode to “safe” mode. This means taking manual control of your heating system and prioritizing pipe protection over energy savings. When Environment Canada issues an extreme cold warning for the Montreal region, your thermostat’s eco-friendly setbacks and away-modes become a liability. The consistent, radiant heat from your system is one of the main things keeping the air inside your walls from dropping below freezing.
During a polar vortex, you must be proactive. Don’t wait for a problem to happen. Take these steps immediately:
Action Plan: Emergency Thermostat Override
- Monitor Environment Canada for extreme cold warnings issued for your region.
- As soon as a warning is active, manually disable all “eco,” “away,” or scheduled setback modes on your thermostat.
- Set a single, consistent temperature of at least 21°C for both day and night. Do not let it drop.
- Override any pre-programmed temperature drops that might occur during the cold snap.
- Keep the heating on consistently, even during peak Hydro-Québec demand periods. The extra cost is negligible compared to a burst pipe repair.
This isn’t about wasting energy; it’s about investing in protection. A few days of higher heating costs are a small price to pay for the peace of mind that comes with knowing your plumbing is secure during the worst of a Montreal winter.
Why Do Pipes Burst More Frequently During Rapid Thaw Cycles?
Here’s a piece of information that surprises most homeowners: pipes don’t usually burst when the water freezes. They burst when it thaws. This is the “Pressure Paradox,” and understanding it is key to realizing why a frozen pipe is such a serious emergency. When water turns to ice, it expands. As the American Red Cross explains, water expands by about 9% when it freezes, creating immense pressure. However, this initial expansion rarely ruptures a copper or PEX pipe on its own.
The real danger comes from the blockage. An ice plug forms inside the pipe, trapping the liquid water between the plug and a closed faucet. As the temperature outside warms up or as you apply heat, the ice plug starts to melt. But the water downstream is still trapped. This trapped water, now under immense pressure from the expanding ice behind it, has nowhere to go. It’s this contained, non-compressible liquid pressure that finds the weakest point in the pipe and causes the rupture.
This is why you often discover the leak *after* the cold snap has passed. It’s also why it’s so critical to open the faucet on the affected line before you start thawing; it gives the melting water and pressure a path to escape. Once you have flow again and the main valve is back on, a thorough inspection is crucial.
Your Checklist: Post-Freeze Pipe Inspection
- Once you believe the pipe is thawed, only open the main shut-off valve a quarter turn.
- Go to the faucet you were working on. If you have a steady, clear stream, proceed to slowly test all other faucets, starting from the lowest level of the house and moving up.
- Visually inspect all accessible pipes in the basement, under sinks, and in closets for any new or minor drips, especially at joints and fittings.
- Listen carefully for any unusual hissing or dripping sounds inside walls, which can indicate a small, hidden pinhole leak.
- Check your water meter. With all faucets off, the dial should be completely still. If it’s moving, you have a leak somewhere in the system.
Only when you are certain there are no leaks should you open the main water valve completely. If you have any doubt, shut it back off and call a professional immediately.
Why Can Microphones Hear Leaks Through Concrete Slabs?
Sometimes, the worst-case scenario happens: a pipe bursts, but it’s not one you can see. It might be buried under the concrete slab of your basement or hidden deep within a wall. You might notice a damp spot on the floor, a drop in water pressure, or hear the faint sound of running water when all taps are off. Finding the exact location of such a leak without tearing up your entire basement used to be a destructive guessing game. Today, we use advanced technology to pinpoint the problem with surgical precision.
The primary tool for this is acoustic leak detection. When water escapes a pressurized pipe, it creates a distinct sound or vibration. The frequency of this sound varies depending on the pipe material, the water pressure, and the size of the leak. It might sound like a “hiss” from a small pinhole leak or a “whoosh” from a larger crack. While you might be able to hear a faint gurgling noise, this sound travels through the ground, concrete, and walls.
This is where professional equipment comes in. As the experts at Crystal Drain & Plumbing note, specialized tools are needed to isolate the specific sound of the leak.
Professional acoustic equipment isolates this sound from background noise, pinpointing the leak’s location without excavation
– Crystal Drain & Plumbing, Frozen Pipes Guide
Highly sensitive ground microphones and electronic amplifiers filter out ambient noise and hone in on the leak’s unique acoustic signature. By taking readings at different points (for example, on either side of a basement), a plumber can determine the precise spot where the sound is loudest, indicating the leak’s location, often within inches. This technology saves homeowners thousands of dollars in unnecessary demolition and repair work.
Key Takeaways
- Immediate Action: The first and most critical step for a suspected frozen pipe is to locate and close your main water shut-off valve.
- Safe Thawing is Essential: Always use gentle, indirect heat like a hairdryer. Never use an open flame, which is a severe fire risk and can damage the pipe.
- Prevention is Proactive: Maintaining adequate heat (at least 21°C in cold snaps), insulating pipes in vulnerable areas like garages, and overriding smart thermostat schedules are key to avoiding a freeze.
Active Monitoring vs. Passive Heating: Which Strategy Saves More?
After you’ve survived a frozen pipe scare, the question becomes: how do I ensure this never happens again? Prevention falls into two main categories: passive methods, which are physical barriers against the cold, and active methods, which involve ongoing action or technology. Deciding on the right long-term strategy involves balancing cost, effectiveness, and convenience.
Passive heating is the traditional approach: adding insulation. Wrapping pipes in foam sleeves and sealing air leaks are fundamental, one-time actions that form the baseline of protection. Active methods, on the other hand, require either ongoing energy consumption or investment in technology. These include letting a tap drip, installing heat cables, or using smart monitoring services. Each has its pros and cons. While a dripping faucet is effective, it wastes water and can add up on your bill. According to estimates from the City of Toronto, the thawing time for a pipe could take 1 to 6 hours, and running water during that entire period can be costly.
To make an informed choice, it helps to compare the different approaches directly. The following table breaks down the most common active prevention strategies:
| Prevention Method | Cost | Effectiveness | Considerations |
|---|---|---|---|
| Running water (pencil-thin stream) | Water charges apply | Highly effective | Continuous water movement prevents freezing |
| Heat cable installation | One-time purchase | Very effective | Thermostat-controlled, only runs when needed |
| Space heater in vulnerable areas | Increased electricity | Moderately effective | Fire hazard if unattended |
| Professional monitoring service | Service fee varies | Highly effective | May qualify for insurance discounts |
The best strategy for your home is often a hybrid approach. Start with robust passive insulation of all vulnerable pipes. Then, for the highest-risk areas (like a pipe in a known cold spot that cannot be re-routed), supplement with an active method like a thermostatically controlled heat cable. This provides targeted, intelligent heat only when needed, offering the most effective and cost-efficient long-term solution.
You have successfully navigated the immediate crisis. The next logical and most important step is to have a licensed plumber conduct a full inspection of your system to check for hidden damage and reinforce vulnerable areas. Contact a trusted Montreal plumbing professional to schedule a post-freeze assessment today.